How to File Nails Step by Step for Beginners
Rough edges, uneven tips, or nails that keep breaking—sound familiar? Getting the hang of how to file nails step by step is a small skill that can completely change your nail routine. With the right tools and some easy nail shaping tips, beginners can get salon-quality results right at home. It’s one of the simplest ways to take better care of your nails without spending a fortune.
4 Beginner Nail Kit Essentials for Easy Nail Shaping
To get smooth, healthy-looking nails, having the right tools makes all the difference—especially for beginners. When starting out, stick to gentle and easy-to-use options that won’t damage your nails. Here are the must-have nail filing tools for home:
- Emery boards: Affordable and widely available, they’re great for shaping but can wear down quickly. Ideal for occasional use.
- Glass nail files: Perfect for beginners. They’re long-lasting, easy to clean, and much gentler on natural nails—helping prevent splitting.
- Buffers: These smooth out rough edges and give nails a natural shine without polish.
- Cuticle oil: Often overlooked, this keeps your nails and surrounding skin moisturized, which helps prevent cracking.
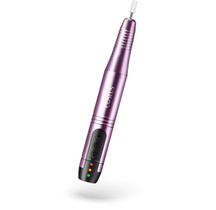
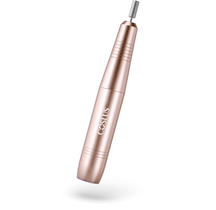
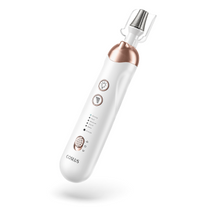
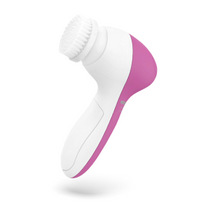
If you're building your beginner nail kit essentials, look for affordable sets online that bundle these items together. Many e-commerce sites now offer kits designed for at-home nail care, saving you time and money. Avoid metal files, as they’re too harsh for beginners and can cause micro-tears. While manual files are great for beginners, many wonder about powered options and if electric nail files are safe for natural nails.
Before you start, always make sure your hands are clean, dry, and that you’re working in a bright space to see clearly. Investing in quality tools from the start makes learning how to file nails step by step much easier—and a lot more enjoyable.
7-Step Guide: How to File Your Nails Like a Pro
Getting that clean, salon-like finish at home is easier than you might think. Whether you’re maintaining your natural nails or just starting out with a simple routine, learning how to file nails step by step helps avoid chipping, breakage, and uneven shapes. Follow these easy, beginner-friendly steps for smooth, healthy-looking nails every time.
Step 1: Prep Your Nails
Before you touch the nail file, start with nail prep for filing. Remove any old polish using a gentle remover, then wash your hands with warm water and mild soap. Dry your hands and nails completely—filing wet nails can lead to splits.
Step 2: Choose Your Nail Shape
Your nail shape sets the tone for your entire manicure—whether you want something soft and natural or bold and edgy. When choosing, consider your nail length, bed width, and lifestyle.
- Round: Great for short nails and small nail beds. Easy to file and ideal for a clean, low-maintenance look.
- Square: Flat tips with sharp corners. Best for longer nail beds and stronger nails.
- Oval: Elongates fingers and works well on wide nail beds. A classic choice for most beginners.
- Almond: Tapered sides with a rounded tip. Best for medium to long nails and a polished finish.
- Squoval: A mix of square and oval. Soft edges with structure, great for all nail types.
- Coffin: Flat tips with a tapered end. Best on long nails or extensions, popular for nail art.
- Stiletto: Pointed and bold, mostly used with acrylics. Stylish but not ideal for everyday wear.
For nail shaping for beginners, stick with oval or round to make symmetry easier.
Step 3: Start Filing the Tip
Hold your file at a 45-degree angle and file in one direction only—avoid the back-and-forth sawing motion, which can weaken nails. Use light pressure and focus on creating a smooth edge. This method is gentle and reduces the chance of splitting.
Step 4: Shape the Sides
Now file the sides of your nails, still using gentle strokes in a single direction. Follow the curve of your nail to keep the shape natural and even. Don’t overdo it—too much filing on the sides can cause weak spots.
Step 5: Smooth the Edges
Once your shape is set, use a nail buffer to gently smooth the tips and surface. This removes any rough bits left from filing and gives your nails a polished, clean look—perfect if you’re skipping polish.
Step 6: Check for Evenness
Hold your hands out in front of you and compare nail lengths and shapes side by side. If something looks uneven, make small adjustments. Avoid reshaping everything—aim for balance, not perfection.
Step 7: Moisturize
Filing can dry out your nail edges and cuticles. Apply cuticle oil or hand cream to restore moisture and support healthy nail growth. It’s a small step that keeps your nails flexible and strong.
Step 8: Clean Up
Brush or rinse away any leftover dust. If you're applying polish afterward, wipe nails with a bit of alcohol or polish remover to ensure the surface is oil-free and smooth.
💡 Short vs. Long Nails or Acrylics?
- Short nails: Use finer-grit files and stick to soft shapes like round or oval.
- Long nails: Be extra gentle at the tip to prevent bending or breakage.
- Acrylic nails: Use a coarser file, but still file in one direction to keep the material from cracking.
With a little patience and the right method, learning how to file nails step by step becomes second nature. You don’t need salon visits to keep your nails in top shape—just the right tools, a steady hand, and a few quiet minutes to yourself.
4 Common Mistakes Beginners Make and How to Avoid Them
Even with the right tools, it’s easy to make small mistakes that leave your nails weaker or uneven. The good news? These beginner nail filing mistakes are simple to correct once you know what to watch out for. Below are common errors—and how to avoid nail damage while filing:
❌ Filing Back and Forth
Why it’s a problem: This “sawing” motion weakens the nail edge and causes splitting.
✔ Fix: Always file in one direction only using smooth, controlled strokes.
❌ Over-Filing
Why it’s a problem: Too much pressure or filing too often can thin your nails over time.
✔ Fix: File only when needed and stick with a fine-grit file for natural nails.
❌ Ignoring Your Nail Type
Why it’s a problem: Using the wrong file or technique can cause brittle or soft nails to crack or peel.
✔ Fix: Choose tools that match your nail strength and condition—softer files for delicate nails.
❌ Skipping Nail Prep
Why it’s a problem: Filing dirty or damp nails increases the chance of breakage and uneven edges.
✔ Fix: Always start with clean, dry nails in a well-lit space.
Avoiding these simple mistakes can make a big difference in keeping your nails healthier, stronger, and smoother. When learning how to file nails step by step, knowing what not to do is just as important as following the right technique.
Advanced Nail Filing Techniques for a Flawless Finish
Once you’ve mastered the basics, a few small tweaks can take your nail care to the next level. One of the most overlooked nail filing techniques is consistency—filing your nails once a week helps maintain the shape and prevent unexpected breaks. It also works best when combined with a simple routine like weekly soaking, gentle cuticle pushing, and moisturizing.
For those aiming for tips for perfect nail shape, the key is to work with your natural nail type. If you have brittle nails, avoid harsh files and always follow with nourishing products like a vitamin-enriched cuticle oil to lock in moisture. For gel nails, opt for a fine-grit file and never file when they're wet or freshly done, as this can lead to cracks.
Seasonal care matters, too—cold weather dries out both nails and skin, so increase hydration with richer creams during winter months. And if you're building a beginner-friendly routine, consider adding a nail strengthener or a starter nail care kit from our collection for an easy upgrade.
6 FAQs About How to File Nails Step by Step
Q1: How often should I file my nails to keep them healthy?
Most people benefit from filing their nails once a week. However, if your nails grow slowly or don’t chip easily, you can file every 10–14 days. Always base your routine on nail condition, not just a set schedule.
Q2: What's the best type of file for natural nails?
A fine-grit glass file is ideal for natural nails. It's gentle, reduces splitting, and lasts much longer than emery boards. Avoid coarse files unless you're working with artificial nails.
Q3: Can beginners file nails at home without any tools?
Technically yes, but it’s not recommended. Filing with makeshift items like sandpaper or metal objects can cause tearing or infection. Even a basic nail file from a pharmacy is better than using non-nail tools.
Q4: How do I know when it’s time to replace my nail file?
If your file feels smooth, slippery, or no longer shapes your nails, it’s time to replace it. Emery boards typically last a few weeks, while glass files can last for years if cleaned regularly.
Q5: Is it okay to file nails after a shower or bath?
It’s better to file when nails are dry. Wet nails are more flexible and prone to bending or splitting, which can lead to uneven shaping or damage.
Q6: Should I file my toenails the same way as fingernails?
Not exactly. Toenails should be filed straight across to prevent ingrown nails. Use a coarser file if they’re thicker, and always file gently to avoid lifting or cracking the nail.
File Nails Step by Step and Keep Them Looking Great
Beautiful nails start with a good filing routine, and learning how to file nails step by step makes it easy. With gentle strokes, the right file, and a shape that suits you, your nails will look neater and stay healthier for longer. It’s a small habit that pays off every time you glance at your hands. If you’re ready to make it part of your self-care, set aside a few minutes this week and see the difference for yourself.
Table of Contents
- 4 Beginner Nail Kit Essentials for Easy Nail Shaping
- 7-Step Guide: How to File Your Nails Like a Pro
- 4 Common Mistakes Beginners Make and How to Avoid Them
- Advanced Nail Filing Techniques for a Flawless Finish
-
6 FAQs About How to File Nails Step by Step
- Q1: How often should I file my nails to keep them healthy?
- Q2: What's the best type of file for natural nails?
- Q3: Can beginners file nails at home without any tools?
- Q4: How do I know when it’s time to replace my nail file?
- Q5: Is it okay to file nails after a shower or bath?
- Q6: Should I file my toenails the same way as fingernails?
- File Nails Step by Step and Keep Them Looking Great


