


All
Promotions
Skin Care
Oral Care
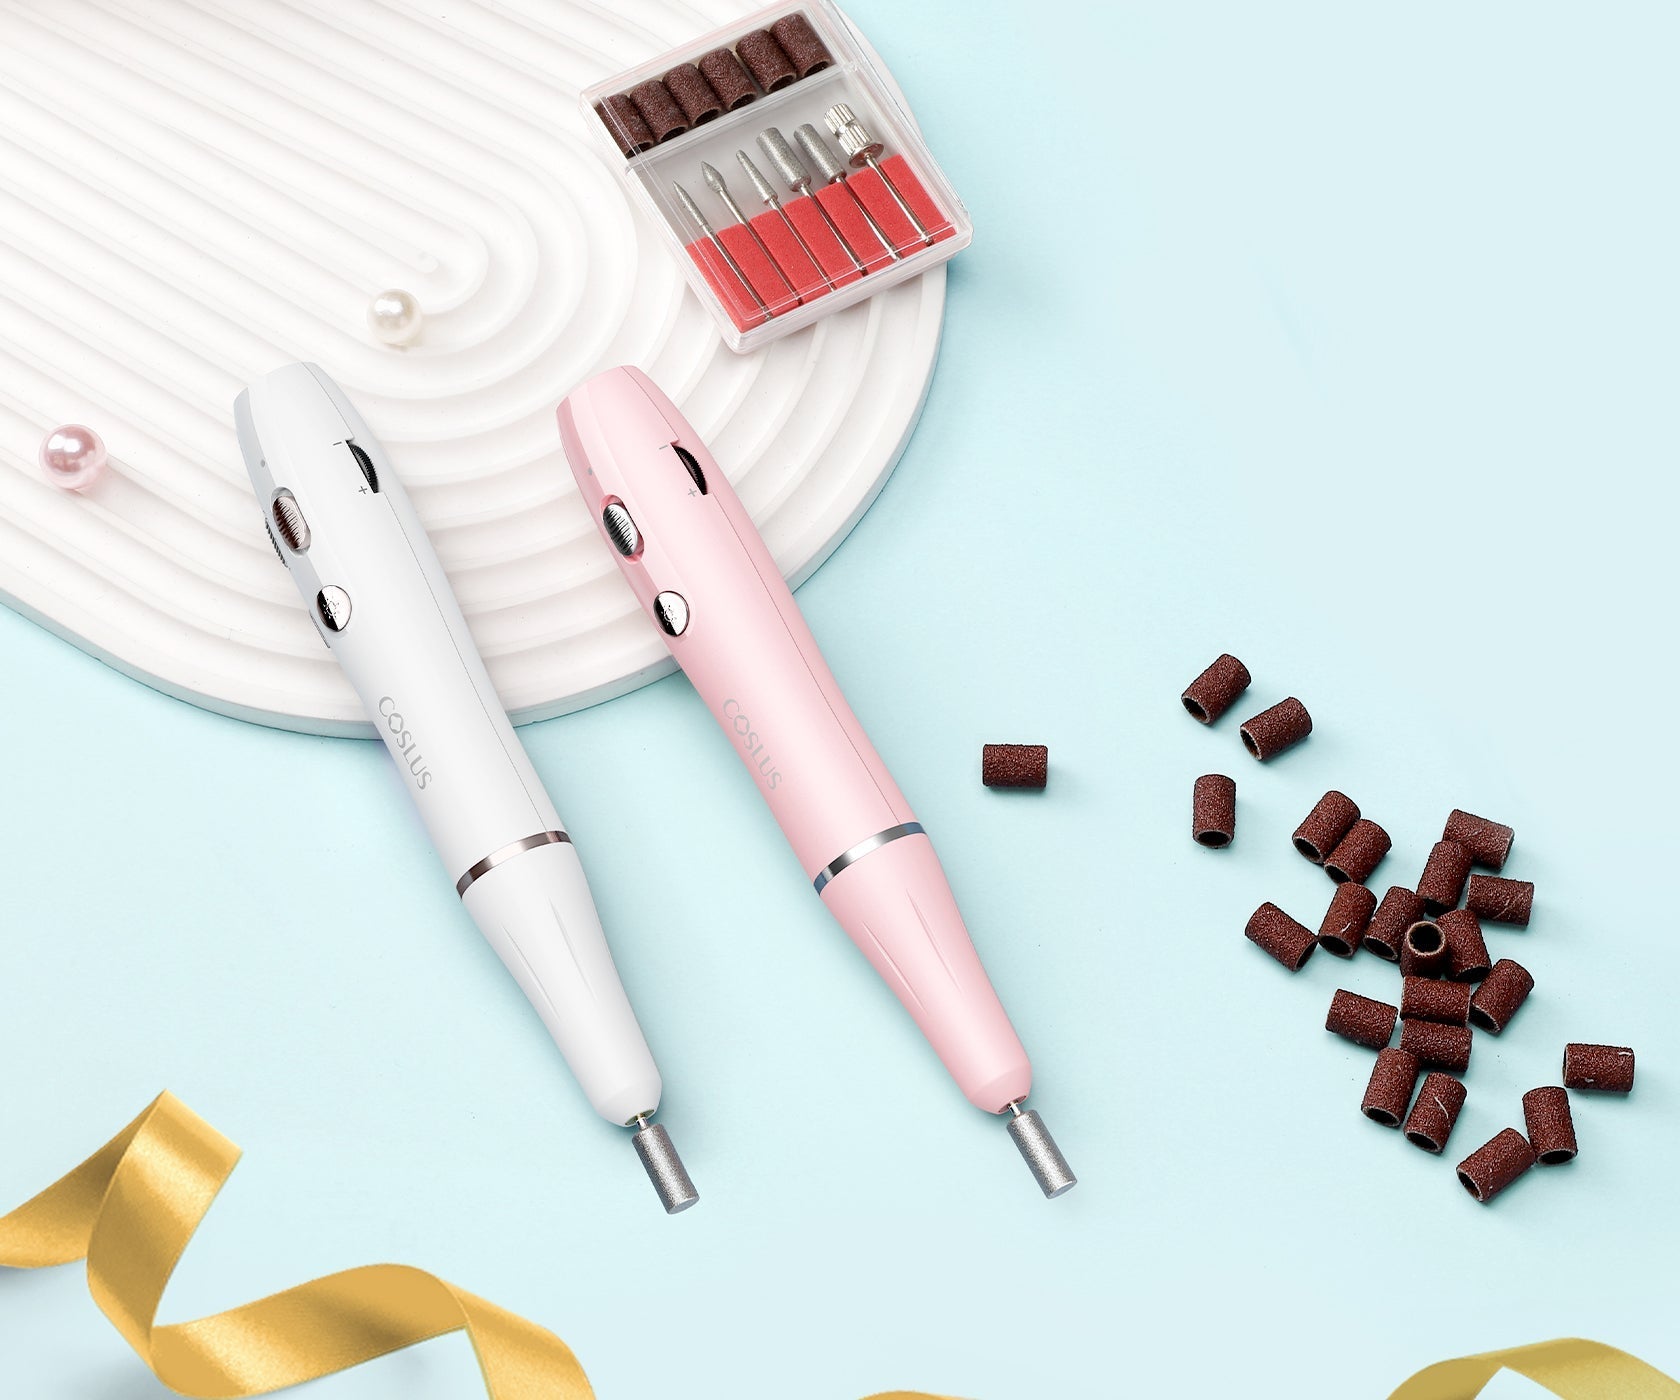
Nail Care
Dentist Recommended

Rough edges, uneven tips, or nails that keep breaking—sound familiar? Getting the hang of how to file nails step by step is a small skill that can completely change your nail routine. With the right tools and some easy nail shaping tips, beginners can get salon-quality results right at home. It’s one of the simplest ways to take better care of your nails without spending a fortune.
4 Beginner Nail Kit Essentials for Easy Nail Shaping
To get smooth, healthy-looking nails, having the right tools makes all the difference—especially for beginners. When starting out, stick to gentle and easy-to-use options that won’t damage your nails. Here are the must-have nail filing tools for home:
Emery boards: Affordable and widely available, they’re great for shaping but can wear down quickly. Ideal for occasional use.
Glass nail files: Perfect for beginners. They’re long-lasting, easy to clean, and much gentler on natural nails—helping prevent splitting.
Buffers: These smooth out rough edges and give nails a natural shine without polish.
Cuticle oil: Often overlooked, this keeps your nails and surrounding skin moisturized, which helps prevent cracking.
If you're building your beginner nail kit essentials, look for affordable sets online that bundle these items together. Many e-commerce sites now offer kits designed for at-home nail care, saving you time and money. Avoid metal files, as they’re too harsh for beginners and can cause micro-tears. While manual files are great for beginners, many wonder about powered options and if electric nail files are safe for natural nails.
Before you start, always make sure your hands are clean, dry, and that you’re working in a bright space to see clearly. Investing in quality tools from the start makes learning how to file nails step by step much easier—and a lot more enjoyable.
7-Step Guide: How to File Your Nails Like a Pro
Getting that clean, salon-like finish at home is easier than you might think. Whether you’re maintaining your natural nails or just starting out with a simple routine, learning how to file nails step by step helps avoid chipping, breakage, and uneven shapes. Follow these easy, beginner-friendly steps for smooth, healthy-looking nails every time.
Step 1: Prep Your Nails
Before you touch the nail file, start with nail prep for filing. Remove any old polish using a gentle remover, then wash your hands with warm water and mild soap. Dry your hands and nails completely—filing wet nails can lead to splits.
Step 2: Choose Your Nail Shape
Your nail shape sets the tone for your entire manicure—whether you want something soft and natural or bold and edgy. When choosing, consider your nail length, bed width, and lifestyle.
Round: Great for short nails and small nail beds. Easy to file and ideal for a clean, low-maintenance look.
Square: Flat tips with sharp corners. Best for longer nail beds and stronger nails.
Oval: Elongates fingers and works well on wide nail beds. A classic choice for most beginners.
Almond: Tapered sides with a rounded tip. Best for medium to long nails and a polished finish.
Squoval: A mix of square and oval. Soft edges with structure, great for all nail types.
Coffin: Flat tips with a tapered end. Best on long nails or extensions, popular for nail art.
Stiletto: Pointed and bold, mostly used with acrylics. Stylish but not ideal for everyday wear.
For nail shaping for beginners, stick with oval or round to make symmetry easier.
Step 3: Start Filing the Tip
Hold your file at a 45-degree angle and file in one direction only—avoid the back-and-forth sawing motion, which can weaken nails. Use light pressure and focus on creating a smooth edge. This method is gentle and reduces the chance of splitting.
Step 4: Shape the Sides
Now file the sides of your nails, still using gentle strokes in a single direction. Follow the curve of your nail to keep the shape natural and even. Don’t overdo it—too much filing on the sides can cause weak spots.
Step 5: Smooth the Edges
Once your shape is set, use a nail buffer to gently smooth the tips and surface. This removes any rough bits left from filing and gives your nails a polished, clean look—perfect if you’re skipping polish.
Step 6: Check for Evenness
Hold your hands out in front of you and compare nail lengths and shapes side by side. If something looks uneven, make small adjustments. Avoid reshaping everything—aim for balance, not perfection.
Step 7: Moisturize
Filing can dry out your nail edges and cuticles. Apply cuticle oil or hand cream to restore moisture and support healthy nail growth. It’s a small step that keeps your nails flexible and strong.
Step 8: Clean Up
Brush or rinse away any leftover dust. If you're applying polish afterward, wipe nails with a bit of alcohol or polish remover to ensure the surface is oil-free and smooth.
💡 Short vs. Long Nails or Acrylics?
Short nails: Use finer-grit files and stick to soft shapes like round or oval.
Long nails: Be extra gentle at the tip to prevent bending or breakage.
Acrylic nails: Use a coarser file, but still file in one direction to keep the material from cracking.
With a little patience and the right method, learning how to file nails step by step becomes second nature. You don’t need salon visits to keep your nails in top shape—just the right tools, a steady hand, and a few quiet minutes to yourself.
4 Common Mistakes Beginners Make and How to Avoid Them
Even with the right tools, it’s easy to make small mistakes that leave your nails weaker or uneven. The good news? These beginner nail filing mistakes are simple to correct once you know what to watch out for. Below are common errors—and how to avoid nail damage while filing:
❌ Filing Back and Forth
Why it’s a problem: This “sawing” motion weakens the nail edge and causes splitting.
✔ Fix: Always file in one direction only using smooth, controlled strokes.
❌ Over-Filing
Why it’s a problem: Too much pressure or filing too often can thin your nails over time.
✔ Fix: File only when needed and stick with a fine-grit file for natural nails.
❌ Ignoring Your Nail Type
Why it’s a problem: Using the wrong file or technique can cause brittle or soft nails to crack or peel.
✔ Fix: Choose tools that match your nail strength and condition—softer files for delicate nails.
❌ Skipping Nail Prep
Why it’s a problem: Filing dirty or damp nails increases the chance of breakage and uneven edges.
✔ Fix: Always start with clean, dry nails in a well-lit space.
Avoiding these simple mistakes can make a big difference in keeping your nails healthier, stronger, and smoother. When learning how to file nails step by step, knowing what not to do is just as important as following the right technique.
Advanced Nail Filing Techniques for a Flawless Finish
Once you’ve mastered the basics, a few small tweaks can take your nail care to the next level. One of the most overlooked nail filing techniques is consistency—filing your nails once a week helps maintain the shape and prevent unexpected breaks. It also works best when combined with a simple routine like weekly soaking, gentle cuticle pushing, and moisturizing.
For those aiming for tips for perfect nail shape, the key is to work with your natural nail type. If you have brittle nails, avoid harsh files and always follow with nourishing products like a vitamin-enriched cuticle oil to lock in moisture. For gel nails, opt for a fine-grit file and never file when they're wet or freshly done, as this can lead to cracks.
Seasonal care matters, too—cold weather dries out both nails and skin, so increase hydration with richer creams during winter months. And if you're building a beginner-friendly routine, consider adding a nail strengthener or a starter nail care kit from our collection for an easy upgrade.
6 FAQs About How to File Nails Step by Step
Q1: How often should I file my nails to keep them healthy?
Most people benefit from filing their nails once a week. However, if your nails grow slowly or don’t chip easily, you can file every 10–14 days. Always base your routine on nail condition, not just a set schedule.
Q2: What's the best type of file for natural nails?
A fine-grit glass file is ideal for natural nails. It's gentle, reduces splitting, and lasts much longer than emery boards. Avoid coarse files unless you're working with artificial nails.
Q3: Can beginners file nails at home without any tools?
Technically yes, but it’s not recommended. Filing with makeshift items like sandpaper or metal objects can cause tearing or infection. Even a basic nail file from a pharmacy is better than using non-nail tools.
Q4: How do I know when it’s time to replace my nail file?
If your file feels smooth, slippery, or no longer shapes your nails, it’s time to replace it. Emery boards typically last a few weeks, while glass files can last for years if cleaned regularly.
Q5: Is it okay to file nails after a shower or bath?
It’s better to file when nails are dry. Wet nails are more flexible and prone to bending or splitting, which can lead to uneven shaping or damage.
Q6: Should I file my toenails the same way as fingernails?
Not exactly. Toenails should be filed straight across to prevent ingrown nails. Use a coarser file if they’re thicker, and always file gently to avoid lifting or cracking the nail.
File Nails Step by Step and Keep Them Looking Great
Beautiful nails start with a good filing routine, and learning how to file nails step by step makes it easy. With gentle strokes, the right file, and a shape that suits you, your nails will look neater and stay healthier for longer. It’s a small habit that pays off every time you glance at your hands. If you’re ready to make it part of your self-care, set aside a few minutes this week and see the difference for yourself.
If you've been told you need tartar removal, you might be asking, “Do gums grow back after tartar removal?” While gums don’t actually regrow, they can recover in ways that make a big difference. Cleanings help stop the damage, reduce swelling, and support healing so the gums can reattach a bit. So even though you can’t fully restore gums after tartar removal, you can definitely help them bounce back.
Do Gums Actually Regrow After Tartar Removal?
The simple answer is no—gums don’t grow back once they’ve receded due to tartar buildup or gum disease. Tartar removal is a key step in improving oral health, but it can’t replace lost gum tissue. What it can do is stop further damage and help your gums heal and reattach slightly to the teeth, making them look and feel healthier.
When tartar builds up along the gumline, it pushes the gums away and forms pockets that expose the tooth roots. This is called gum recession, and it can cause sensitivity, discomfort, or even lead to tooth loss if ignored. After a professional cleaning like scaling and root planing, the area becomes less inflamed and the gums start to tighten. Although this isn't true regrowth, many people notice an improvement in how their gums fit around their teeth—this is often described as “restoring” gums after tartar removal.
If the recession is more serious, gum grafting may be needed. This is a surgical treatment performed by a specialist to rebuild or reposition lost gum tissue.
2 Key Points to Keep in Mind:
Fact: After tartar is removed, inflammation goes down, allowing gums to heal and slightly reattach within weeks.
Myth Busted: Tartar cleaning does not cause gum recession—it simply uncovers gum loss that was already hidden by hardened plaque.
Healing is possible, but full regrowth isn’t. That’s why early care is so important in maintaining healthy gums.
How Gums Heal After Tartar Removal
Once tartar is professionally removed, gum healing begins almost right away, though the full process takes several weeks. While gums don’t actually regrow, they can reattach to the teeth, reducing the depth of gum pockets and improving the overall look and feel of your mouth. Most people start noticing positive changes within the first week, with visible improvements typically occurring between 4 to 8 weeks.
Here’s a general healing timeline to help you know what to expect:
Healing Phase
What Happens
Days 1–3
Mild soreness, swelling, and bleeding begin to subside.
Weeks 1–2
Gums start to reattach to teeth; sensitivity starts to lessen.
Weeks 3–8
Gum tissue becomes firmer; healing stabilizes and becomes visible.
Several factors can affect how quickly and how well your gums recover. These include your age, oral hygiene routine, smoking habits, and how advanced the gum disease was before the cleaning. People who maintain gentle, consistent care—like brushing with a soft toothbrush and flossing daily—often experience faster and more noticeable results.
If your gum recession is severe or if there’s minimal improvement after healing, it may be worth speaking with a dental professional about gum grafting or other procedures to restore the appearance and support of your gumline.
4 Direct Steps to Support Gum Healing Post-Removal
After tartar removal, your gums need gentle care to heal properly—even though they won’t regrow, they can still reattach and feel healthier. A few small daily habits can make a big difference in reducing inflammation, preventing new tartar buildup, and keeping your mouth comfortable during recovery. Here’s what to do:
Brush gently twice a day using a soft-bristled toothbrush and fluoride toothpaste to avoid irritating tender gums.
Floss carefully once daily to remove food particles and use an antibacterial mouthwash to help keep the area clean.
Skip spicy or crunchy foods for at least 48 hours, and choose soft meals rich in nutrients to support tissue healing.
Stay hydrated and consider adding vitamin C-rich foods like oranges or bell peppers to your diet for extra support.
How to Avoid Gum Recession and Maintain Results
Once your gums have healed after tartar removal, the next step is keeping them healthy long-term. While gums can’t regrow, staying consistent with preventive care can help maintain gum attachment and reduce the chances of future recession. A few simple habits go a long way toward keeping your smile strong and clean.
Schedule professional cleanings every 6 months to stop tartar before it causes more damage.
Quit smoking and try to manage stress, both of which are linked to gum inflammation and delayed healing.
Use helpful tools like water flossers to reach areas that brushing alone might miss.
Eat a nutrient-rich diet, especially foods with calcium and vitamin D, to support gum strength and immunity.
These daily choices don’t just protect your mouth—they help your gums stay firm, pink, and securely attached, creating results that look and feel like real regrowth.
4 FAQs on Tartar Removal
Q1: How long does it take for gums to feel normal after tartar removal?
Most people notice improvement within 1 to 2 weeks, as swelling and soreness fade. Full healing and gum tightening typically take 4 to 8 weeks, depending on your oral hygiene and gum condition.
Q2: Why do my gums look worse after cleaning?
That’s actually pretty common. Tartar can hide gum recession, so once it’s removed, the gums may look lower or more exposed. It doesn’t mean the cleaning made things worse—it just revealed what was already there. With proper care, your gums can start to look and feel healthier again.
Q3: Is there a way to speed up gum healing?
Absolutely. Stick to a gentle brushing routine, floss carefully every day, and use an antibacterial mouthwash to keep bacteria in check. Staying on top of your dental checkups will also help spot any issues early.
Q4: When should I worry about my gums after a cleaning?
If your gums are still bleeding, hurting, or swollen a week later, or if things seem to be getting worse, it’s time to call your dentist. It could be a sign of infection or deeper gum problems that need treatment.
After Tartar Removal, Can Gums Recover? You’ve Got Options
So, do gums grow back after tartar removal? Not exactly—but healing is still possible, and your gums can tighten and reattach if you treat them kindly. Think of tartar removal as a reset button—what comes next is up to your daily habits. Keep things clean, stay on top of check-ups, and don’t ignore signs your gums need more help. A healthier smile really does start at home.
Look, your regular face washing gets the job done, but face cleansing brushes? They can totally change the game if you pick wisely. The key is finding one that actually works with your skin instead of fighting it. Whether you want something super gentle or need serious blackhead-busting power, the right brush makes your routine go from "meh" to "wow, my skin looks amazing."
Quick Buying Guide: Choose Your Perfect Face Cleansing Brush
Brush Type
Best For
Skin Types
Key Benefits
Price Range
Sonic Cleansing
Deep pore cleaning, daily use
All skin types, especially sensitive
Gentle vibrations, effective makeup removal, minimal irritation
$30-$200
Rotating Brush
Thorough exfoliation, stubborn makeup
Normal to oily skin
Strong mechanical cleaning, multiple speed settings, various brush heads
$25-$150
Silicone Cleasing Brush
Sensitive/acne-prone skin, hygiene-focused
Sensitive, acne-prone, all skin types
Antibacterial, easy to clean, gentle, long-lasting
$20-$100
Manual Brush
Budget-conscious, travel, simple routine
Normal to oily skin
Complete pressure control, no batteries needed, affordable
$5-$25
Combination System
Multi-functional skincare, tech enthusiasts
Varies by attachments
Multiple functions, customizable, comprehensive skincare
$80-$300
Waterproof Models
Shower use, convenience, durability
All skin types
Shower-safe, versatile placement, easy cleaning
$25-$200
6 Quick Selection Tips:
If you have sensitive skin: Choose silicone or sonic brushes with gentle settings
If you have oily/acne-prone skin: Opt for sonic or rotating brushes with antibacterial features
If you're a beginner: Start with manual or basic sonic brushes
If you travel frequently: Select compact, waterproof, or manual options
If you want maximum value: Consider combination systems or sonic brushes with multiple heads
If you're on a budget: Manual brushes or basic silicone devices offer good results
Do Facial Cleansing Brushes Actually Work?
Yes, facial cleansing brushes absolutely work when you use them right. Quality cleansing brushes are way more effective at removing makeup, dirt, and oil than just using your hands - it's pretty obvious once you try a good one. The key word here is "right" - results depend heavily on choosing the correct brush for your skin type and actually knowing how to use it properly.
The Real Benefits for Skin Health
Face cleansing brushes deliver three major advantages that your hands simply can't match. First, they provide deep cleansing for skin by using gentle vibrations or rotations to dislodge dirt, oil, and makeup trapped deep within pores. This mechanical action reaches areas that fingers often miss, particularly around the nose and chin where blackheads love to lurk.Second, these devices offer controlled exfoliation by removing dead skin cells that can make your complexion look dull and rough. Unlike harsh scrubs that can damage your skin barrier, quality brushes provide consistent, gentle exfoliation that reveals fresher skin underneath without causing micro-tears.Third, cleaner pores mean better product absorption. When your skin is thoroughly cleansed, your expensive serums and moisturizers can actually penetrate effectively instead of sitting on top of dirt and oil. Many users notice their skincare products work noticeably better after incorporating a cleansing brush into their routine.
Solving Common Skin Concerns
Face cleansing brushes address specific skin issues more effectively than traditional washing methods, making them particularly valuable for people dealing with persistent concerns. Here's how they tackle the most common problems:
Stubborn Acne and Blackheads: The gentle mechanical action helps prevent pore blockages by removing excess oil and dead skin cells before they can form comedones. Face brushes for acne work best when used 2-3 times per week with a gentle, non-comedogenic cleanser.
Clogged Pores and Enlarged Appearance: Regular use helps keep pores clear of debris, which can make them appear smaller over time. The consistent cleansing prevents the buildup that stretches pore walls and creates that "orange peel" texture.
Dull, Lifeless Complexion: The gentle exfoliation removes the layer of dead cells that makes skin look tired and lackluster. Improved circulation from the massaging action brings fresh blood to the surface, creating a natural, healthy glow.
Uneven Skin Texture: By providing consistent exfoliation, brushes help smooth rough patches and create a more even skin surface. This makes makeup application smoother and gives skin a more refined appearance.
Poor Product Absorption: Clean, exfoliated skin allows serums and moisturizers to penetrate effectively instead of sitting on top of dead skin and oil. Users often report their skincare products work significantly better after incorporating brush cleansing. When used correctly with appropriate frequency for your skin type, cleansing brushes can significantly improve these common concerns while supporting overall skin health and appearance.
Cleansing Brushes vs. Hand Washing: Which Works Better?
The cleansing brush versus hand washing debate isn't about completely replacing one with the other - it's about understanding when each method works best. While both approaches have their place in skincare routines, the differences in effectiveness and results are significant enough to consider.
Factor
Hand Washing
Cleansing Brushes
Cleansing Power
Removes surface dirt and oil
Removes 6x more makeup, 2x more dirt than hands
Time Required
2-3 minutes for thorough cleansing
60-90 seconds for complete cleansing
Consistency
Varies based on mood, energy, rushing
Same level of cleansing every time
Exfoliation
Minimal to none
Gentle, controlled dead skin removal
Pore Penetration
Surface level only
Reaches deeper into pores
Pressure Control
Inconsistent, can be too harsh or too gentle
Controlled, consistent pressure
Coverage
May miss hard-to-reach areas
Covers entire face evenly
Cost
Free (just cleanser needed)
Initial investment required
Convenience
Always available
Needs charging/maintenance
Skin Sensitivity
Gentler for very sensitive skin
Requires proper brush selection
Face cleansing brushes offer superior efficiency and consistency compared to washing with your hands alone. However, hand washing is still valuable for gentle daily maintenance and when your skin needs a break from mechanical cleansing.
What Types of Face Cleansing Brushes Are Available and Which One is Right for You?
Looking for a face cleansing brush but feeling overwhelmed by all the choices? I get it - there are tons of options out there, and they all claim to be amazing. The secret is being real about what your skin actually needs and how much effort you're willing to put in each day.
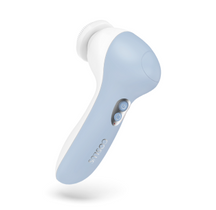
Sonic Cleansing Brushes
Sonic brushes use high-frequency vibrations (300+ per second) to deep clean without harsh scrubbing. The gentle pulsations loosen dirt and makeup from pores while being kind to your skin. They work well for most skin types, including sensitive skin, since the cleaning power comes from vibration rather than rough pressure.
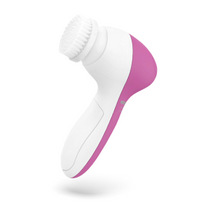
Rotating Brush Systems
These brushes spin in circular motions for more mechanical cleaning than sonic versions. They're great at removing stubborn makeup and providing gentle exfoliation, making them perfect for normal to oily skin. However, sensitive skin types need to be more careful to avoid over-exfoliation.
Silicone Cleansing Devices
Made from medical-grade silicone, these brushes are naturally antibacterial and easier to clean than traditional bristles. They don't harbor bacteria and last longer, making them ideal for sensitive or acne-prone skin. Many feature different textures for targeted cleaning of different face areas.
Manual Cleansing Brushes
No batteries needed - you control the pressure and movement with your hands. They're budget-friendly, travel-friendly, and perfect if you want complete control over your cleansing or prefer avoiding electric device maintenance.
5 Key Factors to Consider When Choosing a Face Cleansing Brush
Picking the right face cleansing brush isn't about buying the most expensive one or whatever your favorite influencer recommends - it's about finding something that actually works with your skin and fits into your daily routine. Choose wrong, and you'll end up with irritated skin, new breakouts, or another device collecting dust in your bathroom cabinet.
1. Know Your Skin Type First
Your skin type should be the main factor when you're shopping for a brush, because what works well for your friend might cause problems for you.
Skin Type
Best Brush Features
What to Avoid
Usage Frequency
Oily Skin
Sonic/rotating brushes, higher settings, nylon bristles
Ultra-gentle settings that won't cut through oil
Daily use once adjusted
Dry Skin
Silicone bristles, lower speeds, gentle settings
Harsh bristles, daily use initially
Every other day
Sensitive Skin
Silicone bristles, lowest settings, 30-second sessions
Nylon bristles, high speeds, long sessions
2-3 times per week
Combination Skin
Adjustable settings, multiple attachments
One-size-fits-all approaches
Customize by face area
2. What Your Brush Is Actually Made Of
The material of your brush head significantly affects both cleaning effectiveness and skin health.
Silicone Bristles are naturally antibacterial, which reduces the risk of breakouts from contaminated brushes. Since silicone doesn't absorb moisture or debris, it's much easier to keep clean and hygienic. They're very gentle, making them suitable for daily use without causing irritation. However, they may not remove heavy makeup as effectively as firmer materials.
Nylon Bristles provide more intensive cleaning and are excellent at removing stubborn makeup and dead skin cells. They're particularly effective for people with normal to oily skin who need thorough cleansing. The drawback is that they can be too harsh for sensitive skin types and require more careful cleaning to prevent bacterial buildup.
Replaceable Heads are necessary for maintaining hygiene and effectiveness. Even high-quality brush heads wear out and accumulate bacteria after 2-3 months of regular use. Consider the ongoing cost of replacement heads when making your initial purchase decision.
3. Tech Features That Actually Matter
Modern brushes come loaded with features that can make or break your experience.
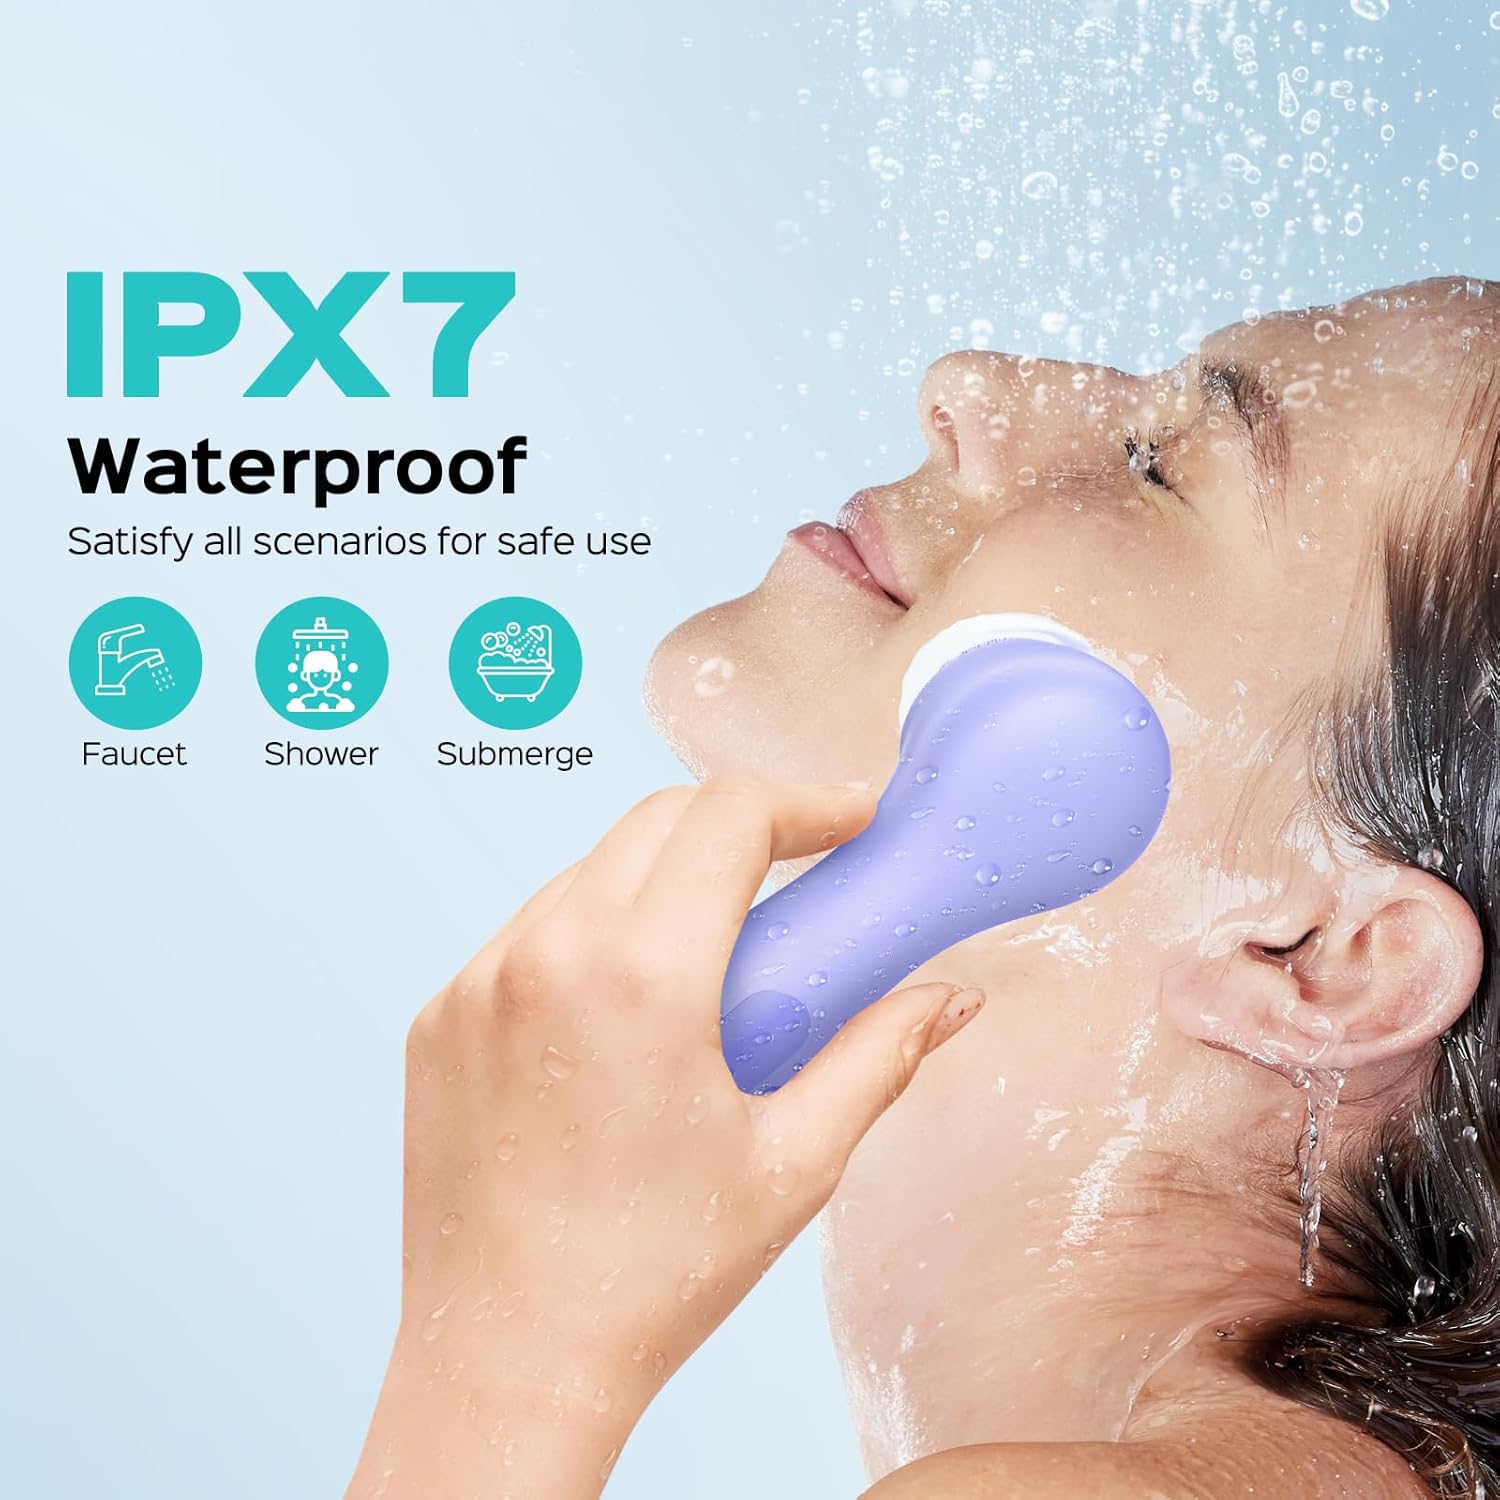
Waterproof Design (IPX7 Rating) lets you use your brush safely in the shower and makes thorough cleaning way easier, which prevents bacterial buildup.
Battery Life varies wildly between models - look for at least two weeks of use per charge for daily users, while premium models offer up to 35 days.
Vibration vs. Rotation offer different approaches: sonic vibration is gentler for sensitive skin, while rotating brushes provide more mechanical power for thorough cleaning.
Adjustable Speed Settings give you flexibility - aim for at least two speeds (gentle daily use and stronger weekly deep cleaning), though advanced models offer 3-5 levels.
4. Getting the Best Bang for Your Buck
Shopping for budget face cleansing brushes? Good news - you don't need to spend a fortune to get results. Just avoid the rock-bottom prices and look for affordable options that still deliver on the features you actually need.
Price Range
What You Get
Best For
Watch Out For
Budget ($15-$40)
Basic functionality, manual or simple silicone brushes
First-time users, simple needs
Unknown brands, poor materials
Mid-Range ($40-$100)
Reliable sonic technology, waterproofing, decent battery
Most people, best value
Feature overload you won't use
Premium ($100+)
Advanced features, multiple attachments, long battery life
Tech enthusiasts, comprehensive needs
Paying for unused capabilities
5. Additional Considerations That Matter
Don't overlook these everyday factors that affect whether you'll actually use your brush long-term.
Will It Fit Your Lifestyle? This matters if you travel often or have limited bathroom space - look for compact designs with protective cases and travel locks.
How Easy Is It to Keep Clean? It directly impacts hygiene and longevity - silicone models need less maintenance than bristle versions, and avoid designs where water gets trapped.
Does It Match Your Daily Routine? This means being honest about your lifestyle - quick morning people need fast-acting sonic brushes, while evening routine lovers might enjoy extra massage features.
Will It Work with Your Current Products? This is often forgotten but important - some brushes work better with gels, others with creams, so check manufacturer recommendations.
Top 5 Face Cleansing Brushes in 2025
After extensive testing and market analysis, these five top face brushes 2025 represent the best electric face brush options available, combining proven effectiveness with cutting-edge technology. From revolutionary eye care features to professional-grade sonic cleansing, these devices deliver results that transform your skincare routine.
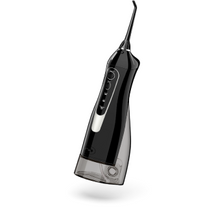
1. Coslus JMY05(FBS02) Facial Cleansing Brush - Most Effective Results
Brand: CoslusPrice: Mid-range premium ($37.99)Why It's Our #1 Pick: This isn't just another cleansing brush - it's a complete facial management system that delivers clinically proven results no other device can match.Standout Features:
Proven Results: 85% blackhead reduction, 70% fewer blemishes, 89% reduced pore appearance, and 95% brighter skin
Revolutionary Eye Care: Unique 48°C constant temperature heating zone that improves eye circulation, lifts corners, and reduces fine lines
Five Specialized Modes: Strong (oily skin), Normal (daily use), Soft (sensitive skin), Comfort (massage), and Eye Protector (heat therapy)
Exceptional Battery Life: 2-hour charging provides 35 days of use
Complete Cleaning System: Large area fine brush for deep cleansing plus coarse brush for T-zone targeting
IPX7 Waterproof: Safe for shower use with food-grade silicone construction Ideal Skin Types: All skin types, especially beneficial for those wanting comprehensive anti-aging benefits alongside deep cleansingDimensions: Compact at 2.15" x 1.37" x 6.1" (7.05 oz)
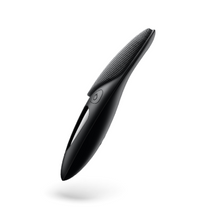
2. FOREO LUNA 4 - Most Advanced Technology
Brand: FOREOPrice Range: Premium (196.99)Why It Stands Out: The most technologically sophisticated cleansing brush available, featuring smart connectivity and professional-grade engineering.Standout Features:
Revolutionary T-Sonic™ Pulsations: 16 adjustable intensity levels with app integration for personalized routines
Advanced Materials: 17% softer silicone touchpoints than previous generations
Smart Features: FOREO For You app connectivity with guided routines and progress tracking
Superior Battery: 600 uses per single charge with USB recharging
Premium Options: LUNA 4 Plus adds LED light therapy and microcurrent technology
Complete Waterproof: 100% bacteria-resistant construction Ideal Skin Types: All skin types with specialized brush head options for balanced, sensitive, or combination skin
3. Michael Todd Beauty Soniclear - Best Clarisonic Alternative
Brand: Michael Todd BeautyPrice Range: Mid-range value ($139)Why It's the Perfect Replacement: The closest thing to the beloved, discontinued Clarisonic with even better antimicrobial protection.Standout Features:
Powerful Sonic Technology: 18,000 bristle movements per minute for deep pore cleansing
Industry-First Antimicrobial Protection: Patented technology reduces bacteria growth by 99.9%
Three Customizable Speeds: Gentle, standard, and power settings for all skin types
Built-in Timer: Automatic 20-second intervals guide you to different face areas
Long-Lasting Brush Heads: Antimicrobial protection keeps brushes fresh for 6 months
Complete Waterproof Design: Rechargeable with wireless charging cradle Ideal Skin Types: All skin types and tones, particularly effective for those missing their Clarisonic
4. PMD Clean Pro - Premium Heat Therapy
Brand: PMD BeautyPrice Range: Premium mid-range ($149)Why It's Special: The only cleansing brush that combines sonic technology with therapeutic heat for enhanced skincare results.Standout Features:
ActiveWarmth™ Heat Therapy: Unique heat technology that enhances serum absorption and provides spa-like experience
Gemstone Integration: Rose Quartz or Obsidian options for natural inflammation reduction
Professional-Grade Sonic: 7,000 vibrations per minute with four customizable modes
Premium Build Quality: 20-year warranty with premium travel case included
Complete Waterproofing: Fully submersible with USB rechargeable battery
Dual Functionality: Cleansing and enhanced product application in one device Ideal Skin Types: All skin types, especially effective for oily and acne-prone skin needing deep cleansing
5. Spa Sciences NOVA - Best Budget Option
Brand: Spa SciencesPrice Range: Budget-friendly ($39.99)Why It Works: Professional-quality sonic technology at the most accessible price point without compromising effectiveness.Standout Features:
High-Speed Sonic Technology: 18,000 bristle movements per minute for thorough cleansing
Antimicrobial Protection: Patented technology reduces bacteria growth by 99.9%
Customizable Intensity: Three speed settings with built-in timer for equal facial coverage
Enhanced Product Absorption: Includes serum infusion head for better skincare product penetration
Complete Waterproofing: Safe for shower use with two-hour maximum battery runtime
Easy Maintenance: USB rechargeable with simple cleaning requirements Ideal Skin Types: All skin types with sensitive brush head option available for delicate skinWhy It's Popular: Available across multiple major retailers with consistent positive feedback
Best Electric Face Brush Selection Guide
Choose Coslus JMY05(FBS02) if you want the most comprehensive skincare solution with proven clinical results and unique eye care benefits
Choose FOREO LUNA 4 if you prioritize cutting-edge technology, app connectivity, and premium Swedish engineering
Choose Michael Todd Beauty Soniclear if you're looking for the perfect Clarisonic replacement with superior antimicrobial protection
Choose PMD Clean Pro if heat therapy and premium spa features appeal to your skincare routine
Choose Spa Sciences NOVA if you need a reliable, effective option at the most affordable price point
Common Mistakes to Avoid When Choosing a Face Cleansing Brush
Making the wrong choice when buying a face cleansing brush can lead to wasted money, skin irritation, and disappointing results. These common errors trip up even experienced skincare users, but knowing what to watch out for helps you make a smart purchase that actually improves your skin.
Ignoring Your Skin Type: Don't choose harsh bristle brushes if you have sensitive or acne-prone skin - they'll cause more breakouts and irritation instead of helping.
Overlooking Hygiene Features: Avoid brushes without replaceable heads or easy cleaning designs, as bacteria buildup leads to skin problems and shortened device lifespan.
Focusing Only on Price: Skip ultra-cheap options that compromise on waterproofing, battery life, or build quality - they'll break quickly and cost more long-term.
Not Checking Routine Compatibility: Don't pair aggressive brushes with exfoliating scrubs or harsh cleansers, as this combination causes over-exfoliation and damaged skin barriers.
Buying Without Research: Avoid impulse purchases without reading reviews or checking return policies - invest time in finding the right match for your specific needs.
Get the Perfect Face Cleansing Brush for Your Skin
Finding the right face cleansing brush really comes down to knowing your skin type and not getting swayed by flashy features you won't actually use. Whether you go with our top pick, the Coslus JMY05(FBS02), for its proven results and eye care benefits, or choose something else from our list, the key is starting slow and being consistent. Once you find your perfect match and get into a good routine, you'll wonder how you ever lived without deeper pore cleaning and that post-facial glow. Your skin deserves better than just your hands - so pick a brush that fits your needs and budget, and get ready to see the difference.
Frequently Asked Questions About Face Cleansing Brushes
Q1: How often should you use a face cleansing brush?
Start with 2-3 times per week, then gradually increase based on your skin's response. Sensitive skin should stick to 2-3 times, while normal to oily skin can often handle daily use once adjusted.Need help figuring out the right schedule for your skin? Check out our guide How Often Should You Use a Facial Cleansing Brush covers everything from creating the perfect schedule to adjusting frequency based on your skin type.
Q2: Is it good to use a facial cleansing brush every day?
Daily use works for some people with normal to oily skin, but it's not necessary for everyone. Sensitive, dry, or acne-prone skin typically does better with every-other-day use to prevent irritation and over-exfoliation.
Q3: What material is not recommended for facial brushes and why?
Avoid coarse synthetic bristles, abrasive materials like pumice, or porous materials that can't be properly cleaned. These cause micro-tears, irritation, and harbor bacteria that lead to skin problems and infections.
Q4: Is it better to wash your face with your hands or a scrubber?
Cleansing brushes remove up to 6 times more makeup and 2 times more dirt than hands alone. However, hands are gentler for sensitive skin. The best approach is using a brush 3-4 times weekly and hands on other days.
Q5: How often should I wash face brushes?
Rinse your brush head with warm water after every use. Deep clean with antibacterial soap 1-2 times weekly. Replace bristle brush heads every 2-3 months, while silicone brushes last much longer with proper care.
Q6: Do cleansing brushes help acne?
Yes, they help remove excess oil, dead skin cells, and pore-clogging debris more effectively than manual cleansing. Use gently and start with every-other-day to avoid irritating acne-prone skin. Always pair with gentle, non-comedogenic cleansers.
Q7: Are facial cleansing brushes good for oily skin?
Yes, they're excellent for oily skin because they remove excess sebum, unclog pores, and prevent blackhead-causing buildup. Oily skin can typically handle more frequent use and stronger settings. Look for brushes with multiple speed options for customization.

You know that feeling when you wash your face but it still doesn't feel completely clean? That's because your hands can only do so much when it comes to removing dirt, oil, and makeup buildup. A facial cleansing brush takes your cleansing routine to the next level with gentle yet powerful bristles that work deeper than manual cleansing ever could. The electric facial cleansing brush benefits are pretty amazing - think clearer pores, smoother texture, and skin that actually glows without expensive treatments.
1. Achieve Deeper Cleanse Than Manual Methods
When you wash your face with just your hands, you're only getting surface-level clean. A facial cleansing brush changes everything by using gentle rotating or sonic vibrations that can reach deep into your pores where dirt, oil, and stubborn makeup love to hide. Research shows that powered cleansing brushes remove up to six times more impurities than manual washing alone, which explains why so many people see dramatic improvements in their skin clarity within just a few weeks of use.
If you struggle with oily skin or frequent breakouts, a facial cleansing brush for acne can be particularly game-changing. The deep pore cleansing brush action helps prevent the buildup of sebum and dead skin cells that lead to blackheads and blemishes. The key is consistency - using your brush 2-3 times per week can significantly reduce the appearance of enlarged pores and keep future breakouts at bay.
Pro tip: Always pair your cleansing brush with a gentle, non-abrasive cleanser to avoid over-irritating your skin. Skip harsh scrubs when using your brush, as the bristles are already doing the exfoliating work for you. Your skin will thank you for the thorough yet gentle approach.
2. Exfoliate Without Harsh Scrubs
Forget those gritty face scrubs that leave your skin red and irritated. A facial cleansing brush provides the perfect amount of gentle exfoliation through its rotating or sonic bristles that naturally slough away dead skin cells without the harshness. The facial cleansing brush exfoliation benefits are immediately noticeable - your skin feels smoother to the touch and looks noticeably brighter after just one use.
What makes the best brush for smooth skin so effective is its ability to promote healthy cell turnover, which is key for maintaining youthful-looking skin. As dead skin cells are gently removed, fresh new cells rise to the surface, helping to minimize the appearance of fine lines and giving you that coveted natural glow. This consistent cell renewal process is one of the most effective anti-aging benefits you can get from a simple skincare tool.
However, moderation is crucial when it comes to exfoliation. For sensitive skin types, limit use to 2-3 times per week to avoid over-exfoliation, which can lead to redness and irritation. Those with normal to oily skin can typically handle daily use, but always listen to your skin's response.
Quick Check: Is your skin feeling tight, red, or extra sensitive? These are signs you might be over-exfoliating and should reduce frequency.
3. Boost Your Serums and Moisturizers
Ever feel like your expensive skincare products aren't living up to their promises? The problem might not be the products themselves, but rather how well your skin can actually absorb them. When dead skin cells and impurities create a barrier on your skin's surface, even the best serums and moisturizers can't penetrate effectively. A facial cleansing brush for better absorption changes this by creating the perfect canvas for your skincare products to work their magic.
Clean, freshly exfoliated skin can absorb active ingredients more effectively than skin that's been washed with hands alone. This means you'll actually see better results from the products you're already using, making your entire routine more cost-effective. When you improve skincare routine with brush cleansing, ingredients like vitamin C, retinol, and hyaluronic acid can reach deeper layers where they're most beneficial.
Your Perfect Evening Routine:
1. Use your cleansing brush with a gentle cleanser for 60 seconds
2. Pat skin dry and wait 2-3 minutes for complete drying
3. Apply your serum (vitamin C works beautifully after brush cleansing)
4. Follow with your favorite moisturizer
5. Notice how much more smoothly products glide on and absorb
Use your facial cleansing brush at night.The difference in how your skin feels and looks the next morning will convince you that this simple addition was worth it.
4. Stimulate Blood Flow for a Natural Radiance
Want that post-facial glow without the spa price tag? The gentle massaging action of a facial brush for glowing skin does wonders for your circulation, bringing fresh blood and oxygen to your skin's surface. This increased blood flow creates that natural, healthy flush that makes you look instantly more awake and radiant - no highlighter required.
The benefits of facial massage brush use go beyond just surface-level improvements. As the soft bristles move across your skin, they help reduce morning puffiness by encouraging lymphatic drainage, which is why your face looks less swollen and more defined after use. Think of it as a mini workout for your facial muscles and blood vessels, promoting long-term skin health while delivering immediate visible results.
This spa-like experience fits perfectly into busy lifestyles, giving you professional-level results in just 60 seconds at home. Morning use is particularly effective for waking up dull, tired-looking skin - the gentle stimulation helps shake off that just-rolled-out-of-bed appearance and gives you a natural energy boost.
Morning Boost Tip: Use your cleansing brush with cool water in the morning to maximize the circulation benefits and really wake up your skin. The combination of gentle massage and cool temperature creates an instant pick-me-up that's better than coffee for your complexion.
5. Personalized Cleansing for Sensitive, Dry, or Oily Skin
One of the biggest misconceptions about facial cleansing brushes is that they're too harsh for certain skin types. The truth is, modern customizable skincare tools are designed with everyone in mind, featuring adjustable speed settings and interchangeable brush heads that adapt to your unique needs. Whether you have reactive skin that turns red at the slightest touch or oily skin that needs serious deep cleaning, there's a setting that works for you.
A quality facial cleansing brush for sensitive skin typically offers ultra-gentle modes with softer bristles, while those with oily or acne-prone skin can benefit from firmer bristles and higher speeds for more thorough cleansing. Many advanced brushes come with multiple brush heads - from extra-soft silicone for delicate areas to firmer bristles for the T-zone where oil tends to accumulate.
Unlike basic one-size-fits-all options, premium brushes offer multiple cleansing modes that let you customize your experience based on how your skin feels each day. Some days you might need gentle care, while others call for deeper cleaning.
Quick Skin Type Guide:
Sensitive/Dry: Soft bristles, lowest speed, 2-3 times per week
Normal/Combination: Medium bristles, moderate speed, 4-5 times per week
Oily/Acne-Prone: Firmer bristles, higher speed, daily use with gentle cleanser
6. Quick and Efficient for Busy Lifestyles
Between work, family, and everything else on your plate, spending 10 minutes scrubbing your face isn't realistic. That's where a time-saving facial cleansing brush becomes a total game-changer for your daily routine. What used to take several minutes of manual washing now takes just 60-90 seconds with better results - it's like having a more thorough cleansing treatment that fits into even the most hectic schedule.
The efficiency comes from the brush doing all the hard work for you. Instead of spending time working cleanser into every pore and trying to remove stubborn makeup, the rotating bristles handle the heavy lifting while you simply guide the brush across your face. This makes for a truly efficient skincare routine that busy professionals and parents can actually stick to consistently.
The convenience factor extends beyond just speed - many brushes are waterproof and rechargeable, making them perfect for travel or quick touch-ups. You can cleanse your face in the shower, at the gym, or anywhere with running water without compromising on thoroughness.
Most people find that using a cleansing brush cuts their cleansing time significantly while providing a deeper clean than manual washing alone. When something saves you time and improves your cleansing effectiveness, it's a practical addition to any skincare routine.
Can a Simple Brush Really Change Your Skin? (Yes, and Here's How)
There's a reason your friends keep raving about their cleansing brushes - these things actually work. From finally conquering stubborn blackheads to making your expensive serums worth every penny, the benefits go way beyond just getting clean. Plus, it's pretty satisfying to see how much gunk comes off your face even after you thought it was clean. The best part is how it works for literally every skin type, so you don't have to guess if it's right for you. Curious to see the difference for yourself? Get a facial cleansing brush and see what your skin has been missing.

Cold water, hot tea, or even a sweet snack—if these trigger pain in your mouth, sensitive teeth might be the reason. It’s a sign that your teeth aren’t as protected as they should be, often due to worn enamel or gum issues. The good news is there are clear answers when it comes to sensitive teeth causes, prevention, and treatment. From simple at-home habits to dental fixes, relief is possible with the right steps.
What Is Tooth Sensitivity and Who Is at Risk?
Tooth sensitivity means feeling sharp or sudden pain in your teeth when they come in contact with something cold, hot, sweet, or acidic. It can also happen during brushing or flossing. This pain isn’t random—it’s caused by exposed dentin, the inner layer of your tooth that connects directly to the nerves. When the enamel (the hard outer layer) wears down or the gums pull back, that dentin becomes uncovered and more sensitive to everyday triggers. The discomfort may come and go, but it often points to a deeper issue with enamel or gum health.
What Happens Inside a Sensitive Tooth?
Each tooth has a protective enamel layer on top and a cementum layer covering the root. Underneath is dentin, filled with tiny tubules that lead to the tooth’s nerve center. When dentin is exposed, those tubules act like open doors, letting hot or cold sensations hit the nerve directly. That’s what causes the quick, stabbing pain many people feel.
Who Is More Likely to Have Tooth Sensitivity?
Tooth sensitivity affects nearly 1 in 2 adults, and it’s especially common in women between the ages of 20 and 50. Certain habits or conditions increase the risk, including:
Brushing too hard or using a hard-bristled toothbrush
Eating or drinking acidic foods and beverages regularly
Having gum disease or natural gum recession with age
Grinding or clenching your teeth at night
Getting frequent whitening treatments or other dental work
Even people with generally healthy teeth can develop sensitivity over time if their enamel weakens. Knowing your risk factors can help you take early steps to protect your smile.
What Are the Most Common Causes of Sensitive Teeth?
Tooth sensitivity doesn’t happen without a reason—something usually triggers the enamel to wear down or the gums to recede, both of which expose the inner dentin and nerve pathways. If you're experiencing sensitivity, it may be due to one or more everyday habits or dental conditions. Here are the most common sensitive teeth causes, plus simple tips to help prevent them.
Brushing Too Hard or Using a Hard-Bristled Toothbrush
Scrubbing your teeth with force or using a stiff brush can wear down enamel over time. It may also damage the gum line. Try switching to a soft-bristled toothbrush and brushing with gentle, circular motions instead.
Eating and Drinking Acidic Foods
Citrus fruits, soda, wine, and vinegar-based foods can weaken enamel and make teeth more sensitive. Limiting these and rinsing your mouth with water afterward can help reduce damage.
Gum Recession from Gum Disease or Aging
As gums recede—either from age or conditions like gingivitis—the roots of your teeth get exposed. Since roots lack enamel, they’re much more sensitive. Regular dental cleanings and gentle oral care can slow this process.
Teeth Grinding or Clenching (Bruxism)
Grinding puts pressure on your enamel and can lead to tiny cracks or worn-down surfaces. Wearing a mouthguard at night may help protect your teeth if you grind in your sleep.
Recent Dental Treatments
Whitening, fillings, or cleanings can cause temporary pain. If you notice sensitive teeth after whitening, try using a desensitizing toothpaste for a few days and avoid very hot or cold foods.
Other Causes: Cracked Teeth, Cavities, or Acid Reflux
A cracked tooth or untreated cavity can expose dentin, and acid reflux can bring stomach acids into contact with teeth. Always have ongoing pain checked by a dentist.
How Can You Prevent Sensitive Teeth from Getting Worse?
Tooth sensitivity often starts gradually—and that means it can often be stopped early, too. A few small changes in your daily routine may help protect your enamel, support gum health, and lower the chance of discomfort. Here are some reliable and easy prevention strategies to keep sensitivity under control for the long run.
Daily Habits to Adopt
Use a soft-bristled toothbrush and brush with light pressure
Choose fluoride toothpaste (look for ones made for sensitive teeth)
Brush twice a day and floss gently to avoid gum irritation
Limit acidic foods and drinks like citrus, soda, and vinegar
Rinse with water after meals to help reduce acid buildup
These habits help keep enamel strong and gums healthy—both are key in preventing dentin exposure.
Lifestyle Changes That Help
Wear a mouthguard at night if you grind or clench your teeth
Visit your dentist every 6 months for cleanings and checkups
Eat a balanced diet with calcium-rich foods like dairy, leafy greens, or almonds
Stay hydrated to support saliva flow, which helps protect your teeth naturally
Natural Prevention Tips
Some people try oil pulling (swishing coconut oil in the mouth) or herbal rinses for added comfort. Mild desensitizing mouthwashes may also help. These may offer short-term relief, but it’s important to talk to a dentist before relying on any home remedy.
Taking steps early on can save you from long-term discomfort. If you're wondering how to prevent sensitive teeth or looking for natural ways to reduce tooth sensitivity, start with what you can control every day.
What Are the Most Effective Treatments for Sensitive Teeth?
If sensitive teeth are disrupting your daily life, there are plenty of treatment options that can help—some you can try at home, and others that require a visit to the dentist. The right approach depends on the cause and how severe the discomfort is. Below are the most trusted sensitive teeth treatment options, along with their pros and cons, so you can find relief that fits your needs.
Over-the-Counter Options
Many people find relief using desensitizing toothpaste, especially those with potassium nitrate or stannous fluoride. These ingredients help block pain signals between the tooth surface and the nerve. Desensitizing mouthwashes can also help strengthen enamel and reduce reactions to temperature or pressure. For consistent relief, use them twice a day as part of your brushing routine.
Professional Treatments at the Dentist
If over-the-counter products don’t work, your dentist may recommend:
Fluoride varnishes to strengthen enamel
Dental sealants or bonding agents to cover exposed dentin
Root canal treatment for severe, ongoing pain that doesn’t respond to other care
These treatments are especially helpful if your sensitivity is linked to gum disease, enamel loss, or deep decay.
Home Remedies That May Help
Some people find short-term relief using saltwater rinses, clove oil, or even green tea rinses. These may have mild antibacterial or soothing effects, but they won’t fix the underlying cause. Use them only as a supplement, not a replacement for long-term care.
When to See a Dentist
If you’ve been using desensitizing products for a few weeks and still feel sharp pain—especially in one area—it’s time to see a dentist. Persistent sensitivity could signal a cracked tooth, cavity, or gum problem that needs treatment.
Treatment Type
Description
Pros
Cons
Recommended For
Desensitizing Toothpaste
Blocks pain signals with potassium nitrate
Affordable, easy to use daily
Takes weeks to work
Mild sensitivity
Fluoride Varnish
Applied by dentist to strengthen enamel
Quick relief, long-lasting
Requires office visit
Moderate cases
Home Remedies (Salt Rinse)
Natural soothing methods
Inexpensive, accessible
Temporary relief only
Short-term or mild cases
Choosing the right solution can help you get back to enjoying hot drinks, cold treats, and everyday brushing—without the sting.
Stop Sensitive Teeth Pain—Find the Right Cause and Treatment
If cold drinks or brushing hurt, it’s time to act. Sensitive teeth often improve with just a few changes to your routine. Try a soft-bristled brush and a toothpaste for sensitive teeth designed to block pain. And if the pain doesn’t go away, your dentist can help find the right fix.

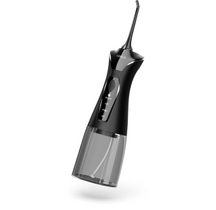
Brushing your teeth is important—but it’s not always enough to keep plaque and gum problems away. One of the biggest water flosser benefits is how easily it removes leftover food and bacteria from hard-to-reach areas. It’s gentle on your gums, quick to use, and makes your mouth feel extra clean. That’s why dentists are calling it a smarter way to floss.
Top Water Flosser Benefits: Why Dentists Recommend Them
Superior Plaque and Debris Removal
One of the biggest water flosser benefits is how well it removes plaque and food stuck between your teeth and under your gums. Brushing alone can miss those tight spots, but a water flosser uses strong pulses of water to clean them out. Research found that water flossers can remove up to 99.9% of plaque when used with brushing.
Dentists like water flossers because they help lower the risk of cavities, especially for people who often get them or have deeper gum pockets. If your teeth still feel rough after brushing, a water flosser can make a real difference.
Gentle Gum Care and Reduced Bleeding
If your gums bleed when you floss, or if they feel sore, a water flosser can help. It's much gentler than string floss and works well for people with sensitive gums or early gum disease. The water stream cleans out bacteria between your teeth and gums without scratching or hurting. Dentists often recommend starting on a low pressure setting and slowly turning it up as your gums get healthier.
Easier Cleaning for Braces, Implants, and Bridges
If you have braces, implants, or a bridge, flossing the usual way can be a pain. One of the key water flosser benefits for braces and other dental work is that it makes cleaning around wires and artificial teeth much easier. You don’t have to thread floss or use special tools—just point and spray.
Dentists and orthodontists often suggest water flossers to avoid plaque buildup around brackets and to protect your gums when you have dental work. It’s quicker, simpler, and a lot more effective.
Quick and Simple for Daily Use
One reason people skip flossing is that it takes too long. But dentist-recommended water flosser benefits include how easy it is to use every day. Most people can finish in just one to two minutes. It’s great for kids, older adults, and anyone who finds regular floss hard to use.
Dentists say people are more likely to stick with a water flosser than string floss. And the more consistent you are, the healthier your teeth and gums will stay.
Broader Health Benefits Beyond the Mouth
Using a water flosser doesn’t just help your teeth—it may support your overall health too. Poor gum health has been linked to serious health issues like heart disease, stroke, and diabetes. Keeping your mouth clean may help lower those risks.
You’ll also notice other small wins: fresher breath, fewer mouth sores, and cleaner teeth between dental visits. Many water flossers let you change the pressure level, and you can even add fluoride rinse for extra protection.
Quick Recap: Why Dentists Recommend Water Flossers
Clears out up to 99.9% of plaque
Gentle on gums—helps stop bleeding and swelling
Cleans around braces, implants, and bridges with no hassle
Fast and easy to use—takes just a couple of minutes
Helps protect your whole body through better oral health
People actually use them—so they work better over time
Want to get more from your daily routine? Try one of our water flossers (oral irrigators) and enjoy all the water flosser benefits.
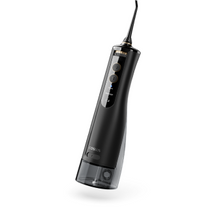
Water Flosser vs. Traditional String Floss: Which Is Better?
Both water flossers and string floss help clean between your teeth, but they work in very different ways. Traditional floss scrapes plaque off manually, while water flossers use a steady stream of water to rinse away debris and bacteria. Many dentists now recommend water flossers for people who struggle with gum issues, wear braces, or simply want a gentler, quicker option.
Here’s a quick side-by-side look at how they compare:
Aspect
Water Flosser
String Floss
Effectiveness
Clears more plaque in tough spots
Effective but less thorough
Gum Friendliness
Gentle, reduces bleeding
Can irritate or cut gums
Ease of Use
Fast and intuitive
Requires skill, often messy
Ideal For
Braces, implants, sensitivities
Simple, budget needs
Long-Term Value
Higher upfront cost, better results
Cheap but less efficient
When comparing water flosser vs string floss, many people find that water flossers are easier to use daily and less likely to cause discomfort. That consistency often leads to better results over time—especially for gum health.
Tips for Maximizing Water Flosser Benefits
Getting the most from your device starts with choosing the right one. If you travel often or prefer a clutter-free counter, look for cordless models with long battery life. For home use, countertop versions usually offer larger water tanks and more pressure settings. To start maximizing water flosser benefits, aim to use it once a day—ideally after brushing—and refill with lukewarm water for comfort.
Replace tips every few months, and clean the tank regularly to keep things fresh. Try using a fluoride rinse occasionally for added protection. These simple water flosser tips can help improve your routine and protect your oral health long term.
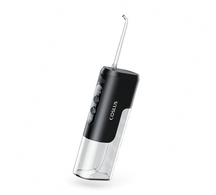
Water Flosser Benefits That Go Beyond Brushing
Brushing alone can only do so much. A water flosser helps remove more plaque, keeps gums happy, and makes flossing something you’ll actually want to do. It’s gentle, quick, and dentist-approved. Start feeling the difference—get a water flosser now.
FAQs About Water Flossers
Q1: Do I need to use dental floss if I use a water flosser?
For most people, a water flosser can be a complete replacement for string floss, especially when used daily and correctly. Dentists often recommend it for people with braces, implants, or gum sensitivity because it’s easier to use and gentler on the gums. However, some individuals with tight contact points may still benefit from occasional string flossing to physically scrape off sticky debris.
Q2: Can I substitute flossing with a water flosser?
Yes, many dentists consider water flossers a safe and effective substitute for traditional flossing. Clinical studies have shown that water flossers remove plaque and reduce gum inflammation as well or even better than string floss. As long as you use it consistently and correctly, it can serve as your primary flossing method.
Q3: Should I use tap water in my water flosser?
You can use tap water in most water flossers unless your local water supply has a high mineral content or the manufacturer recommends otherwise. If you notice buildup or hard water stains, switching to filtered or distilled water can help prevent clogs and extend the life of the device.
Q4: What happens if I don't floss for 10 years?
Skipping flossing for a long time allows plaque to build up between your teeth and under your gumline, increasing your risk for gum disease, tooth decay, and bad breath. Over 10 years, this can lead to tartar buildup, gum recession, bone loss, and even tooth loss. Regular flossing—or water flossing—helps prevent these long-term oral health problems.
Q5: Does water flossing make gums stronger?
Yes, regular water flossing can help improve gum health by reducing inflammation, bleeding, and bacterial buildup. As your gums become healthier, they often become firmer and more resilient. Many users notice less sensitivity and stronger gum tissue within a few weeks of consistent use.
Q6: Can I put mouthwash in my water flosser?
Yes, you can add a small amount of alcohol-free mouthwash to your water flosser tank for extra freshness and antibacterial protection. Just make sure to rinse the unit with clean water afterward to prevent residue buildup. Always check the manufacturer’s guidelines to avoid using ingredients that may damage the device.
Q7: Do water flossers remove tartar?
No, water flossers cannot remove hardened tartar (calculus). They are designed to clean soft plaque and food debris before it hardens. To remove tartar, you'll need a professional dental cleaning. However, regular use of a water flosser can help prevent plaque from turning into tartar in the first place.
Q8: How often should I floss with a water flosser?
Dentists recommend using a water flosser once a day, ideally after brushing your teeth. Consistent daily use is key to getting the full benefits—like reducing plaque, improving gum health, and preventing oral problems over time.

You've probably been told a million times to brush your teeth and avoid sugar, but here's the thing - most people still end up with cavities anyway. Why does this happen when we're all following the same basic advice? The answer is that there are specific, proven methods that go way beyond the usual tips your dentist rattles off during a quick checkup. These five techniques are what dental professionals actually use to prevent cavities, and they're surprisingly easy to add to your daily routine.
Method 1: Brush Twice Daily for 2 Minutes with Fluoride Toothpaste
Most people think they're brushing correctly, but they're actually making their teeth more vulnerable to cavities. The problem isn't that you're not brushing enough - it's that you're probably doing it wrong. The 2-2-2 rule (twice daily, for 2 minutes, with fluoride toothpaste) isn't just a catchy phrase; it's based on how long fluoride actually needs to work on your teeth.
Step 1: Time It Right
Brush for precisely 2 minutes, twice daily. Use a timer on your phone or an electric toothbrush that has a built-in timer. Brushing three times for 30 seconds each is much less effective than brushing twice for the entire 2 minutes.
Step 2: Select the Appropriate Toothpaste
Search for ADA-sealed fluoride toothpaste that has a minimum of 1,000 ppm of fluoride. Stannous fluoride is even more effective than standard sodium fluoride in decay prevention. Stay away from everyday whitening toothpastes as they are too abrasive.
Step 3: Brush with Proper Technique
Place your toothbrush at a 45-degree angle to your gums and brush in gentle circles. Do not scrub back and forth as if cleaning a counter. Use a soft-bristled brush and allow the bristles to do the work, not your arm.
Step 4: Don't Rinse Right Away
After brushing, spit out the excess toothpaste, but don't rinse with water immediately. This lets the fluoride continue protecting your teeth for longer.
Method 2: Clean Between Teeth Daily (It's Not Just About Flossing)
Your toothbrush can only clean about 60% of your tooth surfaces, leaving 40% untouched. These hidden areas between teeth are where most cavities actually start because bacteria love tight, hard-to-reach spaces.
Step 1: Choose Your Weapon
Pick what works best for you: traditional floss, water flosser, or interdental brushes. Water flossers are great for beginners and people with braces. Interdental brushes work well if you have larger gaps between teeth.
Step 2: Clean Before You Brush
Always clean between teeth before brushing, not after. This loosens trapped food and bacteria so your toothbrush and fluoride can reach those freshly cleaned spaces.
Step 3: Use the Right Technique
For traditional floss: wrap it around your fingers, slide it gently between teeth, and curve it into a C-shape against each tooth.
For water flossers: start on the lowest setting and aim the tip between teeth, not at your gums.
For interdental brushes: choose the right size so it fits snugly but doesn't force between teeth.
Step 4: Be Gentle but Thorough
Don't snap floss into your gums or blast water flossers at full power. Flossing prevents cavities by removing bacteria, not by being aggressive. If your gums bleed at first, that's normal - they'll toughen up with regular cleaning.
Method 3: Avoid Cavity-Causing Foods and Timing Mistakes
Sugar isn't the only enemy of your teeth - in fact, some "healthy" foods can be worse for cavities than candy. The real problem is foods that stick to your teeth and feed bacteria for hours, plus the timing of when you eat them.
Identify the Worst Offenders: The biggest cavity-causing foods are sticky carbs like crackers, bread, chips, and dried fruit. These break down into sugars and cling to your teeth. Even "healthy" foods like granola bars and fruit snacks can be worse than chocolate because they stick around longer.
Time Your Treats: Eat sweets and starches with meals, not as standalone snacks. When you eat them with other foods, your mouth produces more saliva to help wash them away. Sipping sugary drinks throughout the day is one of the worst things you can do - it's like giving bacteria a constant sugar drip.
Add Protective Foods: Include cavity-fighting foods in your diet: cheese (neutralizes acid and provides calcium), nuts (stimulate saliva), and crunchy vegetables like carrots and celery (naturally clean teeth). Green tea contains compounds that fight bacteria.
Rinse and Wait: After eating something sugary or starchy, rinse your mouth with water. But don't brush immediately - wait at least 30 minutes. Your tooth enamel is temporarily softened by acid, and brushing right away can actually damage it. Let your saliva do its job first.
Method 4: Boost Natural Saliva Production and Neutralize Acid
Your mouth has its own built-in cavity-fighting system that works 24/7 - your saliva. This isn't just spit; it's a powerful defense mechanism that washes away food particles, neutralizes harmful acids, and even repairs tiny spots of damage on your teeth before they become cavities. When your mouth is too dry or too acidic, bacteria have a field day.
Chew Sugar-Free Gum with Xylitol: Chew xylitol gum for 10-15 minutes after meals. Xylitol is a natural sweetener that bacteria can't process, so it actually starves them while stimulating saliva production. Look for gums that list xylitol as the first ingredient, not just "sugar-free" gums. Popular brands include Trident and Epic.
Stay Hydrated Throughout the Day: Drink plenty of water throughout the day. Dry mouth cavities are incredibly common because saliva prevents cavities by constantly washing away bacteria. If you wake up with a dry mouth, keep water by your bedside and sip it during the night. Certain medications can also cause dry mouth, so talk to your doctor if this is a constant problem.
Use pH-Balancing Rinses: After eating acidic foods like citrus fruits, soda, or wine, rinse with water or use a pH-balancing mouthwash. These rinses help neutralize acid faster than waiting for your saliva to do it naturally. Look for alcohol-free options that won't dry out your mouth - brands like TheraBreath make good pH-balancing rinses.
Stimulate Saliva Naturally: Eat foods that make your mouth water: tart apples, sugar-free mints, or even just thinking about sour foods. The more your mouth pH balance stays neutral, the harder it is for cavity-causing bacteria to survive.
Method 5: Regular Dental Checkups and Preventive Treatments
A lot of individuals assume twice-yearly cleanings are sufficient, but based on your risk factors, you may require more regular visits or specialized treatments that you simply can't receive at home.
Find Your Right Dental Checkup Frequency: The six-month rule is not for all. If you get cavities easily, have gum disease, or use medications that cause dry mouth, you may require cleanings every 3-4 months. Individuals with diabetes, smokers, and people with a history of gum disease may require more visits. Consult your dentist as to what frequency is logical for your individual case.
Think About Professional Fluoride Treatment: Professional fluoride treatments are a lot stronger than you can purchase over the counter. They're particularly useful if you have early decay signs or a high risk of cavities. These treatments can even reverse very early cavity development that hasn't penetrated the enamel yet. The fluoride is put on as a gel, foam, or varnish and only takes a few minutes.
Ask About Dental Sealants: Dental sealants are not only for children - adults can also benefit, particularly on back teeth that have deep grooves. Applied as a thin plastic coating, they are like raincoats for your teeth, shielding bacteria from hard-to-clean crevices where cavities often originate. It's a quick, painless process that can keep cavities at bay for years.
Benefit from Early Cavity Detection: Most dental offices these days utilize cavity detection lights or lasers that can detect issues prior to their appearance on X-rays. Some employ digital imaging that can detect cavities when they are still reversible. Detecting cavities this early frequently implies that they can be dealt with without drilling or filling, which saves you time, cash, and discomfort.
What Other Simple Tricks Can Protect Your Teeth?
Beyond the main five methods, there are several smaller habits that can give your teeth extra protection against cavities. These bonus strategies don't require major changes to your routine, but they can make a real difference in keeping your mouth healthy.
Use Mouthwash at the Right Time
Don't rinse with mouthwash immediately after brushing - use it at another time, such as after lunch. Use the best mouthwash for cavities that contains fluoride and does not contain alcohol, which dries out your mouth. Swish around for 30 seconds and use those with the ADA seal that state they prevent cavities.
Electric Toothbrushes Make It Easier
Electric toothbrushes are more effective than manual toothbrushes since they do the work on your behalf. Timers that ensure you brush for enough time and a uniform scrubbing motion are some of the advantages of electric toothbrushes. However, a manual toothbrush is also okay if you brush properly with it for the entire two minutes.
Clean Your Tongue Too
Your tongue harbors cavity-causing bacteria and bad breath. Brush your tongue gently or use a tongue scraper after brushing your teeth to take off the white coating. This provides bacteria with fewer areas to colonize in your mouth.
Night Guards Assist Teeth Grinders
When you grind your teeth during sleep, you're eroding the protective enamel and developing rough areas where bacteria cling. A night guard from your dentist safeguards your teeth and makes them smoother and easier to clean.
Stop Getting Cavities With These Easy Prevention Tips
The good news is that preventing cavities doesn't require perfect habits - just better ones. Choose one of these five methods and stick with it for a few weeks until it becomes automatic. Whether you start with proper flossing, eating cavity-fighting foods, or using fluoride toothpaste correctly, you're already ahead of most people. Your teeth will be healthier, your dental visits will be more pleasant, and you'll finally have control over your oral health.

Brushing with braces might seem daunting, but it's not! If you're wondering how to brush teeth with braces, don't worry—you're not the only one. With the right tools, technique, and some patience, you can maintain healthy, clean teeth during your orthodontic treatment. Brushing correctly will help you prevent problems such as plaque buildup and white spots, so let's get you doing it the correct way.
Why Proper Brushing Matters with Braces: 5 Reasons
Good tooth brushing while you have braces is very important to keep your teeth and gums healthy during treatment. Braces have areas that are difficult to reach where food and bacteria tend to accumulate, which may cause dental issues.
Braces Trap Food and Bacteria: Braces have areas that are difficult to reach where food accumulates, raising the risk of cavities and gum issues. If not brushed properly, these areas easily trap bacteria.
Good Brushing Prevents Common Problems: Good brushing prevents white spots, bad breath, and treatment delays. Clean teeth accelerate the process and guarantee improved results when your braces are removed.
Brushing with Braces Keeps Your Teeth Healthy: Proper brushing aids in preserving overall oral health by avoiding plaque accumulation and steering clear of costly dental problems down the line.
Regular Brushing Lowers Treatment Complications: Regular brushing can greatly reduce orthodontic problems, making it an easy way to improve the effectiveness of your braces and keep your treatment on track.
Brushing Safeguards Your Investment in a Straighter Smile: As a teen or adult, brushing properly guarantees that the time and money you invest in braces provides you with the optimum result—a straight, healthy smile.
3 Essential Tools for Brushing with Braces
To maintain good oral hygiene with braces, it's important to use the right tools:
Soft-bristled toothbrush
A toothbrush with soft bristles is gentle on both your gums and braces while effectively cleaning around the brackets. If possible, opt for an electric toothbrush with an orthodontic head, as it can provide a more thorough clean.
Fluoride-based toothpaste
Use fluoride toothpaste to help strengthen your enamel and prevent cavities. Avoid whitening toothpaste, as it can cause uneven results around the brackets and wires.
Additional cleaning tools
Interdental brushes are great for cleaning between the brackets and wires. Floss threaders or water flossers can help you floss effectively with braces, reaching areas that a regular toothbrush might miss.
Replace your toothbrush every 3-4 months, as the bristles wear down faster with braces and become less effective. Regular replacement ensures the best clean and maintains your dental hygiene routine.
6 Steps Guide: How to Brush Teeth with Braces
Brushing teeth with braces may appear daunting at first, but the correct technique and quality tools make it easier and second nature. These steps will guide you through how to clean your teeth effectively and safeguard your braces:
1. Prepare your mouth
Rinse your mouth with water before you start brushing to dislodge any remaining food particles. Place a pea-sized glob of fluoride toothpaste on your toothbrush—this will help defend your enamel as you brush.
2. Brush outer surfaces
Place your toothbrush against your gums and braces at a 45-degree angle. Clean the outer surfaces of your teeth using gentle circular motions. Brush each quadrant (upper right, upper left, lower right, lower left) for approximately 30 seconds to ensure that each area is cleaned.
3. Clean inner surfaces and chewing areas
Then move to the inner surfaces of your teeth and your chewing surfaces. Pay special attention to the back molars because plaque likes to lurk there. Don't hurry—be sure to scrub every nook in your mouth.
4. Clean around brackets and wires
Gently brush around each bracket and wire. These are places where food and plaque like to collect. Make sure to clean these spots individually, giving extra attention to where the food might be trapped, like beneath the wires and around the brackets.
5. Rinse with fluoride mouthwash
Finally, after brushing, rinse your mouth out with fluoride mouthwash. This creates another layer of protection for your teeth and gums and will leave your mouth tasting fresh and reduce the risk of cavities.
6. Time it right
Try to brush for a minimum of two minutes, ideally after every meal. That way, you're getting rid of all the plaque and debris before it has a chance to sit and create issues.
If you are using an electric toothbrush, do the same thing, but allow the brush to do the work for you. Just guide it along your teeth and braces. For children with braces, a softer brush with a smaller head can make it easier and more comfortable. Brushing with braces does not need to be difficult—it simply requires a bit of time and consistency to ensure your teeth remain healthy and your braces function properly.
4 Common Mistakes to Avoid When Brushing with Braces
Brushing with braces can be tricky, but avoiding these common mistakes will help you keep your teeth and gums healthy throughout your treatment.
Mistake 1: Brushing too hard
Aggressive brushing will hurt your braces, brackets, and enamel. Brushing with too much force could loosen the brackets or cause gum irritation. Rather, brush your teeth and braces using gentle circular motions—allow the brush to do the job, not the pressure.
Mistake 2: Skipping areas around wires
It's simple to miss the spaces around the wires, yet plaque and food tend to lurk there and cause white spots on your teeth as well as plaque buildup. Be sure to brush around every bracket and wire gently, paying special attention to each area where food might be trapped.
Mistake 3: Not brushing long enough or often enough
Brushing for a duration of less than two minutes or failing to brush after each meal has the effect of leaving food particles as well as plaque behind. Try to brush for a minimum of two minutes, three times daily. The more you brush, the cleaner your mouth will be.
Mistake 4: Using the wrong tools
Hard-bristled brushes or toothpaste that does not contain fluoride can damage your enamel and make cleaning around your braces more difficult. Brush with a soft-bristled toothbrush and fluoride toothpaste to safeguard your teeth while still allowing for an effective clean.
To avoid these issues, use gentle brushing techniques and make sure you're checking in the mirror for missed spots. Keeping a consistent routine and using the right tools will ensure your braces and teeth stay in top shape throughout treatment.
4 Additional Oral Hygiene Tips for Braces Wearers
Proper brushing is just one part of maintaining great oral hygiene with braces. Here are a few more tips to keep your teeth and gums healthy throughout your treatment:
Floss daily: Flossing is necessary to get rid of food and plaque between your teeth as well as around your brackets. Utilize floss threaders or water picks for easy flossing around your braces. This will keep your gums healthy and prevent plaque buildup.
Watch your diet: Some foods can make it more difficult to keep your teeth and braces clean. Stay away from sticky foods such as caramel, taffy, or chewy candies because they stick to your brackets and wires and can be difficult to clean. Hard foods can also damage your braces, so try cutting them into small pieces.
Stick to a routine: Make a habit of brushing after every meal to prevent food from sticking. Rinsing with mouthwash afterwards provides additional protection and freshness. Don't forget to make regular orthodontic appointments so your dentist or orthodontist can check your progress and resolve problems early.
Pro tips for fresh breath: Clean your tongue using a tongue scraper and minimize bad breath. It's an easy yet effective addition to your daily routine that keeps your mouth fresh and clean.
Want a Healthy Smile with Braces? Here’s How to Brush Right
Brushing with braces doesn’t have to be hard. With the right technique, tools, and routine, you’ll keep your teeth and gums healthy throughout treatment. Just stick to brushing after meals, flossing daily, and visiting your orthodontist regularly. Keep these tips in mind, and you'll be all set for a great smile when your braces come off!

Ever catch yourself covering your mouth when you talk? You're not alone - bad breath hits most of us at some point, and it's honestly one of those things that can really mess with your confidence. The thing is, bad breath causes aren't always obvious, and sometimes what you think is just "morning breath" could actually be something that needs a bit more attention. Good news though - getting rid of bad breath is way easier than you might think once you know what's actually causing it.
What Actually Happens in Your Mouth When Bad Breath Strikes?
Ever wondered what's really going on inside your mouth when your breath starts to smell? It's actually a pretty fascinating (and gross) process that happens to everyone. Your mouth is like a warm, moist environment that's perfect for bacteria to thrive - and when they do their thing, that's when the smell starts.
Your Mouth is Full of Bacteria (And That's Normal)
Your mouth naturally contains billions of bacteria - most of them are completely harmless and actually help keep your mouth healthy. But here's the thing: these bacteria need to eat, and they love feeding on leftover food particles, dead skin cells, and proteins in your saliva. When they break down these materials, they produce waste products that smell terrible - specifically sulfur compounds that give off that classic "rotten egg" smell.
Why Some Bad Breath Goes Away and Some Doesn't
There's a huge difference between temporary bad breath and chronic halitosis. Temporary bad breath usually comes from specific foods (like garlic or onions), drinks (like coffee), or just normal stuff like morning breath. This type goes away pretty quickly once you brush your teeth or the food gets out of your system. Chronic bad breath, on the other hand, sticks around no matter what you do. This happens when bacteria have really made themselves at home in your mouth, often because of poor oral hygiene, gum disease, or dry mouth conditions.
When Bad Breath Means Something More Serious
Sometimes persistent bad breath isn't just about what's happening in your mouth - it can be a sign that something else is going on with your health. Conditions like diabetes, kidney disease, liver problems, or acid reflux can all cause halitosis symptoms that won't budge with regular brushing and mouthwash. If your bad breath won't go away despite good oral care habits, it's definitely worth talking to a doctor or dentist about it.
What Are the Main Causes of Bad Breath?
Bad breath doesn't just happen out of nowhere - there's always a reason behind it. Some causes are pretty obvious (like eating too much garlic), while others might surprise you.
You Don't Brush and Floss Enough: Not brushing and flossing regularly is the top cause of bad breath. Food particles get stuck between your teeth and rot. Plaque builds up on your teeth, creating a perfect place for smelly bacteria to grow and multiply.
You Eat Strong Foods Like Garlic and Onions: Garlic, onions, coffee, and alcohol get into your bloodstream and travel to your lungs. You breathe out these smells for hours or even a full day. That's why brushing your teeth after eating garlic doesn't always help.
Your Mouth is Too Dry: Saliva washes away food particles and neutralizes acids in your mouth. When you don't make enough saliva, bacteria multiply quickly. This happens as you age or from medications like antihistamines, antidepressants, or blood pressure pills.
You Have Gum Problems or Cavities: Gum disease creates pockets where bacteria hide and multiply. Cavities are bacterial breeding grounds that are hard to clean. Even with regular brushing, these areas keep producing bad smells.
Tongue is Dirty: Your tongue can hold lots of bacteria, especially when it gets coated with a white or yellow film. Some tongue conditions create more places for bacteria to build up and cause bad breath.
You Have a Health Condition: Diabetes makes breath smell fruity or like acetone. Kidney disease causes fishy or ammonia-like breath. Liver problems create a musty smell. Acid reflux brings stomach acids into your mouth, making breath smell sour.
You Smoke or Chew Tobacco: Smoking makes your breath smell like an ashtray and dries out your mouth. It also increases your risk of gum disease. Tobacco products leave smelly residue in your mouth for hours.
You're Not Eating Enough Carbs: When you eat very few carbs or fast, your body burns fat for energy. This creates chemicals called ketones that make your breath smell fruity or metallic. It's called "keto breath" and it's normal but noticeable.
7 Instant Solutions: Quick Bad Breath Fixes
If you need to get fresh breath quickly, there are a number of things you can do that really work, not just mask the issue temporarily. These quick remedies will make you feel more confident when you're around other people while you're addressing any underlying problems that may be contributing to your bad breath.
1. Brush Your Teeth the Right Way
Everyone believes they're brushing correctly, but really, they're speeding through the process. The magical number is two minutes - that's what it takes to adequately clean all surfaces of your teeth. Gentle circular motions work better than scrubbing back and forth, and be sure to brush along the gum line where the bacteria like to lurk. An electric toothbrush makes this simpler and more efficient.
2. Floss Like You Mean It
Flossing is not only about removing food from between your teeth - it's about removing bacteria and plaque that your toothbrush cannot. By flossing, you are cleaning approximately 35% of your tooth surface area that brushing doesn't cover. Be sure to go beneath the gum line and to use a clean part of the floss for each tooth. For those who find traditional flossing challenging, a water flosser can effectively reach these difficult areas with pressurized water.
3. Scrape Your Tongue Daily
Your tongue can harbor a lot of bacteria, particularly at the back. You can use a tongue scraper (or even your toothbrush) to remove this accumulation and make a big difference in your breath. Begin at the back of your tongue and scrape forward gently. You'll be amazed how much comes off, and your breath will smell significantly cleaner.
4. Choose the Right Mouthwash
Not all mouthwashes are equal. Seek out those that include antibacterial ingredients such as cetylpyridinium chloride or chlorhexidine. If you have dry mouth, avoid mouthwashes that contain alcohol because they will only exacerbate the issue. Swish for a minimum of 30 seconds to receive the full benefit.
5. Chew Sugar-Free Gum that contains Xylitol
Sugar-free gum does more than simply cover up bad breath - it stimulates the production of saliva, which rinses bacteria and food particles away. Gums that include xylitol are particularly effective because xylitol actually works to combat the bacteria that are responsible for bad breath and tooth decay.
6. Drink Water Throughout the Day
Drinking water during the day keeps your mouth wet and washes away bacteria and food particles. If you're suffering from dry mouth all the time, keep a water bottle with you and sip often. This habit can greatly improve the way your breath smells.
7. Have Emergency Breath Fresheners Ready
For those "oh no" moments, carry sugar-free mints, breath strips, or travel-size mouthwash in your purse or car. They won't correct the underlying issue, but they'll provide confidence when you need it most.
How to Prevent Bad Breath for Good
Fast solutions are perfect when you need them, but if you wish to cure bad breath for good, you have to think long-term. The good news is that a majority of bad breath issues could be avoided with the proper habits and lifestyle adjustments. Here is how you can keep your breath fresh on a daily basis.
1. Establish Your Twice-Daily Brushing and Once-Daily Flossing Habit: Brush for two minutes in the morning and before bedtime. Floss daily to dislodge trapped food between your teeth. Rinse with an antibacterial mouthwash after brushing. Select a fluoride toothpaste, and if you have issues with bad breath, choose one that contains antibacterial properties. Electric toothbrushes are more effective at plaque removal than manual toothbrushes, but use them with good technique.
2. Get Regular Dental Cleanings: Have professional cleanings every six months. Your dentist will remove plaque and tartar that you can't reach at home and catch early signs of gum disease. If you already have gum disease, inquire about deeper cleanings or treatments. For advanced gum issues, you may need to visit a periodontist.
3. Select the Appropriate Foods: Apples, carrots, and other crunchy fruits that scrape your teeth clean are good to eat. Take yogurt with live cultures in your diet to minimize bad breath bacteria. Consume green tea, which has compounds that battle mouth bacteria. Avoid garlic, onions, and sugary foods, particularly later in the day.
4. Alter Your Daily Habits: If you're a smoker, try to quit - there are numerous resources and support groups to help you. Exercise, meditate, or practice improved sleeping habits to control stress. Sip water during the day to keep your mouth moist and rinse away bacteria.
5. Control Your Health Conditions: If you have diabetes, collaborate with your doctor to maintain stable blood sugar levels. For acid reflux, follow your doctor's treatment strategy to keep stomach acid from flowing into your mouth. Discuss changing medicines with your doctor if yours produces dry mouth as a side effect.
When Should You See a Doctor or Dentist About Bad Breath?
Sometimes bad breath isn't something you can fix on your own. If you've been doing everything right with your oral care but still have persistent bad breath, it might be time to get professional help. Here are the clear signs that mean you should make an appointment.
Bad breath lasts more than two weeks despite good oral hygiene. When brushing, flossing, and mouthwash aren't solving the problem, there's likely something else going on.
Bleeding gums along with bad breath. This combination usually means gum disease that needs professional treatment.
Tooth pain, swollen gums, or mouth sores with bad breath. These symptoms together often point to infections or other dental problems.
Your dentist can't find a dental cause for your chronic bad breath. Medical conditions like diabetes, kidney disease, or acid reflux might be the real problem.
Bad breath comes with fever, difficulty swallowing, or severe dry mouth. These can be signs of serious health problems that need quick attention.
During your visit, expect questions about your daily routine, diet, medications, and health history. Your dentist or doctor might examine your mouth, take X-rays, or order tests to find the root cause of your halitosis.
Beat Bad Breath for Good: What Really Works
Bad breath happens to everyone, but it doesn't have to stick around and ruin your confidence. The truth is, most bad breath problems can be solved with better oral care habits and addressing any underlying issues. Try the simple fixes first, but don't ignore persistent bad breath - it could be your body telling you something important. Take control of your breath today instead of just covering it up with mints, and you'll feel so much better in every conversation.

Facial brushes can make your skin cleaner and smoother. But only if you use them the right way. Many people use them too often or press too hard. That can hurt your skin instead of helping. In this guide, you'll learn how to use a facial brush safely. You’ll also know when to use it, who should avoid it, and how to get the best results for your skin type.
Clean Start: How to Use a Facial Brush Step-by-Step
Using a facial brush is easy. But you need to follow the steps in order. This helps protect your skin and keeps your brush working well.
1. Remove Makeup First
Always remove your makeup prior to using your brush. Use a makeup remover, micellar water, or cleansing balm. This will clean the brush and stop you from clogging up your pores by pushing makeup further into them.
2. Apply a Mild Cleanser
Choose a face wash that does not have scrubbing beads and strong acids. Foaming cleanser or gel bases are fine. Do not use any face wash that has exfoliating particles in it.
3. Wet Your Face and the Brush
Lukewarm water helps the brush move smoothly. Splash water on your face. Then, soak the brush head under running water. This helps reduce friction and prevents your skin from getting scratched. Make sure both are wet before you turn on the brush.
4. Move in Small Circles
Turn on the brush if it’s electric. Use light, circular motions on your cheeks, nose, forehead, and chin. Do not stay in one place too long. The total time should be about one minute.
5. Rinse and Pat Dry
After brushing, rinse your face with lukewarm water until all the cleanser is gone. Don’t leave any residue behind. Use a clean towel to gently pat your skin dry. Avoid rubbing, which can irritate fresh skin. Also, rinse the brush head well and shake off excess water. Let it air-dry in a clean space.
6. Finish With Your Routine
Cleansing opens your pores and preps your skin. After brushing, use a toner to balance your skin’s pH. Then, apply a serum based on your skin needs—like hydration or calming care. Finish with a gentle moisturizer to lock in hydration and soothe your skin barrier.
7. Safety Tips
Never press hard on your face.
Don’t use it over pimples, scabs, or rashes.
Follow the instructions for your brush model.
Clean your brush after every use.
Timing Matters: How Often Should You Use a Facial Brush?
Facial brushes can be too much if you use them every day. Your skin needs time to rest and rebuild. The right frequency on your skin type and how your skin reacts.
Oily or Combination Skin
If your skin makes extra oil or gets shiny quickly, a brush can help keep your pores clear. Use it two times per week. If your skin handles exfoliation well, you might use it three times—but stop if redness or tightness happens. Always watch how your skin reacts.
Dry or Sensitive Skin
If your skin feels tight, flaky, or reacts easily, be more careful. Start with once a week. If your skin feels okay, try twice per week. But stop if you see redness or get a burning feeling. Use the softest brush head you can find and avoid using it near irritated spots.
Mature or Thin Skin
Older skin is often more delicate. Use once a week at most. Choose the softest brush head available.
Signs You Are Overdoing It
Redness that doesn’t go away after 30 minutes
Flaking or dry patches
Skin that stings when applying products
If any of these happen, stop using the brush for a week. Let your skin recover before trying again.
Know the Limits: Who Should Skip Facial Brushes?
Facial brushes are not right for everyone. Some skin types may get worse with brushing. Here are the top reasons to avoid them:
Active acne: Brushing over inflamed pimples can spread bacteria.
Skin diseases: People with rosacea, eczema, or psoriasis should not use facial brushes.
Damaged skin: If your skin is sunburned or healing from a treatment, skip the brush.
Post-surgery or peeling: Fresh skin needs time to recover fully.
If unsure, ask a dermatologist before starting.
Common Mistakes That Harm the Skin
Many people think more brushing means cleaner skin. That’s not true. Here are mistakes that can hurt your face:
Using Strong Exfoliants
Don’t use acid-based cleansers or physical scrubs with your brush. That’s too much exfoliation and can cause micro-tears in your skin.
Not Cleaning the Brush
A dirty brush is not safe. It can collect oil, dead skin, and bacteria. Rinse the brush every time after use. Once a week, clean it with gentle soap and warm water. Let it dry fully in the open air.
Pushing Too Hard
More pressure doesn’t mean cleaner skin. It can break tiny blood vessels or cause swelling. Always use light, gentle motions. Let the brush do the work.
Brushing Too Long
One minute is enough. Don’t try to "deep clean" by brushing for longer. It can cause more harm than good.
Fitting It In: Where the Facial Brush Belongs in Your Routine
To get the best results, use your brush at the right time in your skincare routine.
Night Is Best
Your skin collects dirt, oil, and sunscreen during the day. Brushing at night helps remove all of that. Your skin can also rest while you sleep.
Routine Order (Evening)
Remove makeup
Apply cleanser
Use the facial brush
Rinse and pat dry
Use toner
Apply serum
Finish with moisturizer
Morning Routine? Use Caution
In the morning, you don’t need deep cleaning. Washing with your hands is enough. Using a brush may irritate skin that’s still recovering from the night before.
Real Routines: Match Your Skin Type
The brush is just one part of your skincare. Here’s how to fit it into different skin types:
Step
For Oily Skin
For Dry Skin
For Sensitive Skin
For Mature Skin
Cleanser
Gel cleanser
Cream cleanser
Fragrance-free cleanser
Balm or cream cleanser
Brushing
Brush twice a week
Brush once a week
Brush with soft bristles once a week
Soft brush once a week
Toner
Pore-tightening toner
Hydrating toner
Soothing toner
Antioxidant toner
Serum
Lightweight serum
Hyaluronic acid serum
Barrier-repair serum
Anti-aging serum
Moisturizer/Cream
Oil-free moisturizer
Thick moisturizer
Rich moisturizer with ceramides
Nourishing night cream
Frequently Asked Questions (FAQs)
Q1. Can I use a facial brush with retinol?
No. Do not use a facial brush on the same night you use retinol. This can make your skin very dry or irritated. Leave 1–2 days between brushing and retinol use.
Q2. How often should I replace my brush head?
Most brands recommend changing the brush headistles look bent, dirty, or discolored, replace them sooner.
Q3. Can I use my facial brush in the shower?
Some brushes are waterproof, others are not. Check the product label. If waterproof, it’s okay to use in the shower—but always air-dry it afterward to prevent mold.
Q4. Is a silicone brush better for hygiene?
Of course. Silicone brushes don’t hold bacteria as easily as bristle brushes. They are easier to clean and better for sensitive skin.
Q5. Can I use the same brush for my face and body?
No. Use a separate brush for your face. Body brushes are usually rougher and not safe for facial skin.
Final Thoughts: Use Smart, Brush Gentle
Facial brushes can be helpful—but only when used with care. Start slow. Don’t press hard. Clean your brush often. Use it at night for better results. Pay attention to how your skin feels after use. If it feels smooth and soft, you’re doing it right. If it feels sore or red, take a break. With the right method, your facial brush can be a great tool for clean, healthy skin.

Using an electric toothbrush feels like it should take care of everything, right? But even with the best brush, it’s easy to miss spots or use it the wrong way. Brushing too hard or skipping around can leave behind plaque and cause gum trouble. The good news is, a few small tweaks can make your brushing way more effective. With the right moves, your mouth feels cleaner and your smile stays healthier.
1. Hold the Brush at a 45-Degree Angle
Holding the brush head at a 45-degree angle along your gum line allows the bristles to reach both the edge of your tooth and the area just beneath the gums—where plaque tends to build up most. Feel free to adjust this, especially in avoiding gingivitis, which often starts when that plaque is not effectively removed. Don't scrub back and forth; rather, position the brush at that angle and let it do its thing. The spins or shaking is designed to loosen dirt without additional pressure, so move the brush gently and let it clean as it goes.
2. Let the Brush Do the Work—Don't Scrub
One of the biggest mistakes people make when brushing with electric toothbrushes is to brush as you would with a manual toothbrush—scrubbing hard and fast. Not only is this unnecessary, but it can also wear away your enamel and irritate your gums in the long term. Electric toothbrushes do all the work for you, so you just have to hold and guide. This is especially true for sonic electric toothbrushes, which use high-frequency vibrations to clean more effectively than manual brushing.
This is how to brush properly:
1. Hold the brush gently—don't squeeze.
2. Push the brush head against your teeth and gums—then let it spin or vibrate on each area.
3. Work it slowly back and forth over your teeth—move the brush head tooth by tooth, without applying additional pressure.
4. Don't rub back and forth—this could damage more than good.
5. Let the technology in the brush do it for you—most models clean quicker than your hand can, so don't apply pressure.
Softer brushing is not only safer but also more effective.
3. Brush for 2 Full Minutes (Use the Built-In Timer)
Most people don’t brush as long as they think—they stop after 45 seconds to a minute without even realizing it. But to fully clean your teeth and gums, you need a full two minutes. That gives your brush enough time to reach every surface and break down the buildup that leads to plaque and bad breath.
A helpful way to stay on track is the 30-second-per-quadrant method. Divide your mouth into four sections: upper left, upper right, lower left, and lower right. Spend about 30 seconds brushing each one slowly and evenly. Most electric toothbrushes come with a built-in timer that either pauses or buzzes every 30 seconds, so you know when it’s time to switch areas.
Don’t try to guess the time in your head—it’s usually shorter than you think. Using the timer ensures you give every part of your mouth equal care, making your brushing routine more consistent and effective.
4. Clean Each Tooth Surface: Front, Back, and Chewing Surface
If you're using an automatic or rushed brusher, it's easy to miss the crucial areas that are most crucial. Each tooth has three important sides that need your attention: the front, the back, and the top (chewing surface).
Start with the Front
This is what the outside world gets to see when you grin. Angle your brush and go slowly across each tooth. Don't merely sweep across a row of them—stop for a second or two on each one so the bristles can get in there and do their job.
Don't Skip the Backs
The back of your teeth, especially those towards the tongue, are prone to being neglected. These places are just as susceptible to building up plaque and bacteria. Angle the brush slightly and move slowly along the back of each set of teeth. This keeps your breath clean and your gums in good health.
Target the Chewing Surface
Molars and premolars also have deep grooves that trap food and sugar. Put the brush flat on top of each tooth, and let it have a few seconds to clean out those tiny pits. This is important for cavity prevention.
Front Bottom Teeth Need Special Care
The back surface of your lower front teeth is one of the easiest areas to miss. The space is thin and tight, so try holding the brush head upright and using light up-and-down motions. A few extra seconds here will prevent tartar from building up.
Taking it slow and covering every surface allows your brushing to be that much more efficient. With a little more TLC, your teeth will be smoother, your breath will still be fresher, and your dentist will notice the difference.
5. Use the Right Brush Head and Replace It Often
Not all brush heads are made alike, and the proper one can make your routine more effective and more comfortable. Soft bristles are safest and most recommended for most people—they are good on gums but hard enough to clean properly. If you have special requirements, like braces, sensitive gums, or heavy plaque accumulation, there are specific brush heads that cater to those conditions.
Also, don't forget to replace your brush head every 3 months. Even earlier if the bristles are starting to flex or fray. Worn-down bristles can't get the task accomplished and can even irritate your gums the incorrect way. Most heads are easy to swap, and a couple even have color-fade markers so you know it is time for a new head. Clean tools equal a cleaner mouth. If you're considering an upgrade, sonic toothbrushes offer advanced cleaning technology that might better suit your oral health needs.
6. Pay Attention to Your Gumline and Back Molars
Some areas are difficult to reach even with an electric toothbrush—especially along the gum line and in the back teeth. These are often where plaque and food particles accumulate most easily, but they're also where these areas get skimped or rushed. Spending a little extra time taking care of them will pay dividends in the battle against gum disease and tooth decay.
This is how to clean these annoying areas better:
1. Tilt the brush slightly towards the gumline to enable bristles to gently sweep below where plaque tends to build up.
2. March slowly and pause briefly along each curvature of your gums but avoid pressing too hard.
3. Tilt the brush head to be able to reach your back molars behind, brushing the top and sides thoroughly.
4. Spend a few extra seconds in these areas, especially if food traps are there or your gums bleed during brushing.
These subtle changes clean your whole mouth—not just the difficult spots.
7. Rinse and Clean the Brush After Every Use
Getting your toothbrush clean is just as important as good brushing. Toothpaste and germs can be left behind on the bristles or handle of your toothbrush after brushing. If not, you may be spreading mold, unpleasant smells, or possibly redepositing germs into your mouth the next time you brush.
Make cleaning a habit:
1. Rinse the brush head thoroughly with running water to dislodge any excess toothpaste and debris.
2. Shake off excess water and store standing up, where it will air dry fully between uses. Avoid using closed containers, which retain moisture.
3. Wash the handle once a week, especially in and around buttons or ridges where dirt is likely to settle.
4. Clean from time to time, especially during flu season or after a cold—some models allow for brush head disinfection by ultraviolet cleaners or dipping into antibacterial rinse.
A clean brush protects both your teeth and your health.
Brush Better with These Electric Toothbrush Techniques
Brushing with an electric toothbrush makes all the difference—if you brush smart. These seven simple steps guarantee you're brushing better, lowering your risk of gum issues, and wiping out the spots most of us commonly miss. No need to overhaul your whole routine—just make a few small changes and the payoff is huge. Try putting one or two of these tips into practice today and see how much fresher your mouth feels. Your smile will thank you.

Think your electric toothbrush cleans itself while it cleans your teeth? Think again. A neglected toothbrush becomes a bacteria magnet and stops working as well as it should. The good news is that proper maintenance takes just a few minutes and can extend your toothbrush's life significantly. Small changes to your routine can make a huge difference in both hygiene and performance.
Why Your Electric Toothbrush Needs Regular Cleaning and Care
Your electric toothbrush is a precision tool designed to remove plaque and bacteria from your teeth and gums. But when you don't maintain it properly, it can actually work against you, harboring the very germs it's supposed to eliminate. Regular cleaning and maintenance aren't just about keeping your toothbrush looking good—they're essential for your oral health and wallet.
Clean Toothbrushes Work Better
Electric toothbrushes use fast movements to break up plaque and food bits that regular brushing misses. The bristles get into tight spots between your teeth and along your gums to remove bacteria before they cause problems. But this only works when the bristles are clean and the toothbrush is running properly. This is particularly important for sonic toothbrushes, which rely on high-frequency vibrations to deliver their cleaning power. Knowing how to use your electric toothbrush properly is just as important as keeping it clean for achieving a superior clean.
Dirty Toothbrushes Can Make Your Mouth Worse
When you don't clean your toothbrush, it becomes home to the same bad bacteria that cause cavities and gum disease. Old toothpaste and spit stick around, giving germs a perfect place to grow. All this buildup can also slow down the motor and make the bristles less effective at cleaning your teeth. Research shows contaminated toothbrushes can harbor harmful pathogens that threaten both oral health and overall wellbeing.
Proper Care Saves Money and Protects Your Health
Cleaning your toothbrush regularly kills germs before they can multiply and cause dental problems. Clean bristles stay strong and do a better job removing plaque every time you brush. Taking good care of your toothbrush also prevents expensive repairs and makes it last much longer—sometimes two or three times as long as a neglected one.
With these compelling reasons to keep your toothbrush clean, let's make sure you have everything you need to get started. The good news is that most cleaning supplies are probably already sitting in your bathroom.
Essential Supplies for Electric Toothbrush Cleaning
You don't need expensive or fancy products to keep your electric toothbrush clean. Most of what you need is probably already in your bathroom or kitchen. Having the right supplies on hand makes cleaning quick and easy.
What You'll Need
Supply
Purpose
Where to Find
Soft cloth or paper towels
Wiping down surfaces
Bathroom/kitchen
Mild hand soap or dish soap
Gentle cleaning
Kitchen sink
Antibacterial mouthwash or hydrogen peroxide
Disinfecting brush heads
Medicine cabinet
Soft-bristled brush (old toothbrush works)
Scrubbing tight spots
Bathroom drawer
UV sanitizer (optional)
Extra sanitizing power
Online/pharmacy
4 Safety Steps You Must Follow
Before you start cleaning, these safety steps will protect both you and your toothbrush:
1. Always unplug your toothbrush charger before cleaning any electrical parts
2. Keep water away from charging ports and electrical connections
3. Make sure everything is completely dry before plugging back in
4. Never submerge the handle or charger in water
With these basic supplies ready to go, you're all set to start the actual cleaning process.
How to Clean Your Electric Toothbrush: Step-by-Step
Cleaning your electric toothbrush properly isn't rocket science, but a lot of people get it wrong. The good news is that with just a few simple habits, you can keep your toothbrush working great and your mouth healthier. Here's exactly what you need to do.
What to Do After Every Brush
Your after-brushing routine sets the tone for how clean your toothbrush stays. These quick steps take under two minutes but make a huge difference:
1. Rinse the brush head right away under warm water—don't let toothpaste and gunk sit there and get crusty
2. Pop off the brush head and rinse both pieces separately, especially around where they connect (that's where gross stuff loves to hide)
3. Give everything a gentle shake and pat dry with a clean towel—just don't scrub the bristles too hard or you'll wreck them
4. Stand your toothbrush upright somewhere with good airflow, away from the toilet if possible, so it can dry out completely
Getting into this habit after every brushing keeps things fresh and makes your weekly deep clean much easier.
Your Weekly Deep Clean
Once a week, your brush head needs some extra attention to kill off stubborn germs that regular rinsing misses. This is especially important if you've been under the weather:
What You're Doing
How to Do It
How Long
Quick Tip
Disinfect soak
Drop the brush head in antibacterial mouthwash or hydrogen peroxide
15-30 minutes
Use whatever mouthwash you already have
Scrub it clean
Gently brush the bristles and tight spots with a soft brush
2-3 minutes
That old toothbrush in your drawer works great
Go natural
Soak in watered-down white vinegar (mix 1:2 with water)
15-30 minutes
Perfect for getting rid of buildup
Final rinse
Rinse everything thoroughly and let it air dry
1 minute
Make sure no cleaning stuff is left behind
This weekly ritual keeps your brush head in top shape and working like it should. For sonic toothbrushes with their advanced technology, this maintenance is particularly important to preserve the precision and effectiveness of their high-frequency vibrations.
Keeping the Electric Parts Clean
The handle and charger need some TLC too, but you've got to be careful around anything electrical. Clean these parts weekly or whenever they look grimy:
1. Always unplug the charger first—seriously, water and electricity are not friends
2. Wipe down the handle with a damp cloth, but keep water away from the charging spots and buttons
3. Dust off the charger base with a dry cloth, getting into those little grooves where dirt builds up
4. Clean the charger with a barely-wet cloth, then dry it right away with a clean towel
5. Let everything air dry for 10-15 minutes before plugging back in—patience pays off here
Taking good care of the electrical bits means your toothbrush will keep charging properly and won't break down on you. However, getting the cleaning routine down is just half the battle—where you store your toothbrush between uses is equally important.
Where and How to Store Your Electric Toothbrush
Where and how you store your electric toothbrush makes a huge difference in how clean it stays and how long it lasts. Most people make storage mistakes that turn their toothbrush into a bacteria magnet without even realizing it. Getting the storage right is actually pretty simple once you know what works.
Keep It Standing Up and Uncovered at Home
Your toothbrush needs to breathe after each use, so always store it upright in a holder or cup where air can flow around it. Never put a cap or cover on a wet toothbrush—that traps moisture and creates the perfect breeding ground for mold and bacteria. Find a spot away from the toilet if possible, since flushing can spray germs around your bathroom. The key is giving your toothbrush space to dry out completely between uses.
Use a Ventilated Case for Travel Only
When you're traveling, you need protection but still want airflow, so invest in a travel case with ventilation holes or slots. These cases protect your toothbrush from getting banged around in your luggage while still letting moisture escape. Make sure your toothbrush is as dry as possible before packing it, and take it out of the case as soon as you reach your destination. Never use these enclosed cases at home for daily storage.
Never Share Brush Heads
Each person should have their own brush head—sharing is a fast way to pass bacteria, viruses, and other germs back and forth. If you have multiple electric toothbrushes in your household, keep them separated so the brush heads don't touch each other. Color-coded brush heads or labels make it easy for everyone to grab the right one. Replace any brush head that might have been contaminated, like after someone's been sick.
Smart storage prevents most problems before they start, but your battery needs some love too. A few simple charging habits can dramatically extend your toothbrush's lifespan.
How to Keep Your Toothbrush Battery Healthy
Your electric toothbrush battery is what keeps everything running, but most people don't think about taking care of it until it starts dying too quickly. Good battery habits can double or even triple how long your toothbrush lasts before you need a replacement. A few simple practices will keep your battery strong and your toothbrush reliable.
Follow Smart Charging Habits
Give your new toothbrush a full charge before using it for the first time—this helps the battery reach its full potential right from the start. Try not to top off the battery constantly with short charging sessions, as this can actually wear it out faster over time. Instead, let it run down to about 20-30% before charging it back up fully. Some manufacturers recommend letting the battery drain completely once a month, so check your manual to see what works best for your specific model.
Keep the Charging Contacts Clean
Those little metal contacts where your toothbrush sits on the charger can get gunky with toothpaste residue, soap scum, and general bathroom grime. When they're dirty, your toothbrush won't charge properly and the battery will suffer. Once a week, unplug your charger and gently wipe both the contacts on the toothbrush handle and the charger base with a dry cotton swab or soft cloth. If there's stubborn buildup, use a slightly damp cloth but make sure everything is completely dry before plugging back in.
When Should You Replace Your Brush Head?
A healthy battery will keep your toothbrush running strong, but even the best-maintained toothbrush needs new brush heads regularly. Most people wait way too long to replace their brush heads, which means they're not getting the clean they think they are.
Follow the Three-Month Rule
Replace your brush head every three months, even if it still looks okay to you. This isn't just a marketing trick—dental professionals recommend this timeline because bristles lose their effectiveness long before they look obviously worn out. Many brush heads come with indicator bristles that fade from blue to white when it's time for a change, which takes the guesswork out of timing. If you're recovering from being sick, replace the brush head right away to avoid reinfecting yourself.
Watch for These Warning Signs
Your brush head will tell you when it's time to go, even before the three-month mark hits. Look for bristles that are bent, frayed, or splaying outward instead of standing straight up—this means they're not cleaning effectively anymore. If you notice your teeth don't feel as clean after brushing, or if your brush head has a smell that won't go away even after cleaning, it's definitely time for a replacement. Some people need to replace their brush heads more often if they brush aggressively or have particularly hard water that wears down the bristles faster.
Electric Toothbrush Extras: Sanitizers and Must-Have Accessories
If you want to take your toothbrush cleaning to the next level, there are some high-tech options and accessories that can help. But before you spend extra money, it's important to know what actually works and what's just marketing hype. Some of these gadgets are genuinely useful, while others can actually damage your toothbrush.
UV Sanitizers: Are They Worth It?
UV sanitizers use ultraviolet light to kill germs on your brush head, and they do work when used properly. The main benefits are convenience and peace of mind—you just pop your brush head in and let the machine do its thing. However, they're not absolutely necessary if you're already following a good cleaning routine, and cheaper models might not provide enough UV exposure to be effective. Quality UV sanitizers can cost $30-100, so consider whether the extra germ-killing power is worth it for your situation.
Look for FDA-Approved Products
When shopping for sanitizing products or accessories, stick with items that have FDA approval or clearance. These products have been tested for safety and effectiveness, unlike many knockoff gadgets you'll find online. Popular brands like Violife and Pursonic make reliable UV sanitizers that are FDA-cleared. For cleaning solutions, hydrogen peroxide and antibacterial mouthwashes are your safest bets since they're already approved for oral use.
Never Use These Cleaning Methods
Some cleaning methods that work for other items will destroy your electric toothbrush. Never put any part of your toothbrush in the dishwasher—the high heat and harsh detergents will melt plastic parts and ruin the bristles. Microwaving toothbrush parts is equally dangerous and can cause fires or toxic fumes. Avoid boiling water, bleach, or harsh chemicals that aren't meant for oral care products. Stick to gentle cleaning methods designed for items that go in your mouth.
Electric Toothbrush Acting Up? Here Are 4 Quick Fixes
Even with all the right supplies and techniques, sometimes things can still go wrong with your electric toothbrush. The good news is that most problems are fixable with the right approach. Here are the most common issues people face and how to solve them quickly.
Problem 1: Mold Growing on Your Toothbrush
Mold will usually take the form of green or black patches, especially around the brush head connection or in the handle. This happens when your toothbrush spends an excessive amount of time wet in a poorly ventilated area. Soak parts that are subject to mold in hydrogen peroxide for 30 minutes and then scrub clean with a mild scrub using an old toothbrush to remove obvious mold. If mold persists, you need better airflow in your storage area and should replace the brush head right away.
Problem 2: Bad Smells That Won't Go Away
Persistent smells mean bacteria have made a base in difficult-to-clean spaces on your toothbrush. Soak the head in antibacterial mouthwash overnight, then wash and air dry it completely. Should the smell be coming from the handle, wipe the dirt off with diluted white vinegar and make sure you are letting it air dry completely after each usage. Sometimes an enduring smell means a new brush head is needed, though the brush head might look fine.
Problem 3: Stubborn Buildup You Can't Remove
The white or yellowish buildup is probably dried toothpaste, hard water minerals, or a combination of both. Make a paste with baking soda and water and then apply an old toothbrush to gently scrub out the buildup. For very stubborn spots, soak areas in white vinegar for 15-20 minutes prior to scrubbing. Rince everything through afterward and make sure no cleaning residue is left behind.
Problem 4: Toothbrush Won't Work After Cleaning
If your toothbrush is not working after brushing, water probably gets into the electrical parts. Shut it off immediately and remove the brush head, and give it a good shake to remove excess water. Let everything air dry for a minimum of 24 hours before trying to use or charge it again. If it still doesn't work after drying completely out, call the manufacturer—most of them offer warranties against water damage if you clean it properly.
Electric Toothbrush Cleaning FAQs: Your Most Common Questions Answered
Q1: Can I use regular soap or toothpaste to clean my brush?
Yes, you can use mild hand soap or dish soap to clean your electric toothbrush—just make sure it's gentle and fragrance-free. Toothpaste is too harsh for the brush head; it would scratch its bristles and plastic parts. You could use antibacterial mouthwash, hydrogen peroxide, or some diluted white vinegar.
Q2: Is it safe to share electric toothbrush handles?
No, you shouldn't borrow electric toothbrush handles from other family members. Even if you replace the brush heads, germs are still going to be transferred through saliva that touches the handle when you are brushing. Everybody needs his or her own entire toothbrush so that bacteria, viruses, and other infections are not shared. In cases where you have to share for a short period, make sure you sanitize the entire length of the handle with some antibacterial wipes before giving it to the next user.
Q3: How do I clean hard-to-reach areas?
An old toothbrush or soft-bristled brush is great for getting into areas around the brush head connection and handle recesses. Cotton swabs are excellent for small grooves and charging contacts—to clean electrical components, use dry swabs. For really tough spots, clean the removable parts first in your cleaning solution to break loose grime, then scrub gently. Never use sharp points that can puncture the plastic or damage the seals, nor force anything.
Keep Your Electric Toothbrush Clean for Better Oral Health
Keeping your electric toothbrush clean isn't rocket science, but it makes a huge difference in how well it works. These simple daily and weekly routines will save you money and keep your oral health on track. The best part is that once you get into the habit, it becomes second nature. Give your toothbrush the care it deserves starting today—you'll notice the difference right away.

COSLUS Prime Day is just around the corner. From July 8 to July 11, we're launching our biggest summer celebration.
This isn’t just about discounts—it’s an invitation to refresh your daily routine. The soothing pulse of a water flosser, the gentle touch of a facial cleanser, the delicate care of your nails—small rituals that quietly remind you: you deserve attention.
At COSLUS, self-care is a gentle dialogue with yourself. This Prime Day, take that step toward better dally habits. You're worth it.
Prime Day 2025: What's Waiting for You?
Oral Care – Up to 38% Off
Enjoy up to 38% off this Prime Day! Whether you need the E40 with stepless speed control for braces and sensitive gums, the C20 Deep Clean for powerful plaque removal, the C30 Customizable Flosser with flexible pressure settings, or the T40 Travel Flosser for on-the-go freshness, all our bestsellers are now on sale.
Skin Care – Up to 41% Off
Bring the spa home with our silicone facial cleansing brushes. Both our bestselling and advanced models are now on sale, with discounts of up to 50% off. It’s the perfect moment to elevate your daily glow routine.
Nail Care – Up to 50% Off
Upgrade your self-care with COSLUS portable nail drills and full manicure kits. This Prime Day, our 2-in-1 Portable Nail Drill with Nail Lamp is available for just $9.9 — bringing salon-quality nail care to your fingertips at an unbeatable price.
Whether you’re refreshing your smile, upgrading your skincare, or simply carving out time for self-care, COSLUS Prime Day is your perfect opportunity to invest in yourself.
Join Our Social Media Giveaway — Real Prizes Just for You
We’re also celebrating with a community giveaway!Participating is simple — show your support, and you’ll have a chance to win.
How to Enter:
Like our pinned post on Facebook @Coslus
Winners will be announced on July 13.
Giveaway Prizes:
First Prize: $50 Cash3 Winners (Base Prize Pool)Bonus: For every additional 100 likes, we’ll add 1 extra winner!
Second Prize: Choose 1 COSLUS Bestseller5 Winners can select from our top-rated products.
Third Prize: $6 Voucher8 Winners can redeem it directly on COSLUS.com
This is our way of saying thank you for being part of our community.
Act Fast — Prime Day Deals Won’t Last!
Visit our Amazon Store today and add your favorite products to your wishlist to be ready when the deals go live.
Bring home the most trusted oral care tools.
Save on skincare that feels like a spa.
Pamper yourself with professional nail care at home.
Why COSLUS?
Our mission is to make these self-care moments accessible to everyone. That’s why we design high-quality, affordable products that fit seamlessly into your life — whether you’re at home, at work, or on the go.
We test every product thousands of times because your comfort and satisfaction truly matter.
Thank you for choosing COSLUS. We can’t wait to celebrate Prime Day with you!
Shop with Confidence: Every COSLUS product comes with a 2-Year Warranty, 30-day No-hassle Returns, and 1-Business-Hour Support Response during business days. Your satisfaction is always our priority.


When was the last time you thought about how you brush your teeth? It's something most of us do on autopilot, but your brushing technique has a huge impact on your dental health. Electric toothbrushes have become a game-changer for many people, offering better cleaning power with less effort than traditional manual brushes. They're not just for people with dental problems—they're for anyone who wants healthier teeth and gums with less work. This straightforward guide will show you how to use an electric toothbrush properly, maintain it, and address common concerns. Follow these simple tips, and you'll be on your way to a cleaner, healthier smile.
Why Should You Switch to an Electric Toothbrush?
Electric toothbrushes are cleaner than manual ones with less effort on your part. They take thousands of strokes per minute and get into the places that an ordinary toothbrush tends to miss.
Electric Toothbrushes Clean Better: The fast, regular strokes clean each tooth extensively, particularly between teeth and in hard-to-reach areas around the gumline where plaque accumulates. This prevents cavities and keeps your mouth healthier.
Gentler on Your Gums: Most electric toothbrushes include pressure sensors that warn you when you're brushing too hard, protecting your gums and tooth enamel from wear. This helps you develop healthier brushing habits.
Smart Features That Are Helpful: Today's electric toothbrushes have timers to make sure you brush for the full two minutes, reminders to move to other parts of your mouth, and various modes for sensitive teeth, gum care, or whitening.
Electric toothbrushes provide intensive cleaning every time, whether you're tired or in a hurry. They come in handy, especially for individuals who have hand disabilities like arthritis or anyone who just can't quite master the correct brushing technique.
Getting Started: Your Pre-Brushing Checklist
Before you start using your new electric toothbrush, there are a few simple steps to take that will help you get the most out of it.
Make Sure It's Fully Charged
When you first get your electric toothbrush, place it on the charging base for the recommended time before using it. Most models need 12-24 hours for a complete first charge, even if the battery indicator shows it's ready sooner. This helps condition the battery and provides maximum power for your first brushing session. After the first charge, regular charging between uses will keep your toothbrush ready whenever you need it. Many models can last 1-2 weeks on a single charge, but it's a good habit to return the brush to its charger after each use.
Take Time to Read the Instructions
Every electric toothbrush model is a bit different, so spend a few minutes looking through the instruction manual. Pay special attention to:
How the power button and settings work
What the different cleaning modes do
What the lights or indicators mean
How long to charge the brush
How to properly clean and maintain your toothbrush
Pick the Right Brush Head
Electric toothbrushes usually come with different brush head options, each designed for specific needs:
Standard/Regular heads: Good for everyday cleaning
Sensitive heads: Softer bristles for sensitive teeth and gums
Whitening heads: Often have special rubber cups or polishing bristles
Gum care heads: Extra-soft bristles that focus on the gumline
Deep clean heads: More bristles for a thorough cleaning
Choose a brush head that matches your main concern. The DY-108 Pro Electric Toothbrush Heads offer excellent standard cleaning performance for daily oral care. If you're not sure, start with the standard head that came with your toothbrush and ask your dentist for recommendations at your next visit.
How to Brush Your Teeth Correctly with an Electric Toothbrush: 6 Steps to a Perfect Clean
Using an electric toothbrush is different from using a manual one. Follow these simple steps to get the best cleaning possible and protect your teeth and gums.
Step 1: Apply Toothpaste
First, wet the brush head slightly—just enough to dampen it. Then apply a pea-sized amount of fluoride toothpaste to the brush head. This small amount is all you need because electric toothbrushes create foam and distribute the paste much better than manual brushes. Using too much toothpaste just creates excessive foam and might make you want to spit before you've finished brushing properly.
Step 2: Correct Positioning
Place the brush head against your teeth at a 45-degree angle toward your gum line. This position is crucial because it allows the bristles to clean both your teeth and the area where your gums meet your teeth—a spot where plaque loves to hide. Make sure the bristles gently touch both your teeth and gums.
Step 3: Power On and Gentle Guidance
Once the brush is in position in your mouth, turn it on. If you have a sonic toothbrush, keep your lips mostly closed to prevent splatter. Let the toothbrush do the work—this is the biggest difference from manual brushing! You don't need to scrub or press hard. In fact, using too much pressure can damage your gums and wear down tooth enamel. Simply hold the brush lightly and guide it slowly from tooth to tooth, spending about 2-3 seconds on each one. The electric motion is doing all the cleaning work for you.
Step 4: Systematic Coverage (The Quadrant Method)
To make sure you clean your entire mouth thoroughly, divide it into four sections (quadrants):
Upper right
Upper left
Lower right
Lower left
Many electric toothbrushes have a feature called a "quad pacer" that buzzes or pauses briefly every 30 seconds to remind you to move to the next section.
For each quadrant, brush:
The outer surfaces (the sides facing your cheeks and lips)
The inner surfaces (the sides facing your tongue)
The chewing surfaces of your molars
Start at the back of one quadrant and work your way forward, then move to the next quadrant. This systematic approach helps ensure you don't miss any areas.
Step 5: Brushing Duration
Brush for a full two minutes—the time dentists recommend for thorough cleaning. Most electric toothbrushes have a built-in timer that will alert you when two minutes have passed. If yours doesn't have this feature, set a timer on your phone. Two minutes might feel longer than you expect when you're brushing properly! Following professional brushing recommendations is one of the dental care essentials that significantly impacts long-term oral health.
Step 6: Finishing Up
After brushing your teeth, gently brush your tongue to remove bacteria that can cause bad breath. Not all electric toothbrush heads are designed for tongue cleaning, so check if yours is suitable or consider using a separate tongue scraper.
Turn off your toothbrush before removing it from your mouth. Rinse your mouth thoroughly with water, and then rinse the brush head under running water to remove any remaining toothpaste and debris. Shake off excess water and stand your toothbrush upright (if possible) to let it air dry completely between uses.
Electric toothbrushes are designed to clean better with less effort from you—so relax, be gentle, and let the technology do its job!
6 Tips That Make Your Electric Toothbrush Work Better
Once you've mastered the basics of using your electric toothbrush, these professional tips will help you take your oral care routine to the next level. These techniques maximize cleaning effectiveness while protecting your teeth and gums.
1. Don't press too hard
The most important thing to remember with electric toothbrushes is that less pressure is more effective. Let the bristles barely touch your teeth and gums—the toothbrush's technology provides all the cleaning power you need. Pressing harder doesn't clean better; it actually reduces effectiveness by limiting the brush head's ability to oscillate or vibrate properly.
Many premium models feature pressure sensors that light up, vibrate, or reduce power when you press too hard. Pay attention to these signals and adjust accordingly. If your brush doesn't have this feature, practice holding it with just enough pressure that you feel the bristles against your teeth but not enough to bend them significantly.
2. Hold it lightly like a pencil
How you hold your toothbrush makes a significant difference. Dentists recommend holding your electric toothbrush with a light, pencil-like grip between your thumb and fingers—not in a closed fist. This "pencil grip" naturally reduces the pressure you apply and gives you better control for precise positioning.
This lighter grip also helps prevent the common tendency to scrub, which can damage enamel and gums. When held properly, your brush should feel like an extension of your hand, allowing for gentle, controlled movements around your mouth.
3. Brush one quadrant of your mouth at a time
Divide your mouth into four sections (upper right, upper left, lower right, lower left) and focus on one section before moving to the next. Within each section, position the brush head to cover one tooth and part of the gum line, hold for 2-3 seconds, then move to the next tooth. This methodical approach ensures thorough cleaning throughout your mouth.
4. Use the right mode for your needs
Modern electric toothbrushes often come with multiple cleaning modes designed for specific needs. Take advantage of these features:
Clean (For daily cleansing)
Comfort
White (Deep Cleaning)
Gum care (For orthodontics and during dental treatment)
Sensitive (For beginners & sensitive teeth)
Start with the gentlest setting if you're new to electric toothbrushes, then gradually experiment with other modes as you become comfortable.
5. Angle the brush where teeth meet gums
The area where your gums intersect your teeth is critical to oral health, but often neglected. Position your brush at a 45-degree angle against your gum line to brush this intersection effectively. This angle positions the bristles below the gum line to sweep out plaque deposits in the sulcus (the small crevice between your gum and tooth).
Take special care in the gum line areas, especially on the teeth in the back of your mouth that are harder to reach. Proper cleaning there can go a long way toward keeping your risk for gingivitis and gum disease at a minimum.
6. Follow the same path each time you brush
Create a routine brushing pattern to cover all areas. Most dental experts suggest beginning with the outside of your back teeth on one side, moving around to the other side, then repeating for the inside, and lastly, cleaning all chewing surfaces. This methodical approach avoids missed spots.
No matter what pattern you choose, maintain consistency in order to build muscle memory so you'll brush your entire mouth every time by default.
If you are coming from a manual toothbrush, give two weeks to acclimate to the electric feel. The strong vibrations and the automatic brushing will be awkward at first, but your mouth will acclimate. Use lower intensities if your brush has levels, and progress in intensity as you acclimate to the brush.
8 Common Mistakes to Avoid When Using an Electric Toothbrush
Even with the best electric toothbrush, your oral health routine can fall short if you're making some common mistakes. Here are the main pitfalls to avoid:
1. Applying too much pressure
One of the biggest mistakes people make is brushing too hard. Unlike manual brushes, electric toothbrushes require almost no pressure to be effective. The bristles just need to touch your teeth while the motor does the work. Pressing too hard can:
Wear down your tooth enamel
Cause gum recession
Damage the sensitive tissue around your teeth
Reduce the effectiveness of the brush's motion
Many modern electric toothbrushes include pressure sensors that flash, buzz, or reduce power when you press too hard—pay attention to these signals!
2. Using manual brushing techniques
Electric toothbrushes work differently from manual ones. Avoid:
Scrubbing back and forth vigorously
Making your own circular motions
Moving the brush too quickly across teeth
Instead, hold the brush gently against each tooth for a few seconds and let the technology do its job. The brush is designed to create thousands of movements per minute that you simply can't replicate with manual techniques.
3. Rushing through your brushing
Skimping on brushing time is another frequent error. The professionally recommended minimum is two minutes—30 seconds per quadrant of your mouth. Most people brush for just 45-60 seconds, which is not sufficient time to effectively remove plaque. Utilize your toothbrush's built-in timer or set one on your phone if necessary.
4. Brushing randomly
Racing around your mouth without a plan will leave you with empty areas. The quadrant method (dividing your mouth into four quadrants) ensures complete coverage. Be aware of those 30-second signals your brush provides you, and double-check that you're providing each quadrant with a good cleaning before moving on to the next one.
5. Keeping brush heads too Long
Worn-out brush heads significantly reduce cleaning effectiveness. Replace your brush head:
Every 3 months as a general rule
Sooner if the bristles become frayed or discolored
After you've been sick
According to your specific manufacturer's recommendations
Some brush heads have colored indicator bristles that fade when it's time for replacement—don't ignore these signals!
6. Neglecting brush head cleaning
After brushing, many people simply give the brush head a quick rinse. However, thoroughly cleaning your brush head is essential to prevent bacteria buildup. After each use:
Rinse the brush head completely under running water
Shake off excess water
Store upright to allow air drying
Weekly, you can soak the head in antibacterial mouthwash for a deeper clean
7. Forgetting to wet the bristles first
A minor but helpful tip: slightly wetting the bristles before applying toothpaste helps with even distribution of the paste across your teeth. Dry bristles can cause the toothpaste to stick in one spot or fall off entirely.
8. Turning on the brush outside your mouth
Especially with powerful sonic toothbrushes, turning them on before they're positioned in your mouth will send toothpaste flying everywhere! Always place the brush against your teeth first, then power it on. This simple habit keeps your bathroom cleaner and ensures all the toothpaste stays where it belongs—on your teeth.
5 Tips to Keep Your Electric Toothbrush Clean and Working Well
1. Rinse your toothbrush after every use
After brushing, rinse both the brush head and handle under warm water. Make sure water flows through all the bristles to remove toothpaste and food particles. Clean where the brush head connects to the handle, as this area often traps moisture. Shake off excess water and wipe the handle with a dry cloth.
2. Store your toothbrush in a clean, dry place
Keep your toothbrush standing upright so water drains away
Store in an open, airy space (not in closed containers)
Keep at least 3 feet from the toilet
Don't let brush heads touch each other
Only use travel cases when actually traveling
3. Clean all parts of your toothbrush once a week
For the brush head:
Soak in mouthwash or a mix of hydrogen peroxide and water for 5-10 minutes
For buildup, clean with baking soda paste
Rinse thoroughly afterward
For the handle:
Wipe with rubbing alcohol or mild soap
Clean crevices and buttons with a cotton swab
Clean the metal shaft where the head attaches
For the charging base:
Unplug before cleaning
Wipe with a damp cloth
Dry completely before plugging back in
4. Get a new brush head every 3 to 4 months
Replace every 3 to 4 months
Replace sooner if bristles look frayed or discolored
Always replace after being sick
Set reminders or use subscription services to remember
5. Take care of the battery to make it last longer
Let the battery fully drain once a month
Don't leave on the charger all the time
If storing long-term, charge to 50%
Taking care of your electric toothbrush doesn't require much time, but makes a big difference in how well it works and how long it lasts. A clean, well-maintained toothbrush not only saves you money in the long run but also ensures you're getting the best possible clean for your teeth every day.
How Often Should I Charge My Electric Toothbrush?
Charging frequency depends on your specific model and usage patterns:
For standard rechargeable models: Most newer electric toothbrushes will run for 1-2 weeks on a single charge with normal twice-daily use. Allow the battery to completely drain before recharging every month or so to maintain the best battery performance and lifespan.
For lithium-ion battery models: These newer brushes tend to hold a charge for 2-4 weeks and do not require being fully depleted of power before being recharged. Do not keep them on the charger constantly, however, as this will reduce battery life over time.
For traveling: Fully charge your toothbrush prior to traveling, particularly if your model lacks USB charging. Most high-end models come with travel cases that have charging functionality built in for longer trips.
Battery status lights on most devices will blink or glow in a second color when power is low, giving ample warning to recharge before next use.
Can I Use Any Brand of Toothpaste With My Electric Toothbrush?
Yes, you may use any ADA-approved toothpaste with your electric toothbrush. Nevertheless, several things can make your experience improve:
Steer clear of whitening toothpastes that are very abrasive: With the enhanced cleaning power of an electric toothbrush, these may strip away enamel gradually. If whitening is your aim, switch to a less abrasive toothpaste and the whitening mode on your brush instead.
Consider the texture of toothpaste: Gel toothpastes may be less likely to splatter than thicker, paste types when used in conjunction with high-powered sonic instruments.
Use the correct amount: Use a pea-sized amount of toothpaste—too much toothpaste used produces too much foam that obstructs vision and good technique during brushing.
There are a few manufacturers that offer toothpastes specifically made to accompany their electric toothbrushes, but these are promotional partnerships and not technical requirements.
Are Electric Toothbrushes Safe For Sensitive Teeth, Braces, Or Dental Work?
Electric toothbrushes are generally safe and often recommended for people with dental sensitivities or appliances, with some specific considerations:
For Sensitive Teeth: Electric toothbrushes are gentle on sensitive teeth. Choose one with a "sensitive" mode that vibrates less aggressively. Start on the lowest setting and use soft-bristled brush heads used for sensitive teeth.
For Braces: Electric toothbrushes are wonderful for braces and often do a better job than manual brushes. Look for special orthodontic brush heads that are designed to get around brackets and wires. Don't press too hard and harm your braces.
For Crowns, Veneers, and Implants: New dentistry can fit electric toothbrushes. They're actually great for brushing around implants and bridges where food accumulates. Just be careful with the pressure, especially around implants.
Following Dental Surgery: Don't brush with an electric toothbrush on operated areas until your dentist advises you to. Usually, you'll need to wait until fully healed.
Electric toothbrushes are often prescribed by dentists to patients with dental work because they clean more effectively with less opportunity for damage from incorrect brushing.
Make Your Electric Toothbrush Work Best for You
Electric toothbrushes can transform your oral health when you use them correctly. Getting comfortable with your electric toothbrush is straightforward, and the benefits are clear: cleaner teeth with less work than a manual brush. Ready to improve your routine? Start tonight by using the right technique, check if your brush head needs replacing, and ask your dentist for personalized advice at your next visit. These small daily changes will make a real difference to your dental health over time!

Quick Answer
The healthiest way to file your nails is using a glass file in one direction only—never saw back and forth, as this creates micro-tears that weaken nails. Always file dry nails with gentle pressure using the right tool and proper grit (240+ for natural nails), and remember to use nail clippers for major length reduction before shaping with a file. These simple changes prevent breakage and splitting while promoting stronger nail growth without requiring expensive treatments.
Introduction
Filing your nails just to make them look pretty might actually be hurting them if you're doing it wrong. When you file incorrectly, your nails can break, split, and become weak, which ruins both how they look and feel. Using the right tools and simple techniques makes a huge difference - instead of constantly dealing with broken nails, you can have strong ones that naturally grow well. A few small changes to how you file can transform fragile, problem-prone nails into healthy ones that look great without much effort.
Which Nail File Should You Choose?
4 Different Files and What They Do
Not all nail files are created equal - some are much kinder to your nails than others.
1. Glass or crystal files: Glass or crystal files are widely considered the healthiest choice for natural nails. Their microscopically fine surface creates a perfectly smooth nail edge that actually seals as you file, preventing future splitting and peeling. These files are gentle enough for even the most delicate nails while still being effective at shaping. They're also hygienic and long-lasting – easily cleaned with soap and water and can last for years with proper care, making their higher price tag ($10-20) a worthwhile investment.
2. Emery boards: Emery boards are the traditional cardboard-based files found in most stores. While convenient and inexpensive, they're not ideal for maintaining optimal nail health. The mineral coating on these files is often too coarse for natural nails, creating micro-tears that lead to peeling and breakage. They also wear out quickly, becoming ineffective after just a few uses, and cannot be properly sanitized due to their porous surface.
3. Metal files: Metal files should almost never be used on natural nails. Their extremely rough surface can tear nail layers, cause significant splitting, and generate heat that damages the keratin structure. These tools are designed primarily for artificial nails or callus removal and can cause lasting damage to natural nails when used regularly.
4. E-files or cordless nail drills: Cordless nail drills, or electric nail files, are electric tools that have become increasingly popular for both salon professionals and at-home use. These battery-powered devices use rotating bits to shape and smooth nails. While convenient for artificial nail maintenance and removal, they require significant skill and caution for use on natural nails. Most professionals recommend that beginners avoid using nail drills directly on natural nails as they can quickly remove too much nail material, causing thinning, heat damage, or even nail bed injury. If you do use a cordless nail drill, select one with adjustable speed settings (ideally 5,000-20,000 RPM) and always start with the lowest speed. These tools are best for removing gel polish, filing artificial tips, or smoothing calluses rather than regular natural nail maintenance.
What Those Grit Numbers Really Mean
Grit numbers are crucial when selecting a file – they indicate how fine or coarse the filing surface is:
The grit numbering system works opposite to what you might expect: lower numbers (80-100) indicate very coarse files that remove nail material quickly, while higher numbers (240+) indicate finer, gentler files that remove less material with each stroke.
For healthy natural nails, always choose files with a minimum grit of 240 or higher. This finer grit prevents over-filing and creates a smoother nail edge that resists breaking and peeling. The finest glass files typically range from 600-1200 grit and are ideal for regular maintenance.
Medium grits (around 180) should only be used briefly for initial shaping of very thick nails or to remove ridges, and should always be followed by finishing with a finer grit. Using these medium grits too long can thin nails excessively.
Never use grits below 180 on natural nails – these extremely coarse files are designed specifically for artificial nails or hard calluses. Using them on natural nails is like using construction-grade sandpaper on fine furniture – they remove too much material too quickly, leading to thinning, sensitivity, and eventual breakage.
Other Helpful Tools for Your Nail Care Kit
A good file isn't the only thing you need for healthy nails.
Sharp nail clippers are a must if you need to shorten your nails before filing - dull ones crush your nail edges instead of cleanly cutting them.
A soft cuticle pusher (rubber-tipped ones are gentlest) helps keep your cuticles neat without damaging that important protective seal.
A soft nail brush lets you clean under and around your nails properly before you start filing.
A buffer block can be used occasionally to smooth out ridges after filing - but don't overdo it as buffing thins your nails.
Hand lotion or cuticle oil applied after filing helps keep everything hydrated and prevents the dryness that leads to brittle nails.
How to File Your Nails Properly: A 6-Step Guide
Armed with the right file, you're ready to learn the technique that professionals use to create strong, beautifully shaped nails. The way you file matters just as much as the tools you choose.
1. Getting Ready: The Clean vs. Damp Debate
The majority of nail professionals believe that it is best to begin with clean, thoroughly dry nails. Dry nails have the greatest resistance to the file, which means cleaner edges and more accurate shapes. Wash your hands and dry your nails completely before you start.
Of course, there is one disagreement that needs to be mentioned. Some people have success with filing after a shower, especially for people whose nails are very thick, because the slightly softened keratin might be less resistant to shaping. If you do this, be extra careful and patient—wet nails are more likely to tear and won't give as clean an edge. For most people, dry filing is still safer and better.
2. The Golden Rule: One Direction Only
The most crucial technique to remember is filing in one direction only. Begin at the outer edge of your nail, gently stroke toward the center, then lift the file completely off the nail. Return to the starting point and repeat. This might feel awkward at first if you're used to sawing back and forth, but it's absolutely essential for nail health.
Why is sawing so harmful? Each back-and-forth motion creates tiny tears in the nail layers that you can't see. These micro-tears weaken your nail structure and eventually lead to peeling, splitting, and frustrating breakage that seems to come out of nowhere. One-directional filing keeps the nail edges sealed and strong.
3. Light Touch, Steady Pace
Let your file work for you. Most people press too hard and file too fast, believing it will make the process faster. Actually, soft pressure and a slower speed produce healthier results and save time in the long term by avoiding damage that would have to be repaired later.
Hold your file lightly, but firmly, in the middle between your index finger and thumb. Hold it parallel to the side of your nail at first, and then change the angle as needed for shaping. Your nail won't curve due to the pressure of the file—if it does, you're pressing down on it too strongly.
4. Finding the Right Angle
For all general nail shaping, keep your file held straight (perpendicular at a 90-degree angle) against the edge of your nail. This gives the most precise line and evenest pressure along the edge of your nail.
If you have extremely short nails, try to file in a discreet 45-degree slant underneath the nail edge. This will prevent you from unintentionally cutting your skin and allows for a refined edge that will not catch on clothing. Use small changes of angle to decide what works well for your exact nail shape and length.
5. Shapes That Strengthen
While there are many fashionable nail shapes ranging from classic round to square, oval, squoval (squared oval), or almond, some shapes have a tendency to promote healthier nails. Rounded tips place stress on the nail more evenly, so breakage is less likely. Pointed tips and corners create stress areas that lead to splitting.
Whatever shape you choose, don't over-file the sides of your nails. The nail sides are needed for structural support, and weakening them makes breakage almost inevitable. Attempt to produce smooth, snag-free edges by completing with very light strokes on the finest part of your file.
Understanding how different nail shapes complement specific hand types can help you choose a style that's both aesthetically pleasing and structurally sound for daily wear.
6. Know When to Stop
Filing is a case of smoothing, not cutting. Once you have achieved your desired shape, stop. Many people file more than necessary, making their nails weak. Over-filing your nails shortens the nail bed and removes the strongest part of the nail—the free edge—resulting in painful, brittle nails that break easily.
A rule of thumb: if you feel heat from friction between your nail and file, you should halt. This indicates that you're removing too much nail material too quickly.
To Cut or To File? Which is Healthier for Your Nails?
One of the most common questions in nail care is whether you should reach for nail clippers or a file when managing your nail length. Both methods serve a purpose, but they affect your nail structure differently.
Aspect
Cutting with Nail Clippers
Filing
Speed
Very quick for removing significant length
Slower, especially for major length reduction
Precision
Limited control over exact shape
Excellent precision for creating specific shapes
Impact on Nail Structure
Can cause compression and stress to nail layers
Gradually removes nail material without compression
Risk of Damage
Higher risk of splits and micro-fractures, especially with dull clippers
Minimal risk when proper technique is used
Nail Edge Quality
Often leaves rough, jagged edges that need refinement
Creates smooth, sealed edges (especially glass files)
Best Used For
Major length reduction
Shaping, maintenance, and minor length adjustments
Skill Required
Minimal skill needed
Requires proper technique for best results
To have the healthiest nails possible, you should both clip and file—each does the other better. If your nails are very long and need a significant cutback, nail clippers will handle more than files. Filing off a lot of length takes time and can be an annoyance to your nail bed. But for shaping and getting the specific look that you desire, filing will be less stressful on your nails than cutting. Files will not compress or push into your nail as clippers can.
The ideal technique? Trim excess length with sharp nail clippers initially, then use a good glass file and shape the edges and smooth them out. The two-step process will provide you with enhanced nail edges that will not peel or split so easily. Using proper nail trimming techniques ensures clean cuts that minimize stress on the nail structure and prepare nails perfectly for filing.
7 Nail Filing Mistakes You Might Be Making
Even with the best electric nail file and knowledge of proper technique, it's easy to fall into habits that damage your nails without realizing it. Many common nail problems trace back to these simple filing mistakes.
1. The Back-and-Forth Sawing Motion
The mistake: Filing your nails in a sawing motion might feel natural, but it's actually tearing your nail layers apart at a microscopic level.
The fix: Train yourself to file in one direction alone, lifting the file off your nail entirely before initiating the next stroke. It takes a little longer, but it spares your nails from millions of micro-tears.
2. Using Files That Are Too Rough
The mistake: Reaching for whatever nail file is handy, regardless of its grit, can be like taking sandpaper to fine wood.
The fix: For regular nails, use fine-grit files (240 or higher). Save the coarse ones for fake nails or calluses—never to be applied to your regular nails.
3. Filing With Too Much Pressure
The mistake: Filing too hard when filling in an attempt to shape nails more rapidly actually destroys nail layers and may hurt or be tender.
The fix: File gently and let the file do the job. If you sense heat produced by friction, you're either filing too quickly or filing too hard. Electric nail files present even greater risks due to their high-speed rotation.
4. Weakening the Sides of Your Nails
The mistake: Over-shaping the sides of your nails removes their natural support system, leading them to split, peel, and break.
The fix: Gently shape only the free edge (tip) of your nail. Shape the sides only slightly, keeping them strong. Think of the sides as support beams in a building.
5. Filing Very Wet Nails
The mistake: Filing after a long soak or shower when nails are water-logged makes them too soft and prone to tearing and damage.
The fix: Either file when completely dry (best option) or wait until nails are just slightly damp but no longer saturated with water if you prefer that method.
6. Neglecting File Hygiene
The mistake: Using the same nail file without cleaning it transfers bacteria and can lead to infections, especially if you have any tiny cuts around your nails.
The fix: Wash glass/crystal files with soap and water after each use. For emery boards, either clean with alcohol or replace them regularly as they can harbor bacteria in their porous surfaces.
7. Treating Nails Like Tools
The mistake: Using your nails to open cans, scrape off labels, or pry open packages stresses them out in a way that cancels out even the best nail-filing technique.
The fix: Protect your nail investment by using the proper tools for these tasks. Dermatologists always make this one of their top suggestions for naturally healthy nails.
Keep in mind that nail care is cumulative—steering clear of these errors consistently results in stronger, healthier nails over the long term. The majority of nail damage doesn't occur overnight, and neither does repair. Provide your nails with a few months of proper care, and you'll notice outstanding improvement in their strength and appearance.
File Your Nails Right and Watch Them Grow Stronger
The way you file your nails might not appear to be any big deal, but it actually does make a huge difference in how good your nails look and feel. Simply switching to a glass file and filing one instead of sawing back and forth can totally revolutionize your nail care. The next time you have your nails done, try these healthier filing tips - you'll have fewer breaks, less splitting, and naturally better-looking nails even without polish. It takes seconds to file correctly, but leaves you with stronger, more beautiful nails for weeks. Your future self will thank you for making this easy switch today.

Quick Answer
Facial cleansing brushes should be used according to your skin type—typically 2-3 times weekly for normal skin, potentially daily for oily skin, but only once weekly for sensitive or dry skin. Using them too frequently can damage your skin barrier, causing redness, dryness, and even breakouts, so start slowly and increase only if your skin responds well. Always use gentle pressure, avoid the eye area, and follow with moisturizer to maximize benefits while preventing irritation.
Introduction
Facial cleansing brushes have become popular tools that clean your skin more deeply than just using your hands. Many people aren't sure how often to use them—using them too much can irritate your skin, but too little might not give you the benefits you're looking for. How often you should use one really depends on your skin type—people with oily skin might do well with more frequent use, while those with dry or sensitive skin should use them less often. When used correctly, these brushes help remove dirt, clear away dead skin cells, and can make your skin look healthier and clearer.
Why Use a Facial Cleansing Brush? Understanding the 6 Benefits
Wondering if a facial cleansing brush is worth adding to your routine? These popular tools do more than just clean your face. Here's what makes them special:
Gets the Deep Dirt: Your fingers just can't reach everything. These brushes dig deeper into pores to wash away stubborn dirt, makeup, and oil that regular washing leaves behind.
Scrubs Away Dead Skin: We all have dead skin cells making our face look dull. The brush gently sweeps them away, revealing the fresh, glowing skin underneath without harsh scrubbing.
Evens Out Your Skin: Noticed patches of uneven color on your face? Regular brush use helps balance your skin tone over time, giving you a more uniform complexion.
Makes Products Work Better: Ever feel like your expensive serums just sit on top of your skin? After using a cleansing brush, your skincare products can actually sink in and do their job properly.
Boosts Blood Flow: The gentle massage from the brush brings blood to the surface of your skin and helps drain puffiness. Many users notice their skin looks more alive and refreshed after use.
Fights Off Breakouts: By keeping pores clean and clear, these brushes help stop acne before it starts. Clean pores simply mean fewer chances for pimples to form.
Regular use of facial brushes can also effectively remove blackheads by deeply cleaning pores and clearing away the oil and debris that cause them.
The Golden Rule: Finding Your Skin's Sweet Spot for Brush Usage
Having learned the benefits of facial cleansing brush use, you might be asking yourself how often to use one. Finding the right frequency is like finding the right balance—too much will make your skin irritated, too little will not yield results.
What the Experts Suggest
Most dermatologists suggest using your facial brush 2-3 times a week for most people. This gives you a deep clean without doing too much, finding a great balance for most skins.
Take It Slow at First
If you're new to facial brushes, don't start with a daily routine. Start once or twice a week and see how your skin does. Notice any redness or irritation? That's your cue to step back. Skin is looking fabulous? Then you might be able to start gradually increasing its frequency of use.Understanding when to use a facial cleansing brush is essential for maintaining healthy skin and avoiding irritation.
Your skin is trying to tell you something—are you listening?
Pay attention to the feeling on your face after brushing. Irritation, redness, or flaky spots signal "slow down!" However, if your skin remains dull or your pores remain clogged, you can brush a bit more frequently.
What Affects Your Ideal Schedule
We're all unique, and several things determine your perfect brush regimen: your skin type (oily skin can handle more frequent usage), the quality of brush you have (sonic or manual), the softness of the bristles, and simply how sensitive your skin is to begin with.
How Often to Use a Facial Cleansing Brush Based on Your Skin Type
Your skin type largely determines how often you should use a facial cleansing brush. Here's a simple guide to help you find what works best for your specific needs:
Skin Type
Recommended Frequency
Key Tips
Normal Skin
2-3 times per week
May increase to daily if skin responds well
Monitor for any signs of irritation
Combination Skin
2-3 times per week
Focus more on oily T-zone areas
Go lighter on dry areas
Adjust based on how different areas respond
Oily Skin
Every other day to daily
Best tolerates frequent use
Helps manage breakouts by keeping pores clear
Natural oils provide some protection against irritation
Dry Skin
1-2 times per week maximum
Apply rich moisturizer immediately after use
Choose gentle brush heads only
Use with hydrating, non-foaming cleansers
Sensitive Skin
Once per week or less
Use only the softest brush head available
Stop immediately if redness or irritation occurs
Those with rosacea, eczema, or psoriasis should consult a dermatologist first
Remember that these are starting points. Always listen to your skin and adjust accordingly—the perfect routine is one that gives you benefits without irritation.
Signs You're Overusing Your Facial Cleansing Brush (And How to Recover)
Even with the best intentions, it's easy to get carried away with your facial brush. Using it too frequently or too aggressively can damage your skin's protective barrier. Watch for these warning signs that indicate you need to scale back:
6 Red Flags Your Skin Is Sending
1. Persistent Redness and Irritation: If your skin stays red and irritated long after cleansing, your brush usage is likely too frequent or too harsh. Occasional mild flushing is normal, but redness that lasts for hours is not.
2. Unusual Dryness and Flaking: Notice new dry patches, flaking, or a tight, uncomfortable feeling? Your brush might be stripping away too much of your skin's natural oils, compromising its moisture barrier.
3. Surprising Breakouts: Counter-intuitively, overexfoliation can actually cause more pimples. When you damage your skin barrier, bacteria can enter more easily, leading to inflammation and breakouts where you didn't have them before.
4. Heightened Sensitivity: If products that never bothered you before suddenly sting or burn, your skin barrier has likely been weakened by too much physical exfoliation.
5. Unusually Shiny Skin: A strange, tight shininess (different from a healthy glow or natural oil) often indicates your skin's outer layer has been compromised from overexfoliation.
6. Disrupted pH Balance: Healthy skin maintains a slightly acidic pH. Overusing your brush can alter this balance, making your skin more vulnerable to bacteria and environmental damage.
Your Skin Recovery Plan
If you recognize these signs, here's how to help your skin heal:
Stop using the brush immediately. Give your skin a complete break from all forms of exfoliation—both physical and chemical.
Simplify your routine drastically. Switch to a gentle, fragrance-free cleanser and a basic, soothing moisturizer with minimal ingredients.
Focus on barrier repair. Look for products containing ceramides, hyaluronic acid, and panthenol, which help rebuild your skin's protective layer.
Be patient. Depending on the damage, your skin may need 2-4 weeks to fully recover.
Reintroduce very gradually. If you decide to use the brush again, start with just once every 1-2 weeks, using the gentlest setting and softest brush head available.
Remember, more exfoliation doesn't always mean better results. Your skin needs its protective barrier intact to look and feel its best.
7Best Practices: How to Use Your Facial Cleansing Brush Correctly
Getting the most from your facial cleansing brush isn't just about frequency—technique matters too. Adhere to these steps for safe, effective cleaning that's optimal for benefits but low in possible irritation:
Step 1: Remove All Makeup First
Always start anew. Use a different remover or cleaning oil before handling your brush against your skin. Putting your brush on makeup-stained skin can push cosmetics deeper into pores, causing clogs and breakouts.
Step 2: Prepare Your Cleanser
Choose a mild, pH-neutral cleanser with no harsh chemicals or perfume. Use it on your wet face or directly onto your wet brush head. Avoid foaming cleansers with sodium lauryl sulfate, as it is too harsh when paired with a brush.
Step 3: Use a Light Touch
Let the brush do the work, not your arm muscles. Move the brush in a circular motion gently, and don't press the brush firmly against the skin. The bristles need gentle contact in order to work well; pressing harder won't produce better results and may cause irritation.
Step 4: Time It Right
Most professionals suggest keeping your brush time at around 60 seconds overall. That's approximately 15-20 seconds per facial area (forehead, each cheek, nose/chin). Many electronic brushes have timers to avoid overbrushing. If unsure, better to err on the side of caution.
Step 5: Protect Delicate Areas
Do not allow the brush to touch the area around your eyes, including eyelids and the delicate skin underneath your eyes. Both are too sensitive for brush exfoliation and easily irritated or damaged.
Step 6: Rinse Well
Rinse your face thoroughly with lukewarm (not hot) water to remove all cleanser residue. Pat—not rub—your face dry with a clean towel.
Step 7: Follow With Your Skincare
Apply your serums, treatments, and moisturizer immediately upon washing when your skin is most receptive. Products penetrate more efficiently after brushing cleansing.
Evening is generally ideal for brush cleansing. It removes the day's accumulated dirt, oil, and pollution, preparing your skin for nighttime repair. Morning cleansing is typically gentler, as your skin doesn't need as much exfoliation after sleeping. Understanding the correct techniques for using a facial brush is essential for achieving healthy, glowing skin.
5 Common Questions About Facial Cleansing Brushes: Your FAQ Guide
Q1: Can I use a facial cleansing brush every day?
No - daily usage is not recommended for most people. Combination or normal skin can be used 2-3 times a week. Oily skin can tolerate daily usage, while dry or sensitive skin should use it weekly. Start less frequently and only increase if your skin is still unirritated.
Q2: What kind of cleanser should I use with my brush?
Gentle, pH-balanced cleansers without harsh ingredients work best. Avoid cleansers containing scrubbing particles (e.g., microbeads) as these will over-exfoliate when used with a brush. Use a cream or gel cleanser. Avoid rough foaming cleansers containing sodium lauryl sulfate, which will strip your skin when used with brush exfoliation.
Q3: Will a cleansing brush make my pores smaller?
No - cleansing brushes can't really reduce the size of pores (size is largely genetic), but they can cause pores to appear smaller by cleaning them. When pores are clean, dirt, oil, and dead skin cells don't plug them up, so they're less noticeable. Frequent cleansing prevents the accumulation that causes pores to look larger from happening.
Q4: Is it normal to break out when first using a cleansing brush?
Yes - a temporary "purging" period will occur in some users. Open pores now will reappear as breakouts during the first 1-2 weeks. However, if breakouts continue beyond this time period, become excessively inflamed, or appear in new areas, your skin is likely irritated as a result of overuse. Reduce frequency or stop using the brush.
Q5: How do I choose the right brush head?
Select according to your skin type. For dry or sensitive skin, employ the very finest bristles available (generally tagged "sensitive"). Ordinary skin can use medium-soft bristles. Oily skin can quite often tolerate slightly stiffer bristles. Begin with the mildest variety provided by your brush system and move to firmer ones only if required and tolerable.
Use Your Facial Brush the Right Way for Healthy, Glowing Skin
Finding your perfect cleansing brush routine doesn't have to be complicated. The secret is balance—use it enough to get the benefits but not so much that your skin gets irritated. For most people, that sweet spot is 2-3 times a week, but your skin type matters. If you have sensitive or dry skin, once a week might be plenty. Oily skin? You might handle every other day. Start slow and watch how your skin responds—it'll tell you if you need to dial it back or if you can do more. Remember, technique matters just as much as frequency—use gentle circular motions, avoid the eye area, and always follow with moisturizer. Your skin deserves care, not punishment! Give it the right amount of exfoliation, and you'll see clearer, healthier skin that makes you feel great about your reflection.

Quick Answer
Electric nail files are safe for natural nails when used correctly. The key is how you use them, not the tool itself. Keep speeds between 5,000-7,500 RPM for natural nails and always keep the file moving. Don't press too hard or file in one spot too long, as this creates heat that damages nails. Watch for warning signs like bendy nails, see-through spots, or pain after filing—these mean you're filing too much. Most people only need to file once a week to keep nails healthy and strong.
Introduction
If you've ever questioned whether electric nail files might harm your natural nails, you're not alone. Many people worry about potential damage while being attracted to the professional results these devices promise. Electric nail files (or e-files) have gained popularity in home nail care routines, yet concerns persist about their impact on nail health. When used correctly, these motorized tools can actually be completely safe for your natural nails. The key factor isn't the device itself but rather how you use it - proper technique and appropriate speed settings make all the difference between damaged nails and beautifully maintained ones.
What are Electric Nail Files (E-Files)?
Electric nail files, often called e-files or nail drills, are handheld motorized tools designed to shape, buff, and maintain both natural and artificial nails. Unlike traditional emery boards or manual nail files that require physical back-and-forth motion, e-files use a rotating bit powered by an electric motor to perform filing tasks with minimal manual effort.
The fundamental difference between e-files and regular nail files lies in their operation. While manual files rely on your hand movements and pressure, electric files maintain consistent speed and power through their motor. This motorized action allows for precise control, especially when working on small areas or performing detailed nail art.
E-files have numerous substantial advantages over traditional filing methods. The accuracy they provide allows for the creation of symmetrical shapes and smooth edges that are difficult to achieve manually. They save time to a significant extent, with experts able to complete work much more rapidly. They are also excellent for gel polish, acrylics, and other hard nail extensions that would require a lot of manual work to be removed otherwise.
An electric nail file is usually made up of a series of essential components. The motor resides in the handpiece and is also used as the handle. The chuck securely retains interchangeable bits. Various types of bits are employed for various purposes: barrel bits for cutting and shaping, cone bits for precision in tight spaces, mandrel bits for gripping sanding bands, and specialty bits like diamond or ceramic ones for specific materials. The device typically includes a control box with speed settings ranging from 3,000 to 35,000 RPMs, allowing users to adjust power based on the task and nail type.
The Great Debate: E-Files vs. Hand Filing
When it comes to nail care, professionals and enthusiasts often find themselves choosing sides between electric nail files and traditional hand filing methods. Both approaches serve the same fundamental purpose—shaping and maintaining nails—but they differ significantly in technique, results, and potential risks.
Feature
Electric Nail Files
Traditional Hand Files
Speed
3-5 minutes to remove gel polish vs. 10-15 minutes with hand filing
Takes roughly 3x longer; removing gel polish may take 10-15 minutes
Control
Depends on skill and practice; beginners may struggle with pressure
Easy to control by hand; you feel exactly how much pressure you're applying
Learning Time
May take 2-4 weeks of regular practice to use safely
Can be learned in a single session; intuitive for most people
Detail Work
Great for smoothing edges and hard-to-reach areas when mastered
More difficult to achieve perfect smoothness, especially in cuticle areas
Safety
Can damage nails through heat or over-filing if used carelessly
Generally gentle on nails; harder to accidentally remove too much nail
Material Handling
Easily removes hard products like acrylics, dip powder, and thick gel
Struggles with hard materials; may cause hand fatigue with tough products
Cost
Higher upfront cost ($25-$300+)
Budget-friendly ($1-$15 for quality files)
Comfort
Makes noise and vibrates during use
Silent and no vibration
Electric nail files clearly outperform traditional files when efficiency and handling tough materials are the priority, while hand filing remains superior for beginners and those prioritizing gentle treatment of natural nails.
What Risks Do E-Files Pose to Natural Nails When Used Incorrectly?
Electric nail files are efficient and precise, but can damage nails if used incorrectly. The most common issues are thinning of the nail plate, leading to weakened nails and breakage; painful heat buildup during filing; peeling or splitting of nail layers; and micro-trauma, which may lead to infection when the protective nail barrier is compromised. In severe cases, improper e-file use can even lead to the separation of the nail from the nail bed (onycholysis).
Electric nail files aren't inherently risky—the real issue lies in technique. When used correctly, even professional-grade e-files are completely safe for your natural nails. Just look at experienced nail technicians who've been using them daily for years without causing any damage to their clients' nails.
4 Step to Use E-Files Safely
The difference between nail damage and beautiful results isn't the e-file itself—it's how you use it. These four essential techniques prevent thinning, heat buildup, and other problems that occur when electric files are used incorrectly.
1. Set the Correct Speed
Apply 5,000-8,000 RPM to natural nails. Apply 8,000-12,000 RPM to product removal. Reserve speeds over 12,000 RPM for artificial nails only by a professional. Start low, especially with thin or damaged nails. Gradually build up if needed.
2. Utilize the Right Angle and Pressure
Hold the e-file at a 45-degree angle to the nail. Press lightly—let the bit do the work. Use small sweeps to avoid heat buildup. File in the direction of nail growth on natural nails. If you experience vibration or discomfort, you're pressing too hard.
3. Select the Correct Bits
For natural nails, use fine-grit (180+) ceramic bits or sanding bands. It's alright to shape artificial nails with medium grit (120-180). Take off artificial products only with a coarse grit (80-120). Cuticle bits are rounded-end bits. Recycle broken bits—they'll tear your nails.
4. Don't Overdo It
File each nail for just a few seconds. Don't repeat the same spot over and over. Check your progress every now and then. Stop at once if the nail begins to warm up—damage is being done. Good air circulation enables you to see and keeps you from breathing in dust.
E-File Troubleshooting: Quick Fixes for 4 Common Nail Drill Problems
Problem 1: Handpiece Gets Hot During Use
Fix it fast: Reduce your speed setting and clean dust air vents. Don't push so hard—let the bit work for you. Make sure that your bit's spinning steadily without wobbling. If it's still warm after these fixes, give your machine time to cool down.
Problem 2: Power Drops or Speed Changes
Fix it fast: Clean your handpiece thoroughly, with special attention to the area of the chuck where dust builds up. Check your power cord for wear and verify that it's plugged in. Examine and replace carbon brushes on professional machines as needed. Test using alternate bits to see if the problem persists.
Problem 3: Too Much Vibration
Fix it fast: Make sure your bit goes in straight, and the chuck is tightened completely. Inspect bent or broken bits and replace them as soon as possible. Clean out the chuck thoroughly—even a small bit of dust will cause the machine to wobble. If vibration continues, bearings might need to be replaced.
Problem 4: Machine Won't Turn On
Fix it fast: Try a different outlet to rule out power supply issues. Check connections at both ends of the power cord. If your e-file has a foot pedal, make sure it's properly connected. Look for power switches or reset buttons you might have missed. For machines with fuses, check if they need replacement.
What Speed Should I Use to File My Natural Nails?
If an electric nail file is to be applied to natural nails, controlling the speed is necessary for safety. For natural nail work, use speeds between 5,000-7,500 RPM. These speeds offer enough power and protection for your natural nails from being damaged.
Different parts of the natural nail require different speeds:
1. For working near the cuticle region, reduce to 5,000-6,000 RPM and take special care. This delicate area is bruised easily by excess speed or pressure.
2. For polishing the nail surface, 6,000-7,000 RPM provides good control while efficiently smoothening out imperfections.
3. To shape the free edge, you can use 6,500-7,500 RPM with the proper bits for natural nails.
Your bit's diameter also affects effective speed - wider diameter bits produce more friction, so reduce your speed by 1,000-1,500 RPM when cutting with wider bits (over 1/4\" diameter). Begin at the lowest recommended speed and gradually increase as your skill level and comfort level grow.
On natural nails, which are about as thin as a business card, you need to have total control. When e-filing, keep the speed slow enough that you can feel the full effect of the amount of nails you are removing. If you start to feel heat or notice the nail dust building up too quickly, you're doing it too fast or using too much pressure.
Beginners should start at 5,000 RPM until developing a feel for the machine. With practice, you'll discover that proper e-file use involves constant movement rather than higher speeds. This gentle approach protects the nail while still achieving professional results.
Can You File Your Nails Too Much?
Yes, you can certainly over-file your nails, leading to nail plate weakening and reducing its structural integrity. Overfilling damages nails, making them split, peel, and break. Filing away once, the nail plate cannot be "repaired" - it must grow out completely, which will take 4-6 months for fingernails.
Warning signs that you're over-filing are:
1. More nail flexibility - healthy nails do have some stiffness; if you've filed so much that your nails bend greatly, you've likely removed too many layers.
2. White spots or translucency - if the nail becomes more transparent than usual or white spots develop, it is a sign of thinning of the nail plate.
3. Heat sensitivity - over-filed nails are heat-sensitive or hot water-sensitive.
4. Ridges more prominent - this can occur if filing removes surface layers, which eliminates natural ridges.
5. Pain or soreness upon filing - pain or tenderness should not originate from healthy filing.
Use Your E-File Right — Keep Your Nails Strong and Bright
Using an electric nail file doesn't have to be complicated. Whether you're just starting out or you've been doing nails for years, the key is matching your e-file to your skills and treating your nails with care. Keep speeds between 5,000-7,500 RPM for natural nails, and remember that feeling heat or seeing lots of dust means you should slow down. Clean your machine after each use and give it a deeper clean monthly to keep it running well. Pay attention to your nails too—if they feel thin, flexible, or sensitive after filing, you're probably filing too much. Most people only need to file once a week, and always in one direction.

Quick Answer
Yes, facial brushes can help remove blackheads by providing deeper exfoliation than washing with hands alone, loosening the oil and dead skin cells trapped in pores. While they typically reduce rather than completely eliminate blackheads, many users see significant improvement when using brushes 2-3 times weekly, especially when paired with blackhead-fighting ingredients like salicylic acid.
Introduction
Blackheads show up when oil and dead skin cells get trapped in open pores and turn dark, especially on your nose and forehead. Facial brushes are popular tools that clean deeper than just using your fingers, with soft bristles or silicone tips that gently scrub your skin. These brushes help by lifting away dirt from pores and boosting blood flow, which can loosen those stubborn blackheads regular washing often misses. Many people see fewer blackheads with regular use, though brushes usually reduce rather than completely eliminate them. For better results, try using your brush with face washes containing salicylic acid, which helps break down the oil causing blackheads in the first place.
What Makes Blackheads So Stubborn to Remove?
Blackheads are small, dark bumps that form when your pores get clogged with oil (sebum) and dead skin cells. Unlike whiteheads that close over, blackheads stay open at the surface. This allows the trapped material to contact air and oxidize, turning dark. This is similar to how an apple browns when cut—it's not dirt, but a chemical reaction.
These spots typically appear in areas where your skin is oilier, mainly the T-zone (forehead, nose, and chin). Your nose often has the most blackheads because it has more oil glands per square inch than almost anywhere else on your face. Understanding the causes of blackheads is the key to removing them.
Why Blackheads Are Hard to Get Rid Of:
Sticky Material: The sebum forming blackheads is sticky and becomes firmly lodged in pores
Constant Production: Your skin continuously produces new oil and sheds cells daily, creating an endless supply of blackhead-forming materials
Individual Factors: Some people naturally produce thicker, stickier oil or have pore shapes that clog more easily
Improper Removal: Using the wrong techniques can push debris deeper into pores or cause inflammation, making blackheads more noticeable
How Do Facial Brushes Work?
Facial brushes clean skin more deeply than fingers alone can. They come in different types and use various methods to improve skin health.
3 Types of Facial Brushes
Manual Brushes: These need no electricity and work using your hand movements. Manual brushes have soft bristles or silicone tips that you move in circles across your face. They're cheap, portable, and gentle.
Silicone Brushes: Made from soft, medical-grade silicone that resists bacteria growth, making a silicone brush more hygienic than bristle brushes. It’s gentle enough for sensitive skin and usually waterproof.
Electric/Sonic Brushes: Sonic brushes use batteries to create vibrating movements. Sonic brushes produce thousands of pulses per minute. The vibrations help break up dirt and oil in pores while gently touching the skin surface.
How They Clean Your Skin
Exfoliation: All facial brushes remove dead skin cells from the surface, revealing fresher skin underneath. The bristles or silicone tips create gentle friction that lifts away dead cells more evenly than many scrubs.
Deep Cleaning: Brushes reach into pores to remove trapped oil, makeup, and pollutants. Sonic brushes use rapid vibrations to "shake loose" stubborn debris. Studies show brushes remove makeup more effectively than washing with hands.
Improved Blood Flow: The gentle massage action increases blood flow to your skin. This delivers more oxygen and nutrients to skin cells while removing waste. The result is a healthy glow and possibly reduced puffiness.
When used properly, facial brushes combine these three actions—exfoliation, deep cleaning, and improved circulation—to enhance skin texture and appearance. Electric brushes typically provide the most powerful cleaning through their vibration technology.
Can a Facial Brush Remove Blackheads?
Yes, facial brushes can help remove blackheads, but their effectiveness varies based on the type of brush, your skin type, and how you use them. While they can significantly reduce blackheads through exfoliation and deep cleansing, they typically won't eliminate blackheads completely on their own.
Clinical studies have shown promising results for facial brushes in improving overall skin condition, including blackhead reduction. In one study published in the Journal of Drugs in Dermatology, researchers found that using a sonic facial brush with an appropriate cleanser effectively reduced acne lesions, which often include blackheads. Both physician assessments and patient self-reports confirmed improvements in skin clarity and texture.
Dermatologists generally agree that facial brushes can be beneficial when used correctly. The mechanical exfoliation they provide helps to clear pores more effectively than manual washing alone. According to clinical reviews, sonic brushes in particular have demonstrated effectiveness in improving cleansing routines and enhancing overall skin condition when used as part of a complete skincare regimen.
User testimonialsalso support these findings, with many reporting visible reduction in blackheads after incorporating facial brushes into their routines. However, results vary significantly between individuals, with factors like skin type, brush type, and consistency of use playing important roles in determining effectiveness.
4 Benefits of Using a Facial Brush for Blackheads
Facial brushes have become popular skincare tools that use bristles or silicone tips to clean skin better than hands alone. When used correctly, they help with multiple skin issues while being gentle enough for regular use.
1. Deeper Cleansing Action
Facial brushes remove dirt that regular washing misses. They loosen dirt, oil, and dead skin cells from pores—the stuff that forms blackheads when exposed to air. This works especially well on oily areas like the nose, chin, and forehead. Studies show brushes clean more thoroughly than washing with hands alone, breaking down stubborn debris without harsh scrubbing.
2. Better Product Absorption
Your skin care products work better after using a facial brush. By exfoliating dead skin and debris, ingredients that fight blackheads—like salicylic acid or retinol—can penetrate deeper into pores. This means better performance from your existing products without buying new ones.
3. Improved Skin Texture and Appearance
Regular use smooths out uneven areas and yields smoother skin. Almost everyone discovers softer, more radiant skin when they add a brush to their routine. Exfoliation also lessens the size of pores by keeping them unclogged. And the massage effect stimulates circulation, giving you a healthier face.
4. Works for Most Skin Types
Facial brushes can work for most skin types when used correctly. For sensitive skin, silicone brushes are gentler than bristle versions. People with normal to oily skin may prefer bristle brushes for more intense cleaning. Those with combination skin can focus on oilier areas like the T-zone. Using brushes 2-3 times weekly provides effective blackhead management without damaging skin.
4 Possible Problems When Using Facial Brushes for Blackheads
While facial brushes can help with blackheads, there are important risks to know about. Using these tools correctly and knowing when to avoid them helps prevent skin problems.
1. Risk of Over-Exfoliation
Using a brush too often or too hard can damage your skin's protective layer, causing redness and irritation. Ironically, this can trigger more oil production, making blackheads worse. Signs of over-exfoliation include unusual shininess, tight skin, and flaking. Most experts recommend using brushes only 2-3 times weekly, not daily.
2. Not Right for All Skin Types
People with active acne should avoid facial brushes as they can spread bacteria and irritate inflamed skin. Those with very sensitive skin, rosacea, or eczema should be cautious as brushing may trigger flare-ups. If you're using strong acne treatments or had recent skin procedures, wait until your skin heals before using a brush.
3. Bacteria Buildup Concerns
Facial brushes can trap moisture and debris, creating a breeding ground for bacteria. Clean your brush after each use with warm water and mild soap. Replace brush heads every 2-3 months, like toothbrushes. Always let your brush dry completely between uses in an open area.
4. Finding What Works for You
Start with once-weekly use and gradually increase if your skin responds well. Use light pressure—let the brush do the work. If you're unsure whether a facial brush is right for you, consider talking to a dermatologist for personalized advice based on your skin needs.
6 Basic Steps for Using Your Facial Brush
Correct usage of a facial brush eradicates blackheads without harming your skin. Just go through these simple steps to get the best results and have healthy skin.
Step 1: Prepare Your Skin
Splash your face several times with lukewarm water until your face is fully wet. Water has to feel comfortable against the skin—not hot, since hot water strips natural oils and can leave skin red and irritated. Wash your hands first before handling your face in order not to transfer dirt and bacteria.
Step 2: Apply Cleanser
Choose a gentle cleanser that is appropriate for your skin type. For dry skin, try a creamy formula. Squeeze about a dime-sized amount either onto your damp face or directly onto the brush head. Too much cleanser can create too much foam and make it harder to rinse off.
Step 3: Brush Technique
Turn on your brush to its lowest setting if it has multiple speeds. Hold the brush against your skin with just enough contact to feel the bristles moving—pressing too hard can cause irritation. Sweep it around in small circles, taking about 10-15 seconds per area of your face. Take special precautions in the spots where blackheads are prone to appear, e.g., the nose, chin, and forehead, but avoid lingering over an area for long. The entire process should never take longer than 60 seconds.
Step 4: Rinse and Dry
Splash your face with lukewarm water at least 10-12 times, making sure to remove all traces of cleanser. Leftover cleanser can clog pores and cause irritation. After rinsing, take a clean, soft towel and gently press it against your skin to absorb water. Avoid rubbing or dragging the towel across your face, which can irritate freshly exfoliated skin.
Step 5: Maintain a Schedule
Mark your calendar or set reminders to use your facial brush only 2-3 times per week with at least one day between uses. Your skin needs time to recover between exfoliation sessions. If you notice any redness, sensitivity, or irritation, reduce usage to once a week or stop completely until your skin heals. Remember that more frequent use doesn't mean better results—it often leads to skin damage.
Step 6: Clean Your Brush
Immediately after use, give your brush head a good soaking in running water when the bristles are still wet. Rinse gently out with your fingers any cleanser or skin cells embedded in the bristles. Shake off surplus water from the brush and stand the brush bristle-end upwards in a dry, well-ventilated space—not in the sealed bathroom cabinet where the moisture builds up. Dry completely before applying it again in order to prevent breakouts caused by harmful bacteria growth.
Facial Brushes vs. Other Blackhead Removal Methods
When it comes to tackling blackheads, you have several options beyond facial brushes. Each method works differently and offers unique benefits and drawbacks depending on your skin type, sensitivity level, and how severe your blackheads are.
Working Principles of 7 Methods
1. Facial Brushes: These items use rotating or vibrating bristles to manually remove dirt and dead skin cells from the surface of your skin. The gentle scrubbing is effective in opening up pores by breaking up and flushing away the oil and dead skin that form blackheads.
2. Chemical Exfoliants (BHA/AHA): These have acids that dissolve the bond between dead skin cells. BHAs like salicylic acid are oil-soluble, so they go deep into pores to break up the oil and debris, causing blackheads. AHAs hit the skin more on the surface to smooth out the overall texture.
3. Manual Extraction: This is a straightforward process wherein clean fingers or extraction tools are applied to exert pressure around a blackhead, forcing the sebum plug and dead skin from the pore. The contents are manually removed from the skin.
4. Pore Strips: These adhesive strips are put on moist skin, usually on the nose. When dry, they adhere to the tops of blackheads and surface oil. When they're peeled off, they bring out the visible part of blackheads and surface grime.
5. Clay Masks: These work by drawing excess oil from the skin's surface and pulling impurities out of pores as the clay hardens. Drying brings debris to the surface, making blackheads less noticeable.
6. Professional Chemical Peels: Dermatologists apply more concentrated acids that penetrate deeper than store-bought products. Peels strip away multiple layers of skin cells, unclog plugged pores, and resurface with new cell growth.
7. Microdermabrasion: A salon treatment in which a machine that sprays small crystals on the skin or a diamond wand actually sands off the top layer of skin cells. The pores open up, and then a vacuum sweeps away the loosened waste.
Comparison of Blackhead Removal Methods
Method
Best For
Pros
Cons
Frequency of Use
Facial Brushes
Mild to moderate blackheads; oily skin types
Immediate visible results
Improves product absorption
Can be used with cleansers
One-time investment
Can irritate sensitive skin
Risk of over-exfoliation
Requires proper cleaning
May spread acne bacteria
2-3 times weekly
Chemical Exfoliants (BHA/AHA)
All skin types; BHAs especially good for oily, acne-prone skin
Gentler than physical methods
Penetrates deeper into pores
Prevents new blackheads
Improves overall skin texture
Takes time to see results
Can cause dryness
Increases sun sensitivity
May sting upon application
Daily to 3 times weekly
Manual Extraction
Visible, ready-to-extract blackheads
Immediate visible results
Targets specific blackheads
No product cost if using fingers
Risk of scarring and infection
Can cause broken capillaries
Temporary solution
Requires proper technique
As needed, not for regular use
Pore Strips
Nose and chin blackheads
Immediate satisfaction
Easy to use
Shows visible results
Only removes surface portion
Can damage skin barrier
May enlarge pores over time
Only works on certain areas
Once weekly at most
Clay Masks
Oily skin; mild blackheads
Gentle on skin
Additional skincare benefits
Helps prevent new blackheads
Reduces shine
Results not immediate
Less effective on stubborn blackheads
Can be drying
Requires consistent use
1-2 times weekly
Professional Chemical Peels
Moderate to severe blackheads; stubborn cases
Dramatic results
Professional guidance
Addresses multiple skin concerns
Deeper exfoliation
Expensive
Downtime required
Risk of burns or pigmentation
Not for very sensitive skin
Every 4-6 weeks
Microdermabrasion
Mild to moderate blackheads; thicker skin
Immediate texture improvement
No downtime
Helps with other skin concerns
Controlled exfoliation
Temporary redness
Multiple sessions needed
Less effective for deep blackheads
Expensive over time
Every 2-4 weeks
The most effective approach often combines methods—for example, using chemical exfoliants regularly with occasional facial brush use, supplemented by professional treatments a few times a year. Always introduce new products or tools gradually and pay attention to how your skin responds. What works best will depend on your skin type, sensitivity level, and the persistence of your blackheads.
8 FAQs about Facial Brush Blackhead Removal
Q1: Do facial brushes work for everyone?
No, facial brushes are not the same for everyone. They are best suited to individuals with normal to oily skin who do not have active acne or sensitive skin conditions such as rosacea or eczema. If your skin is dehydrated, sensitive, or fragile, facial brushes can be too harsh and potentially lead to redness or small tears in your skin. Start with the gentlest brush head and test on a small area first.
Q2: How often should I use a facial brush?
Most dermatologists suggest using a facial brush 2-3 times a week, leaving one day in between. Daily use can damage the natural defense barrier of your skin and lead to dryness, irritation, or even over-oiliness as your skin tries to protect itself. If you're new to facial brushes, start once a week and increase gradually as your skin gets used to it.
Q3: Can facial brushes prevent blackheads from coming back?
Blackheads can be reduced by facial brushes, but they will never stop altogether. Regularly using them washes away dead skin cells that can clog pores, but blackheads develop because of so many factors like oil production, the speed with which your skin cells shed, and genetics. For optimal effect, use your facial brush alongside oil-controlling products, for example, products with salicylic acid, and stick to a regular skincare routine.
Q4: What should I do if my skin gets irritated?
If your skin becomes red, sore, or sensitive because of using a facial brush, stop using it right away and allow your skin to heal. Use fragrance-free mild moisturizers and avoid other scrubs or peels until the irritation clears up. When you brush again, brush less often, press less hard, spend less time for each area, or switch to a softer brush head. If your skin continues to be irritated, consult a skin doctor since facial brushes might not be suited for your skin.
Q5: Which brush head is best for blackheads?
For blackheads, a "deep cleansing" or "pore cleansing" branded brush is generally used, which has slightly harder bristles to break up the dead skin and oil in pores more. If you do have sensitive skin, always opt for the mildest first and notice how you use it, not how hard the bristles are.
Q6: Should I use special cleansers with my facial brush?
You don't need special cleaners, but you don't want to use abrasive or gritty cleansers. Non-foaming, mild face washes work best with facial brushes since the brush itself will scrub. Do not use face washes that have beads or grains or face washes that have acids like glycolic or salicylic acid when you brush.
Q7: How do I know if my facial brush is clean enough?
A clean facial brush should appear free of any product, be stain-free, and not have a bad odor. Rinse thoroughly after every use until the water is clear, and dry it completely in a well-ventilated area. Change brush heads every 3 months or sooner if bristles become frayed, stained, or develop a bad odor.
Q8: Can I share my facial brush with others?
No, never share your face brush with anyone else, even when you change the head. Skin cells and bacteria are passed from person to person and can cause infection or pimples. Everyone must use a different gadget, even in the same house.
Find Your Perfect Blackhead Solution Today
Dealing with blackheads doesn't have to be complicated. Facial brushes work well for many people, but they're just one tool in your skincare toolkit. What works best really depends on your skin type, sensitivity, and how stubborn those blackheads are. Start with gentle methods and see how your skin responds. Mix and match approaches—maybe use a facial brush twice weekly along with a clay mask on the weekend. If you're still struggling, it might be worth chatting with a skin doctor for personalized advice. Remember, clear skin takes time and consistency. Be patient with your skin, adjust your routine when needed, and you'll find the right blackhead-fighting combination that works for you.

Keeping your teeth clean between brushing can be confusing with so many options available today. Most people wonder whether they should stick with traditional dental floss or invest in a modern water flosser for better results. Traditional string floss uses thin nylon to physically remove plaque between teeth, while water flossers use streams of pressurized water to wash away debris. The truth is, both methods work well—dentists agree that the best flossing method is simply the one you'll actually use every day.
What is Dental Floss?
Dental floss is a thin strand specifically designed to clean between your teeth where your toothbrush can't reach. Made primarily of nylon or Teflon (a type of polytetrafluoroethylene), these materials provide the perfect balance of strength and flexibility to slide between tight spaces without breaking or fraying.
Different types of dental floss are available to suit various needs:
Waxed floss: Coated with a light wax layer that helps it glide more smoothly between tight teeth contacts, making it less likely to shred or break. Ideal for people with closely spaced teeth.
Unwaxed floss: Thinner and made of many nylon strands twisted together. Some dental professionals believe unwaxed floss cleans more effectively because it doesn't have a slippery coating, though it may be more prone to breaking between tightly packed teeth.
Flavored floss: Available in mint, cinnamon, and other flavors to make the flossing experience more pleasant and leave a fresh feeling afterward.
Dental tape: Broader and flatter than regular floss, making it especially effective for people with wider spaces between teeth or those with dental bridges and other restorations.
Each type offers specific benefits depending on your teeth spacing, sensitivity level, and personal preference, but they all serve the essential purpose of removing plaque and food particles from between teeth that brushing alone can't reach.
How to Use Dental Floss Correctly
Getting the most from your daily flossing routine starts with proper technique. Many people floss regularly but miss out on the full benefits because of small technique errors. Here's how to floss effectively:
Step-by-Step Flossing Guide
1. Start with enough floss: Break off about 18-24 inches of floss. This gives you plenty to work with and allows you to use a fresh section for each tooth.
2. Hold it properly: Wind most of the floss around your middle fingers on both hands, leaving 1-2 inches of floss to work with between your hands.
3. Control with your thumbs and index fingers: Use your thumbs and index fingers to gently guide the floss between your teeth.
4. Use a gentle motion: Slide the floss between teeth using a gentle back-and-forth motion. Avoid snapping or forcing the floss, which can damage your gums.
5. Create a "C" shape: Once the floss reaches the gumline, curve it into a C-shape against one tooth and gently slide it into the space between the gum and tooth.
6. Clean thoroughly: Move the floss up and down against the side of each tooth, making sure to go slightly below the gumline where bacteria collect.
7. Use fresh sections: As you move from tooth to tooth, unwind fresh floss from your fingers. Using a clean section for each tooth prevents transferring bacteria between teeth.
8. Don't forget the back: Be sure to floss the back side of your last teeth as well.
Common Flossing Mistakes to Avoid
Snapping the floss: This can cut your gums and cause pain and bleeding. Always use gentle, controlled movements.
Not reaching the gumline: The most harmful bacteria hide just below the gumline. Make sure your floss curves slightly beneath the gum.
Using the same section of floss: This spreads bacteria from one area to another. Always move to a fresh section for each new tooth.
Flossing too quickly: Effective flossing takes time—about 2-3 minutes. Rushing through it leaves plaque behind.
Skipping teeth: Make sure to floss between all teeth, including those hard-to-reach back molars where food often gets trapped.
Why Traditional Flossing Remains Essential for Oral Health
Traditional dental floss continues to be a fundamental component of effective oral hygiene despite technological advances in dental care products. The following benefits highlight why this simple tool remains irreplaceable in maintaining optimal dental health.
Floss Reaches Where Your Toothbrush Can't
Traditional floss excels at removing plaque between teeth, especially in tight spaces where toothbrushes cannot reach. The physical contact of string floss against tooth surfaces provides superior mechanical cleaning of interdental areas, effectively dislodging stubborn bacteria and food particles that contribute to decay.
Floss Is Affordable and Easy to Find
As one of the most cost-effective oral hygiene tools available, traditional floss offers exceptional value for dental care. Found in virtually any pharmacy or grocery store, floss comes in various options to suit personal preferences without requiring electricity, batteries, or special equipment.
Take Floss Anywhere, Use It Anytime
The remarkable portability of traditional floss makes it ideal for maintaining interdental cleaning anywhere. Small enough to fit in pockets, purses, or travel kits, floss can be used on-the-go without special equipment or water sources.
Dental professionals consistently endorse traditional flossing technique as essential for comprehensive oral hygiene. Regular flossing helps prevent gingivitis by removing bacteria at the gumline and reduces the risk of more serious periodontal conditions.
What is a Water Flosser?
How Water Flossers Work
A water flosser (also known as an oral irrigator) cleans between teeth using a pressurized stream of water rather than string. The device delivers a targeted jet of water through a small spout or floss tip that you position around your teeth while leaning over a sink. This water pressure effectively dislodges food particles, plaque containing bacteria, and debris from between teeth and along the gumline. The gentle yet thorough cleaning action reaches into areas that are difficult to access with traditional brushing alone, including deep gum pockets.
Types of Water Flossers
Countertop Water Flossers
Countertop models connect to an electrical outlet and feature a water reservoir base with a handheld wand. These units typically offer:
Larger water capacity requiring less frequent refilling
More powerful and consistent water pressure
Multiple pressure settings for customized cleaning
Specialized tips for different needs (orthodontic, periodontal)
Greater stability during use
Cordless Water Flossers
Cordless models are compact, portable units powered by batteries or rechargeable systems. Their advantages include:
Travel-friendly design that fits easily in luggage
No need for electrical outlets
Convenient for small bathrooms with limited counter space
Easier maneuverability around the mouth
Simpler setup and maintenance
Both types can be particularly beneficial for people with braces, dental implants, crowns, or those with dexterity issues that make traditional flossing challenging. However, dental professionals generally recommend using water flossers as a supplement to, rather than a replacement for, traditional string floss for optimal oral health.
How to Use a Water Flosser Correctly
Step-by-Step Instructions
1. Fill the reservoir with lukewarm water (cold water may cause sensitivity).
2. Select the appropriate tip for your needs and attach it firmly to the handle.
3. Start with the lowest pressure setting, especially if you're a first-time user. You can gradually increase as you become comfortable.
4. Lean over the sink to avoid mess, keeping your mouth slightly closed around the tip.
5. Turn on the device while the tip is in your mouth to prevent water spraying.
6. Place the tip at a 90-degree angle to your teeth, about 1/4 inch away from your gum line (not directly against teeth).
7. Focus on the gum line where teeth and gums meet—this is crucial for effective cleaning and plaque removal.
8. Follow a methodical pattern: start with back teeth and work your way around, pausing briefly (2-3 seconds) between each tooth.
9. Close your lips slightly to prevent splashing while allowing water to flow out into the sink.
10. Turn off the device before removing it from your mouth.
Benefits of Water Flossers
They Are Easier for People with Special Needs
Water flossers are easier to handle for people with dexterity issues or arthritis. They work around braces and dental implants without getting caught or damaged. The simple technique requires minimal coordination, unlike the precision needed for string floss.
They Clean Hard-to-Reach Areas
Water flossers reach tight spaces between teeth that traditional floss might miss. They clean deeper periodontal pockets effectively, flushing out hidden bacteria. The water stream navigates easily around bridges, crowns, and other dental work.
They Are Gentler on Sensitive Gums
The pulsating water is gentler on sensitive or receding gums than string floss. Adjustable pressure settings let you customize cleaning intensity to your comfort level. Many users experience less bleeding and irritation when switching from traditional floss.
They Help Prevent Gum Disease
Regular water flossing helps prevent gum disease by removing harmful bacteria. The streaming action effectively disrupts and washes away plaque biofilm. Water flossers complement brushing in a complete oral hygiene routine for optimal health.
Dental Floss vs. Water Flossers: A Head-to-Head Comparison
Good oral hygiene goes beyond just brushing your teeth. Cleaning between teeth helps prevent gum disease and tooth decay. Traditional dental floss and water flossers are two popular options for this task.
Feature
Dental Floss
Water Flossers
Effectiveness
Physically scrapes away plaque; reaches tight spaces between teeth
Removes more plaque according to studies; better for cleaning around braces and dental work
Ease of Use
Requires good hand coordination; can be difficult to master
Simple to use; great for people with limited dexterity or braces
Cost
Very affordable ($2-5); minimal ongoing expense
More expensive upfront ($30-100+); needs replacement tips
Portability
Extremely compact; fits anywhere; no power needed
Bulkier; needs charging and water source
Maintenance
No maintenance; just dispose after use
Needs regular cleaning; parts wear out over time
Both dental floss and water flossers have their strengths. Traditional floss is cheaper and more portable, while water flossers are easier to use and better for people with braces or dexterity issues. Many dentists recommend using both: dental floss for its effective scraping action and water flossers for flushing out debris from hard-to-reach spots.
Not everyone finds traditional string floss easy or comfortable to use. While both methods can effectively clean between your teeth, certain situations make water flossers particularly helpful. Here's when you might want to consider choosing a water flosser for your daily routine:
If you have arthritis or dexterity issues, choose a water flosser with an ergonomic handle to make daily cleaning easier.
For children learning oral hygiene habits, water flossers are more engaging and simpler to master correctly.
When wearing braces or orthodontic appliances, use a water flosser with an orthodontic tip specifically designed for cleaning around wires and brackets.
If you find traditional flossing painful, try a water flosser or floss picks as gentler alternatives that still provide effective cleaning.
If you have dental implants, use a water flosser with specialized implant tips to clean around abutments without scratching them.
For seniors in assisted living, recommend water flossers to caregivers as they're easier to help with than traditional flossing.
When recovering from dental surgery, follow your dentist's recommendation, typically using a water flosser on the lowest pressure setting.
If you have consistently bleeding gums despite good technique, try combining methods—water floss first to loosen debris, then follow with string floss for thorough cleaning.
Choose Your Perfect Flossing Tool Today
Whether you pick regular floss, a water flosser, or both, what matters most is cleaning between your teeth every day. Regular floss is cheap and portable, while water flossers are easier to use and better for braces. Think about what works for your specific needs—do you travel a lot? Have trouble with hand movements? Wear braces? Not sure which to pick? Just ask your dentist at your next visit. The best tool is simply the one you'll actually use consistently, because regular cleaning between teeth keeps your smile healthy for years to come.

Keeping your nails healthy while achieving a perfect manicure can be challenging, especially when considering electric nail files as an option. Many nail enthusiasts wonder if these powered tools are worth the investment or if they might cause more harm than good. Electric nail files offer speed and convenience, but they also come with potential problems like nail damage, safety issues, and discomfort from vibration.
What is an Electric Nail File?
If you've seen a nail tech shape and buff nails with ease in a fraction of the time it would take you at home with a regular file, you're seeing an electric nail file in action.
An electric nail file (also called an e-file or nail drill) is a handheld motorized tool that spins interchangeable bits at varying speeds to file, shape, buff, and polish nails. Rather than back-and-forth physical movement such as manual files, electric files achieve the work by vibrating or rotating, which provides faster, more precise results with little physical effort. Most models feature variable speeds (typically 3,000 to 30,000 RPM) and are sold in corded or rechargeable battery-powered versions.
At the salon, nail technicians use e-files for numerous purposes like shaping and shortening artificial nails, gel polish removal, pre-application smoothing of the nail surface, and fine cuticle detail work. Electric files are particularly handy in salon use for creating crisp smile lines for French manicures and for getting into tight areas around the cuticles. For home users, less powerful and less complicated versions of the files help with general nail preparation, extension maintenance, and light buffing.
Common Disadvantages of Electric Nail Files
While proper training helps minimize risks with electric nail files, even experienced users face inherent challenges with these powerful tools. The very features that make e-files efficient—high-speed rotation and powerful motors—also create specific drawbacks that anyone considering their use should carefully weigh.
1. They Can Damage Your Nails
Filing too fast with e-files can thin nails before you realize it. This weakens the nail plate and may cause damage that takes months to heal. Misused e-files create painful "rings of fire" (red, inflamed skin) or nail dents. The worst damage happens when you hit the nail matrix (growth area under the cuticle), which can permanently deform nails.
2. They Can Malfunction and Cause Injuries
Corded e-files pose electrical risks, especially in wet salon environments. Some models overheat during long use, creating fire hazards or breaking mid-service. Rechargeable models avoid some electrical issues but have battery problems like declining performance over time.
3. They Create Uncomfortable Heat
High-speed rotation tends to create friction and heat naturally. Excessive pressure or speed distributes this heat to the nail bed, resulting in anything from warm temperature to stinging burning. This heat can make nails brittle or even separate from the nail bed, especially on thin nails or when using dull bits.
4. They Vibrate and Hurt Your Hands
Vibration affects clients and nail technicians alike. Clients will experience discomfort or pain, especially those who have sensitive hands or arthritis. For technicians, repeated exposure results in hand tiredness during the treatment and leads to carpal tunnel syndrome or tendonitis over time.
5. Low-Quality Models Increase Risks
Professional e-files are totally different from economical consumer models. Economical models have poor speed control, which makes precision difficult to obtain and which also increases the risk of damage. Economical bits wear out faster, require more pressure, and generate more heat and vibration. Poor ergonomics of cheaper models implies hand fatigue and trouble with fine work.
Misconceptions About Electric Nail Files
1. "Electric Files Always Damage Nails"
One of the oldest myths is that e-files necessarily damage natural nails. Damage does happen, but not as a mechanism designed into the tool. Properly used professional e-files are actually gentler on nails than abrasive manual filing techniques. The precision of e-files allows trained technicians to work only on the exact areas that need attention and not waste time filing over the entire nail surface unnecessarily. Most nail technicians have successfully utilized electric files for several years without client damage, illustrating that the equipment itself is not necessarily damaging.
2. "The Tool Is Dangerous, Not The User"
Nail damage, when it does occur with electric file use, is generally due to a technique misuse and not due to the tool being defective. Some of the typical mistakes made by users include:
Exerting too much pressure (the bit should do the work, not force)
Selecting inappropriate speed settings (higher isn't always better)
Using the wrong bit for the task at hand
Holding the file in one spot for too long
Filing in the wrong direction against the nail grain
These are mistakes that can be made with any tool, but the power of electric files just amplifies the damage. Just like a power saw is more demanding than a hand saw, electric files require proper respect and technique skills.
3. "Anyone Can Learn To Use Them Quickly"
The second misconception is that electric nail files are intuitive tools anyone can master by watching some YouTube videos. The reality is that an effective e-file technique requires formal training and lots of practice. Professional nail technicians may take months or weeks to develop their skills before they are fully confident. Learning involves understanding:
How different bits function and when to use each type
Proper hand positioning and tool angles
How to maintain control at various speeds
Recognizing when to stop filing based on visual and tactile feedback
The majority of nail technicians recommend that beginners start by practicing on artificial tips or themselves first, then practice on clients, slowly building speed and confidence over time.
4. "More Expensive Means Safer"
While quality matters with electric files, price alone doesn't guarantee safety. Some mid-range models offer excellent control features and reliability, while certain expensive models may still cause damage in untrained hands. More important than price is selecting a file with appropriate features for your skill level, including adequate speed control, minimal vibration, and ergonomic design. Even the most basic model can be safe when used with proper technique and respect for the tool's capabilities.
Factors That Exacerbate Disadvantages
You've probably heard both sides of the electric nail file debate—some say they're perfectly safe while others warn they'll ruin your nails. The reality? These tools aren't automatically good or bad. Here's what actually makes these tools risky so you know what to watch out for:
Poor Training Causes Most Damage: Without proper training, users apply too much pressure, hold the file at the wrong angles, and use inappropriate speeds. Professional nail techs need specialized e-file courses, not just general nail education. Home users should learn proper techniques before attempting to use them.
Cheap Tools Are More Dangerous: Low-quality electric files often lack precise speed controls and have inconsistent motors that cause unexpected speed changes. They typically vibrate more, reducing control and increasing hand fatigue. Choose models from established manufacturers with safety certifications, even if they cost more.
Using Wrong Bits Harms Nails: Using incorrect bits for specific tasks increases damage risk. Coarse-grit bits can quickly thin natural nails. Metal bits generate excessive heat. Worn bits require more pressure, causing more heat and potential damage. Each bit type—carbide, diamond, ceramic—has a specific purpose that users must understand.
How to Use Electric Nail Files Safely to Minimize Risks
Don't worry—electric nail files aren't as scary as they might sound. You can use them safely and get great results if you know what you're doing. The very things that can cause problems—the speed, power, and special bits—are actually what make these tools so effective when used correctly.
1. Learn How to Use Your E-File First: Don't just wing it with your e-file! Take time to learn proper techniques through online courses, YouTube tutorials from licensed professionals, or in-person workshops. Even a single lesson will significantly enhance your skills and safety. Begin with the fundamentals of how to hold the handpiece and know various bit types before trying advanced techniques.
2. Buy Good Quality Tools for Safety: A good electric nail file need not be expensive, but steer clear of the lowest priced ones. Find ones with smooth speed transitions (not merely high/low) and ergonomic grip designs that minimize hand fatigue. The best e-files have little vibration and even power output, making them simpler to control.
3. Press Lightly and Keep Moving: Let the tool do the work instead of pressing hard—light, gentle movements prevent heat buildup and nail damage. Keep the file moving constantly rather than lingering in one spot, and take breaks to check your progress. When in doubt, slow down! Lower speeds give you more control and reduce risks.
4. Clean Your Tools After Each Use: Keep your bits clean after every use by swabbing off dust and debris—this easy habit stops excessive friction and heat. Change bits when they get dull or worn out, typically every few months with frequent use. Clean your handpiece once a week and inspect the cord (if it is corded) for damage
FAQs About Electric Nail Files
Q1: Are electric nail files safe for beginners?
Electric files can be safe for beginners if they start off with training. Choose a beginner-friendly model with lower speeds (less than 15,000 RPM) and practice on artificial tips first, not your real nails. Start with the lowest speed and use light pressure. Take a class or watch step-by-step tutorials from professional nail technicians before first use.
Q2: How do I avoid overheating while using an e-file?
To prevent overheating, don't leave the bit in one position for more than a few seconds. Apply light pressure—let the bit do the work instead of applying pressure to it. Rest every 15-20 seconds to let the nail cool. If the nail feels warm to the touch, stop using it immediately. Lower your speed setting and make sure that you are using the appropriate bit for the task at hand. Clean bits from time to time, as accumulated debris causes friction and heat.
Q3: What should I look for when buying an electric nail file?
Look for variable speed controls to 3,000 RPM for precision applications. Choose a low-vibration model to prevent hand fatigue. If for professional work, choose one with a powerful motor (at least max 30,000 RPM) that can handle all-day use. Choose one that accepts standard-sized bits for more flexibility. Look at weight and ergonomics—the file must be easy to hold.
Q4: How often should I replace the bits?
Change bits when they become worn or when there is visible wear. In professional use, carbide bits will last 3-6 months with a good cleaning, and diamond and ceramic will last 6-12 months depending on usage. Bits have a longer life in homeowner use. Using dull bits puts more pressure and excessive heat buildup on the nails, damaging them.
Q5: Can electric files be used on natural nails?
Yes, but with caution. Use fine grit bits (180 grit or higher) at low speeds (less than 10,000 RPM) on natural nails. The e-file should touch the nail surface lightly—use it to smooth and buff only, never cut length or thickness. Manual files are used most often by professionals on natural nails to prevent breaking them.
Use Electric Nail Files Right and Get Amazing Results
Don't let the risks scare you away! With the right approach, electric nail files transform your manicure routine from tedious to professional in minutes. The key? Proper training, quality equipment, and smart technique. Choose the perfect speed settings, use the correct bits for each task, and maintain a gentle touch. You'll slash your manicure time in half while achieving precision that manual files simply can't match. Whether you're a DIY enthusiast or a budding professional, these powerful tools deliver flawless results when used correctly. Take control of your nail game today and experience the difference proper e-file skills make!

Keeping your skin clean and healthy can feel like a challenge, especially when you're unsure about which tools work best for your specific needs. Many people struggle with stubborn makeup residue, clogged pores, and dull skin despite regular washing. Facial cleansing brushes offer a solution by providing deeper cleansing than hands alone, but knowing when and how to use them makes all the difference. These handheld devices work through gentle vibrations or soft bristles to remove impurities that regular washing might miss. Evening use typically works best since your skin collects dirt, oil and pollution throughout the day, and using the brush 2-3 times weekly helps maintain that healthy glow without risking irritation or over-exfoliation.
What Exactly is a Facial Cleansing Brush?
A facial cleansing brush is a handheld skincare tool designed to give your face a deeper clean than washing with your fingers alone. These devices typically feature either soft bristles or silicone touchpoints that move across your skin—some rotate in circles while others pulse with gentle sonic vibrations. The motion helps remove makeup residue, dead skin cells, and dirt that regular washing might miss. You'll find different types to choose from: traditional brushes with nylon bristles that rotate, gentler silicone models that vibrate, and even hybrid options. The right choice depends on your skin's needs—sensitive skin generally does better with softer silicone versions, while oilier skin might benefit from more thorough bristle cleansing.
When to Use Your Facial Cleansing Brush
Now that you know what a facial cleansing brush is, let's talk about when to use it for the best results. Using it at the right time can make a big difference for your skin.
Why Nighttime Is Often Best
Using your facial brush at night helps remove all the dirt, oil, pollution, and sunscreen that builds up on your skin during the day. This deep clean creates a fresh surface for your nighttime face creams and serums to work better. Your skin also naturally repairs itself while you sleep, so cleaning well before bed helps this process.
Can You Use It in the Morning?
You can use your facial brush in the morning to wash away oils that form on your skin overnight and to create a smooth base for makeup. However, using the brush twice a day might clean your skin too much and cause irritation over time. For most people, using a facial cleansing brush once a day—usually at night—works best and keeps skin healthy.
How Often Should You Use It?
Now that you know the best time of day to use your facial cleansing brush, let's tackle another key question: how often should you use it? While nighttime use is generally ideal, the frequency of use depends on several factors unique to you and your skin.
Key Factors Influencing Frequency
Your skin type plays a major role in how often you should use a facial brush. Oily skin often tolerates more frequent use, while dry or sensitive skin needs less. The type of brush matters too—a silicone brush is typically gentler than bristle brushes, making it better for more regular use. Pay attention to how your skin responds, as everyone's skin tolerance is different.
General Guidelines & Listening to Your Skin
Start slowly with your facial brush, using it just once or twice a week. If your skin handles this well, you can gradually increase to 2-3 times weekly, which works well for most people. Some with very resilient skin may use it daily, but this isn't necessary for most. Watch for warning signs of overuse: redness, irritation, unusual tightness, dryness, or increased sensitivity. If you notice these signs, cut back on how often you use your brush and give your skin time to recover.
Is a Facial Cleansing Brush Right for Your Skin?
Facial cleansing brushes help some people get clearer skin but can cause problems for others, so you should check if one works for your skin type before buying it..
Who Benefits Most?
Not everyone needs a facial cleansing brush. These tools work best for:
People with oily skin who need help removing excess oil
Those with clogged pores looking for deeper cleaning
Anyone with dull skin who wants gentle exfoliation
Regular makeup wearers who need help removing all makeup residue
People whose skin doesn't get irritated easily
When to Be Cautious or Avoid
Some people should skip using these brushes or be extra careful:
People with very sensitive skin that gets red or irritated easily
Those with active, inflamed acne (brushes can spread bacteria)
Anyone with skin conditions like rosacea, eczema, or psoriasis
People with sunburned skin or open wounds
Those taking medications that make skin more sensitive
How to Use a Facial Cleansing Brush Correctly
Once you've decided whether or not a facial cleansing brush is suitable for your skin type, learning how to use the right technique is important to get maximum benefits while remaining irritation-free. Even individuals with suitable skin types can be at risk of issues if they improperly use these tools, so the correct steps can be a lifesaver.
Preparation Steps
Start by wiping off all heavy makeup with a makeup remover or micellar water before using your brush. Wet the face and brush the head with lukewarm water, not hot water, because it can irritate your skin. Apply a gentle, nonabrasive cleanser directly on either the face or brush head; gel or cream cleansers tend to work well together with facial brushes.
The Cleansing Process
Turn on your brush and gently move it over your skin in small circular motions without pressing hard. Divide your face into zones—forehead, cheeks, and nose/chin area—spending about 20 seconds on each zone. Keep the total cleansing time to around 60 seconds (or follow your device's specific instructions), and always avoid the delicate skin around your eyes. After cleansing, rinse your face thoroughly with lukewarm water and pat dry with a clean towel. Apply your serums and moisturizers immediately after to hydrate freshly cleansed skin.
Brush Care
Wash your brush head clean after every use following the manufacturer's directions to avoid bacteria accumulation. All but one need rinsing with running water and periodic deep cleaning with mild soap. Always dry the brush head in the air completely before storage to avoid mold and bacteria development.
What a Facial Cleansing Brush Can Do for Your Skin
Proper technique with your facial cleansing brush isn't just about avoiding irritation—it's also about maximizing the many benefits these tools can offer. When used correctly as outlined in the previous section, facial cleansing brushes can transform your skincare routine with several important advantages.
Better Cleaning Than Hands Alone
Facial cleansing brushes remove dirt, oil, and makeup much more effectively than washing with your hands alone. The brush's movement helps dislodge impurities from pores that fingers simply can't reach, leading to fewer breakouts and clearer skin over time.
Natural Skin Renewal
The brush gently removes dead skin cells from the surface of your skin without harsh scrubbing. This gentle exfoliation helps smooth rough patches and prevents the dullness that comes when old skin cells build up on your face.
Brighter, Fresher-Looking Skin
By removing both surface impurities and dead skin cells, facial cleansing brushes help reveal the fresher skin underneath. This process leads to a more vibrant complexion with regular use, as your natural skin tone appears more even and healthy.
Better Absorption of Your Skincare Products
Clean, freshly exfoliated skin absorbs creams and serums more effectively. After using a facial cleansing brush, your moisturizers and treatments can work better because they penetrate deeper into the skin, potentially giving you better results from the products you already own.
The Other Side of the Coin: When Facial Brushes Cause Problems
While facial cleansing brushes provide better benefits like deeper cleaning and improved product absorption as we've seen, they're not without their cons. Being aware of these possible issues—and how to avoid them—means you'll get all the benefits and none of the drawbacks.
Irritation and Redness
Pressing too hard or choosing the wrong brush for your skin type can leave your face feeling raw and looking red. To keep your skin happy, use a light touch, start with the gentlest setting, and select a soft brush head that matches your skin's sensitivity level.
The Over-Exfoliation Problem
Just like too much chocolate can get you ill, over-exfoliating can damage your skin's natural barrier. This leads to dryness, sensitivity, and redness that cancels out the efforts your skincare routine is making. Start using your brush once or twice a week initially, and hear your skin out when it comes to frequency.
Preventing Broken Capillaries
Scrubbing too aggressively—especially around delicate areas—can break tiny blood vessels under the skin, creating permanent red marks. Keep your movements light and circular, avoid the eye area completely, and if you notice persistent redness, take a break from using your brush.
Keeping Bacteria at Bay
A wet brush head is a five-star hotel for bacteria, which will cause breakouts when they are transferred onto your skin. Clean your brush after use, let it air dry completely in an open well-ventilated area, and replace the brush head every so often as advised by the manufacturer.
Using Your Facial Brush for Better Skin
Getting great skin doesn't have to be hard. A facial cleansing brush can make a big difference when used right. The key is simple: use it in the evening, about 2-3 times a week, with gentle circles. Pay attention to how your skin reacts and adjust as needed. This tool should help your skin, not hurt it. Want better results? Choose a brush that fits your skin type, follow our tips, and watch your skin become clearer and healthier. Your skin deserves good care—start today!

Quick Answer
No, water flossers cannot remove tartar once it has hardened on your teeth. While they excel at washing away loose plaque and preventing tartar formation by cleaning hard-to-reach areas, only dental professionals can remove existing tartar deposits using specialized scaling instruments during professional cleanings.
Introduction
Maintaining good oral health is a top priority for many people, and dealing with tartar buildup is a common concern. Water flossers have become increasingly popular dental tools that many wonder if they can remove stubborn tartar deposits. While water flossers excel at washing away plaque and preventing tartar formation, they cannot remove hardened tartar that has already formed on teeth. Understanding the difference between plaque and tartar is essential for developing an effective oral care routine that keeps your smile healthy and bright.
What is Dental Plaque?
Dental plaque is a sticky, colorless or pale yellow film that constantly forms on your teeth throughout the day. It's made up of bacteria, food particles, and saliva that naturally collect on tooth surfaces. Think of plaque as an unwelcome guest that moves in on your teeth after you eat or drink.
When you consume foods and beverages—especially those containing sugars and starches—the bacteria in your mouth feed on these particles and produce acids. These acids can attack your tooth enamel, the protective outer layer of your teeth, which is the first step in cavity formation.
If plaque isn't removed daily through brushing and flossing, it can lead to several dental problems:
Tooth decay (cavities): The acids produced by plaque bacteria gradually erode tooth enamel, creating holes in your teeth.
Gingivitis: This early stage of gum disease occurs when plaque builds up along the gumline, causing inflammation, redness, and bleeding when you brush.
Bad breath: The bacteria in plaque release unpleasant-smelling compounds that contribute to bad breath.
The good news is that plaque is soft and can be removed with proper daily oral hygiene. Regular brushing (twice daily), flossing, and using a tool like a water flosser can effectively disrupt and remove plaque before it hardens into tartar, which is much more difficult to remove.
What is Tartar (Dental Calculus)?
Tartar, also known as dental calculus, is what happens when plaque overstays its welcome on your teeth. It's the hardened, calcified form of plaque that firmly attaches to your tooth surfaces and can appear as yellow, brown, or even black deposits. Unlike plaque, which is soft and colorless, tartar is mineral-rich, rough-textured, and often visible to the naked eye.
The transformation from plaque to tartar happens through a process called mineralization. Here's how it works: The minerals in your saliva—primarily calcium and phosphate—naturally begin to combine with the sticky plaque on your teeth. Over time, usually within 24-72 hours of plaque formation, these minerals crystallize and harden the plaque into tartar. Think of it like cement setting—once it hardens, it's not coming off easily.
Tartar typically builds up in predictable locations in your mouth:
Along the gumline (where your teeth meet your gums)
Between teeth, especially in tight spaces that are harder to clean
Around dental work like crowns or bridges
Behind your lower front teeth, where saliva glands release minerals
What makes tartar particularly problematic is that its rough, porous surface creates the perfect environment for even more plaque to accumulate. It's like a vicious cycle—tartar forms, collects more plaque, which then turns into more tartar. Additionally, the rough texture can irritate your gums, potentially leading to more serious gum disease over time.
Unlike plaque, which you can remove at home with good oral hygiene, tartar can only be safely removed by dental professionals using specialized instruments during a professional cleaning.
Why Tartar is a Major Concern
Tartar buildup isn't just an aesthetic issue—it's a serious dental health concern that can lead to several problems if left untreated.
Gum Health Problems
When tartar forms along and below your gumline, it creates a rough surface that irritates your sensitive gum tissue. It typically leads to gingivitis, the early stage of gum disease characterized by red, swollen, and bleeding gums. If untreated, it can progress to periodontitis, the later stage of gum disease where the gums pull away from the teeth, creating pockets that become infected. Later on, this infection can damage the bone and tissues that support your teeth and even lead to tooth loss.
Increased Tooth Decay Risk
Tartar creates the perfect environment for harmful bacteria to thrive. These bacteria produce acids that eat away at your tooth enamel, increasing your risk of developing cavities. The rough surface of tartar also makes it easier for more plaque to accumulate, creating a continuous cycle of dental damage that becomes increasingly difficult to manage.
Persistent Bad Breath
The bacteria that live in tartar deposits release foul-smelling chemicals as they feed and multiply. This can cause chronic bad breath (halitosis) that doesn't get better with brushing, flossing, or mouthwash. If you're developing chronic bad breath despite good oral hygiene, tartar buildup might be the culprit.
Noticeable Tooth Discoloration
Tartar is usually yellow or brownish deposits on your teeth, most often along the gumline. As it builds up, it can really impact the appearance of your smile. Unlike surface stains from tea or coffee that can be minimized with whitening products, tartar staining cannot be removed with at-home treatments—it needs professional cleaning.
Complications Beyond Your Mouth
There is increasing evidence that tartar bacteria can cause health issues outside of your mouth, including heart disease, diabetes complications, and respiratory infections. While the exact links are still being studied, a tartar-free mouth is increasingly recognized as an important part of overall health.
The good news is that tartar can be efficiently eliminated through routine professional dental cleanings before it causes severe problems, and proper daily oral hygiene can significantly decelerate the rate at which it forms in the first instance.
How Do Water Flossers Work? The Science Explained
Mechanism of Action
Water flossers, also known as oral irrigators, use a surprisingly simple but effective technology to clean your teeth. These devices deliver a concentrated, pulsating stream of water through a specialized tip, creating a combination of water pressure and pulsation that works wonders for your oral health.
When you aim this pressurized water stream at your teeth and gums, several things happen simultaneously:
The water forcefully flushes out food particles trapped between teeth and below the gumline
The pulsating action creates a hydrokinetic effect that disrupts bacterial biofilms (the organized communities that make up plaque)
The water reaches areas that traditional brushing and string flossing often miss, like deep periodontal pockets
Think of it like power-washing your teeth—the water stream physically dislodges debris while the pulsations create tiny bubbles that burst and help break up the sticky plaque biofilm. Most water flossers allow you to adjust the pressure (typically between 10-100 PSI) to suit your comfort level and specific needs.
Proven Effectiveness in Plaque Removal
Water flossers truly shine when it comes to removing loose debris and disrupting newly-formed plaque, especially in places that are challenging to clean with traditional methods.
Water flossers are particularly beneficial for:
People with braces or dental work like bridges and implants
Those with limited dexterity who struggle with string floss
Individuals with sensitive gums who find traditional flossing uncomfortable
Anyone with periodontal pockets (spaces between teeth and gums)
The pulsating action of water flossers reaches up to 4-5mm below the gumline—areas that harbor harmful bacteria but are difficult to clean with other methods. This makes water flossers excellent tools for preventing gingivitis and maintaining gum health.
While water flossers excel at removing loose plaque and food particles, it's important to understand their limitations when it comes to tartar, which we'll explore in the next section.
Can a Water Flosser Remove Tartar?
Water Flossers Cannot Remove Hardened Tartar
Water flossers cannot remove tartar (also called dental calculus) once it has formed on teeth. Tartar is a hard, crusty substance that develops when soft plaque stays on teeth too long and mixes with minerals from your saliva.
Why Water Pressure Isn't Enough
Tartar firmly bonds to tooth enamel in a way that water pressure is not able to dislodge. The hardened material needs special dental tools that possess the ability to physically scrape it off the tooth surface. No matter how high you dial the pressure on a water flosser, it simply is not able to provide the physical force needed to remove these hardened deposits.
Not a Substitute for Professional Cleaning
Think of water flossers as prevention, not as a means to treat already existing tartar. Professional dental cleaning from dentists or dental hygienists is the sole method of effectively removing tartar. Dentists and hygienists utilize specialized equipment that is designed to safely scrape away the tartar without hurting your teeth.
Marketing Claims vs. Scientific Evidence
Some water flosser companies might hint their products help with tartar, but science doesn't back up claims about tartar removal. Research shows water flossers are excellent for washing away plaque and preventing tartar from forming in the first place, but they can't remove tartar that has already hardened on your teeth. Dentists and dental organizations consistently point out this limitation, even while recognizing the many other benefits water flossers offer for keeping your mouth clean.
Does Water Flossing Prevent Tartar?
Yes, water flossing effectively prevents tartar by removing plaque before it can harden. By washing away plaque daily, water flossers help keep your teeth clean and tartar-free.
Stopping Plaque Before It Hardens
Water flossers flush away soft plaque from tooth surfaces, between teeth, and along the gumline. Daily use of a water flosser prevents this sticky film from hardening into tartar.
Water Flosser vs. String Floss for Prevention
Water flossers and string floss both help prevent tartar, but in different ways. Water flossers use streams of water to fire off plaque and food debris, deeper between gums (up to 6mm) and between braces and bridges. String floss strikes tooth surfaces directly and has the capability of pulling out plaque from areas in between tight teeth where water may not be able to get to as easily. Most dentists recommend doing both methods for the most thorough cleaning, although what works best is up to your teeth, ability, and dental work.
Why Choose Water Flossers? Benefits Beyond Basic Cleaning
Preventing tartar is perhaps the greatest benefit of water flossers, yet they help your mouth in many other ways too. Water flossers provide many health benefits that make them a great addition to your daily cleaning routine.
Better Gum Health
Water flossers reduce gum disease and bleeding since they wash away destructive bacteria from your gumline and between your teeth. Gentle pulses of water clean and also maintain healthy gums.
Cleaning Hard-to-Reach Areas
For people with braces, implants, bridges, or tight teeth, water flossers get into spaces where ordinary floss might have a hard time. The water stream can navigate around brace wires, under bridges, and between tightly fitting teeth to remove food and bacteria that tend to get stuck there. Dentists often prescribe water flossers for patients with these kinds of dental issues.
Gentler Alternative
The majority of people find water flossers more comfortable to use than string floss, especially those with receding or sensitive gums. The water stream cleans efficiently without the pain that can be caused by improperly using string floss. This cleaner, yet gentler, cleaning motivates people to stick to it more regularly, which leads to better mouth health.
Easy to Use
Water flossers benefit those who struggle with their hands, arthritis, or coordination problems who have trouble using string floss. The simplicity of design makes daily cleaning easier for many users, including children, the elderly, and people with physical disabilities. Because they are simpler to manipulate, users are more likely to floss daily.
How is Tartar Actually Removed? The Professional Solution
While water flossers help prevent tartar buildup, only dental professionals can remove tartar once it forms on your teeth. Regular visits to your dentist remain essential for maintaining optimal oral health.
Expert Care: What Dentists and Hygienists Provide
Dental professionals are the only ones who can safely and effectively remove tartar from your teeth. They possess the requisite training, the appropriate tools, and the expertise to scale off hardened deposits without damaging your tooth enamel or your gums. Attempting to get rid of tartar at home with non-dental tools has the potential to scratch your enamel, hurt your gums, and cause more damage than benefit.
Professional Dental Cleaning
During a professional cleaning, your dental hygienist or dentist will perform a process called scaling to remove tartar. They use either hand-held metal instruments called scalers or ultrasonic devices that use vibration to break up and remove tartar deposits. These tools can reach above and below the gumline where tartar often accumulates.
When all of the tartar is gone, your dental professional will brush your teeth with a slightly abrasive paste. This polishing helps to smooth the surface of the tooth, making it harder for new plaque to stick and easier for you to clean between visits. The final result is not only cleaner teeth but also fresher breath and healthier gums.
Why Regular Appointments Matter
Most dentists recommend cleanings every six months for the average person. Some people, though, need more frequent cleanings, such as those with:
A history of gum disease
Heavy tartar buildup
Certain medical conditions like diabetes
Smoking habits
Your dentist will recommend a cleaning schedule based on your individual needs. Following this schedule helps prevent excessive tartar buildup and catches any developing dental issues before they become serious problems. Even with excellent home care using water flossers and brushing, these professional cleanings remain necessary to remove tartar that inevitably forms in hard-to-clean areas.
Keep Your Smile Tartar-Free with Smart Water Flosser Habits
Water flossers can't eliminate tartar once it's formed, but they're excellent at preventing it from occurring in the first place by rinsing away plaque each day. For the healthiest smile, use your water flosser daily and continue to see your dentist on a regular basis for professional cleanings to scrape away any tartar that builds up. It's this team effort—your daily water flossing and professional care—that keeps your gums healthier, breath fresher, and smile brighter. Start with a water flosser today, select one that meets your needs, and follow those dental appointments to maintain your oral health at its optimum for the coming years.

A healthy smile is not only about looks—it reflects your state of being. Having great oral hygiene helps avoid cavities, gum disease, and other issues with your teeth. Brushing your teeth every day is good, but an entire oral care regime needs more than a toothbrush.
These are the top three dental care necessities you must never miss to achieve a healthy and glowing smile.
1. Electric Toothbrush and Fluoride Toothpaste
Brushing your teeth twice a day is essential for maintaining good oral hygiene. While both manual and electric toothbrushes can effectively remove plaque and food debris, an electric toothbrush offers enhanced cleaning power with its oscillating or sonic movements. Choosing a toothbrush with soft bristles is key to protecting your gums and enamel. Coslus electric toothbrushes are designed with gentle yet efficient bristles that provide a deep clean while ensuring gum health.
Equally important is the toothpaste you use. Fluoride toothpaste helps strengthen enamel, prevent cavities, and fight tooth decay. Look for one with the American Dental Association (ADA) seal to ensure its safety and effectiveness.
Pro Tips:
Change your toothbrush or brush head every three to four months.
Brush using gentle, circular strokes to prevent gum recession.
Brush for a minimum of two minutes to ensure good cleaning.
2. Dental Floss or Interdental Cleaners
Brushing will only remove about 60% of your teeth's surface. Flossing is needed to dislodge plaque and food particles from between teeth and below the gumline, areas inaccessible to toothbrushes. Daily flossing prevents cavities, gum disease, and bad breath.
For those with difficulty using conventional floss, water flossers or interdental brushes can be excellent alternatives. These devices are particularly helpful for individuals with braces or dental hardware such as bridges and implants. With high-quality dental floss, cleaning between the teeth is made easy and efficient, minimizing plaque and improving gum health.
Pro Tips:
Floss daily, ideally at bedtime.
Take 18 inches of floss and wrap the majority around your fingers, leaving a new section for each tooth.
When using a water flosser, direct the stream of water at a 90-degree angle to your gumline to achieve the best cleaning.
3.Antimicrobial Mouthwash
A good antimicrobial mouthwash does more than freshen breath—it kills bacteria that create plaque, gingivitis, and bad breath. Mouthwash gets where brushing and flossing may not, adding a little extra protection.
Mouthwashes containing fluoride also harden enamel and protect against cavities. If you have sensitive gums or dry mouth, though, an alcohol-free formula is a better choice, as alcohol-based mouthwashes can cause irritation.
Pro Tips:
Rinse with mouthwash following brushing and flossing for a minimum of 30 seconds.
Do not eat or drink for 30 minutes after fluoride mouthwash use.
Ask your dentist for advice specific to your oral health requirements.
Conclusion
A regular and thorough oral hygiene practice is the secret to a healthy smile. Brushing with fluoride toothpaste, daily flossing, and antimicrobial mouthwash are three steps you must never miss. Combine these with routine dental check-ups, a healthy diet, and adequate hydration to maintain long-term oral health. Keeping your teeth healthy today means less dental trouble and a whiter smile tomorrow

Living with crooked teeth affects your confidence and smile. It also stirs N number of problems like cavities, gum diseases, plaque buildup, bad breath, fungal infections, and more. The way to move forward is by opting for braces. Now, there's a lot of terror surrounding braces, and as exciting as it is to have a healthy smile, it’s important to set an oral health routine to improve your entire orthodontic experience.
This blog post will discuss a few tips to maintain your oral hygiene before getting braces.
Importance of Oral Care Before Getting Braces
Before beginning braces treatment, it is crucial to take care of your teeth and gums. Any existing dental issues like cavities or gum diseases can worsen the braces thereby making the treatment more complicated. From preventing decay, and reducing the risk of cavities surrounding the braces wires, and brackets.
Additionally, healthy gums will diminish inflammation and bleeding which can occur due to braces pressure. A healthy mouth can also aid the orthodontist in aligning the braces more accurately which can result in reduced treatment time.
Essential Oral Care Steps Before Getting Braces
Now that we have understood the importance of oral care, let us understand what are the essential steps we can take before starting the orthodontic treatment.
1. Setting up The First Appointment With Orthodontist
Make an appointment for a consultation with your orthodontist before beginning your orthodontic journey. Your teeth will be examined, X-rays will be taken, and your treatment choices will be discussed during this appointment. Any queries you may have concerning the procedure, such as the length of treatment and expenses, will also be answered by the orthodontist.
2. Healthy Gums
Making sure your teeth and gums are healthy is an important step before receiving braces. This entails making an appointment for a dental examination and cleaning. Untreated dental conditions, such as cavities or gum disease, can make orthodontic therapy more difficult.
3. Changing Dietary Habits
Making dietary changes is crucial when getting ready for braces. Avoid hard, sticky, or chewy foods that can harm braces. It may be simpler to follow the new dietary guidelines after getting braces if you modify your eating habits in advance.
4. Braces Discomfort
Although receiving braces is usually painless, some soreness is to be expected both during the application process and after alignment. To handle any discomfort, be ready with orthodontic wax and over-the-counter pain medications. It can also be relieved with warm salt water rinses.
5. Tools for Oral Hygiene You May Need
Toothbrushes & Toothpaste To clean around braces, use a toothbrush with soft bristles. Using fluoride toothpaste to brush after every meal helps keep teeth healthy and prevent cavities.The Coslus Electric Toothbrush is a great option, offering 5 pressure settings and a double-curved blade that fits the shape of your teeth for efficient cleaning.
Interproximal Brush Wearing braces makes flossing more difficult, but an orthodontic flosser or floss threader can help you clean in between your teeth more efficiently. For an even simpler option, try a water flosser. The Coslus Speed Control Water Flosser offers 10 adjustable speed settings for a precise and comfortable cleaning experience. It’s a perfect addition to any oral care routine.
Dental Picks and Sticks Dental picks and sticks are useful for cleaning your braces by eliminating food particles from the area surrounding the wires and brackets.
Mouth Rinse After brushing and flossing, use a fluoride mouth rinse to keep your mouth fresh and add an additional layer of protection against decay.
6. Mental and Emotional Preparation
Being mentally and emotionally ready can help the procedure go more smoothly. Getting braces can be a big step. Spend some time learning about the process of receiving braces before beginning treatment. Anxiety can be decreased by being prepared. To learn more about the process, the many kinds of braces that are available, and the anticipated length of treatment, consult your orthodontist.
Don't forget to have reasonable expectations. It's not an easy solution. Treatment with braces may take months or even years. It's crucial to exercise patience and keep in mind that the outcome will make the wait worthwhile. Recognize that discomfort is possible, particularly following modifications. You can prepare yourself psychologically for these situations by being aware of this beforehand.
Final Thoughts
It is crucial to prioritize your dental health for the immediate and long-term health of your teeth and gums before obtaining braces. You can reduce difficulties and improve your orthodontic treatment by developing a solid foundation in dental hygiene.
Keep in mind that maintaining your dental health today will reap the long-term benefits. Years down the line, you will thank yourself for not giving up on the treatment. It can help you get the smile of your dreams and have a more positive and successful braces experience.

Quick Answer
Yes, sonic toothbrushes are generally better than manual toothbrushes, with studies showing they can remove about 10% more plaque and are particularly effective for people with braces or limited hand mobility. While they have a higher upfront cost, their high-frequency vibrations (24,000+ strokes per minute) combined with proper brushing technique provide superior cleaning in hard-to-reach areas while being gentler on gums, though remember that good oral health still depends more on consistent dental habits than the tool itself.
Introduction
Ever wondered if those fancy sonic toothbrushes are worth the extra money? These modern dental tools vibrate at amazing speeds—thousands of times per minute—creating tiny bubbles that clean between teeth where regular bristles miss. Dentists often point to research showing sonic brushes can remove more plaque with less effort, potentially leading to healthier gums and fewer dental problems down the road. Whether upgrading makes sense depends on your specific dental needs, budget, and whether you're likely to use the special features that come with that higher price tag.
What Are Sonic Toothbrushes?
Sonic toothbrushes are advanced electric dental tools that clean teeth using extremely rapid side-to-side vibrations, typically ranging from 24,000 to 48,000 brush strokes per minute. Unlike regular electric toothbrushes that rotate or oscillate at much lower speeds (2,500-7,500 movements per minute), sonic models create high-frequency vibrations that generate fluid dynamics—essentially creating tiny bubbles and water movement that help clean beyond where the bristles physically touch.
What Features Do Sonic Toothbrushes Typically Have?
Those powerful vibrations might be the heart of sonic technology, but they're just the start of what these brushes can do. Today's models come equipped with smart features that turn basic brushing into a customized cleaning experience.
1. Replacement Brush Heads
Many sonic toothbrush models come with multiple replacement heads in the package, offering excellent value. Some brands include up to 6 brush heads with each purchase, which can last up to 18 months of regular use (replacing every 3 months as dentists recommend). These replacement heads often feature food-grade bristles that are gentle on gums while effectively removing plaque.
2. Smart Timing Features
Most sonic toothbrushes include 30-second interval timers that prompt users to move to different areas of the mouth. Two-minute overall timers signal when the dentist-recommended brushing time is complete.
3. Multiple Brushing Modes
Most sonic toothbrushes come with different brushing options to suit your specific needs. The Clean mode is your go-to for everyday brushing, while Sensitive mode uses gentler vibrations perfect for beginners or if you have sensitive teeth. When you want to tackle stains, the White mode provides deeper cleaning to help brighten your smile. If you wear braces or are recovering from dental work, the Gum Care mode offers specialized cleaning that's safe for orthodontics and healing gums. There's also a Massage mode that gently stimulates your teeth and gums to improve blood flow.
4. Battery Life and Charging Options
Most sonic toothbrushes run on rechargeable lithium-ion batteries that last between 1-4 weeks before needing a recharge. However, newer models have made impressive strides in battery efficiency. The Coslus C40 Sonic Electric Toothbrush, for instance, can run for up to 60 days on a single charge, eliminating the hassle of frequent recharging. This model also comes with a convenient travel box, making it ideal for those who are frequently on the go.
Sonic vs. Rotating Toothbrushes: A Practical Comparison
When choosing between sonic and rotating toothbrushes, consumers often face confusion about which technology offers better cleaning results. Both types have evolved significantly from their early models, and each offers distinct advantages based on clinical studies and user experiences.
Comparison of Sonic and Rotating Toothbrushes:
Feature
Sonic Toothbrush
Rotating Toothbrush
Movement Speed
24,000-48,000 movements/minute
2,500-7,500 rotations/minute
Cleaning Action
Side-to-side vibrations + fluid dynamics
Circular rotation and pulsation
Plaque Removal
Excellent, especially in hard-to-reach areas
Very good, particularly on tooth surfaces
Gum Care
Gentler on gums, better for sensitive teeth
More aggressive, may require careful pressure control
Learning Curve
Shorter adaptation period
May take longer to master technique
Price Range
Generally higher ($25-300)
Generally lower ($20-200)
Battery Life
Typically 2-3 weeks
Usually 1-2 weeks
Noise Level
Generally quieter
Usually louder
Based on current research and clinical studies, sonic toothbrushes demonstrate superior performance in reaching between teeth and below the gum line, while rotating toothbrushes excel at removing surface stains and plaque on the front and back of teeth. For overall gum health and sensitive teeth, sonic toothbrushes prove more effective than rotating models, though rotating brushes often provide better results for heavy stain removal and are typically more affordable for budget-conscious consumers.
How to Make Your Sonic Toothbrush Work Best for You
Many first-time sonic toothbrush users, especially those with physical limitations or dental work, assume the device will do all the work automatically. The truth is that proper technique and regular maintenance play crucial roles in achieving optimal cleaning results.
1. Hold Your Brush at 45 Degrees and Don't Push Hard
Position your brush at a 45-degree angle against your gum line, allowing the bristles to do their work without applying excessive pressure. Move methodically from tooth to tooth, spending 2-3 seconds on each surface to ensure thorough cleaning. Remember that sonic technology works best when you let the vibrations do the cleaning rather than manually scrubbing.
2. Use Your Brush for 2 Minutes, Morning and Night
Maintain a consistent schedule of brushing for two minutes, twice daily. Systematically clean all tooth surfaces, including the outer faces, inner areas, and chewing surfaces. Select the appropriate brushing mode based on your specific needs, such as sensitive or deep clean. For optimal enamel protection, wait 30 minutes after consuming acidic foods before brushing.
3. Clean Your Brush and Replace Head Every 3 Months
Replace your brush head every three months or sooner if bristles show wear. Clean both the handle and head weekly using warm water and mild soap to prevent bacteria buildup. Store your toothbrush upright in an open area to ensure proper drying between uses. Monitor battery performance monthly to maintain consistent brushing power, and always rinse the brush head thoroughly after each use to prevent residue accumulation.
Switch to Sonic Toothbrushes for Better Oral Health
The research speaks for itself - sonic toothbrushes really do make a difference in your daily dental care. Studies show they remove about 10% more plaque than manual brushing, and their powerful vibrations (24,000+ strokes per minute) reach spots that regular brushing often misses. While they might cost more initially, think of it as an investment in healthier teeth and gums - especially if you have braces or find it hard to brush thoroughly by hand.
Frequently Asked Questions About Sonic Toothbrushes
Q1: Can a sonic toothbrush damage fillings?
No, sonic toothbrushes won't damage properly placed fillings, crowns, or other dental work. Their vibrations are safe for all types of dental restorations. In fact, they can help maintain better hygiene around fillings and other dental work.
Q2: Can I use a sonic toothbrush with sensitive teeth?
Yes. The majority of sonic toothbrushes have a sensitive mode with reduced vibration intensity. Start with this mode and increase to normal mode as the teeth become accustomed.
Q3: Do sonic toothbrushes work with dental implants?
Yes, sonic toothbrushes are safe for implants and can help maintain them better than manual brushes. Just ensure you're using the appropriate pressure and brush head type recommended by your dentist.
Q4: Will a sonic toothbrush help with teeth staining?
No, while sonic toothbrushes can help remove surface stains from coffee, tea, or wine more effectively than manual brushes, they cannot remove deep or long-term stains that require professional whitening.
Q5: Can children use sonic toothbrushes?
Yes, children age 3 and older can utilize sonic toothbrushes for kids. These machines have lower levels of vibration and smaller brush heads suitable for a child's mouth.
Q6: Do I need to floss if I use a sonic toothbrush?
Yes, flossing remains essential even with a sonic toothbrush. While sonic technology helps clean between teeth, it cannot physically remove trapped food particles and plaque in tight spaces that only floss can reach.
Q7: Can I use a sonic toothbrush everyday?
Yes, sonic toothbrushes are designed for daily use, twice a day. They are less abrasive to teeth and gums than manual scrubbing if used properly.
