Free shipping sitewideFree shipping sitewideFree shipping sitewideFree shipping sitewideFree shipping sitewideFree shipping sitewideFree shipping sitewideFree shipping sitewideFree shipping sitewideFree shipping sitewide
DY-108 Pro
Cart 1
You've got free shipping!

Your cart is empty

Add your favorite items to your cart

Continue Shopping
Why Choose Coslus?
img

Fast & Free Shipping

img

30-Day Money Back

img

2-Year Warranty

img

24/7 Support

Oral Care
Do Water Flossers Remove Tartar? Your Complete Guide
Quick Answer No, water flossers cannot remove tartar once it has hardened on your teeth. While th...
by Official COSLUS 18 April 2025·COSLUS
Home > Blog > Do Water Flossers Remove Tart...
Shares

Quick Answer

No, water flossers cannot remove tartar once it has hardened on your teeth. While they excel at washing away loose plaque and preventing tartar formation by cleaning hard-to-reach areas, only dental professionals can remove existing tartar deposits using specialized scaling instruments during professional cleanings.

Introduction

Maintaining good oral health is a top priority for many people, and dealing with tartar buildup is a common concern. Water flossers have become increasingly popular dental tools that many wonder if they can remove stubborn tartar deposits. While water flossers excel at washing away plaque and preventing tartar formation, they cannot remove hardened tartar that has already formed on teeth. Understanding the difference between plaque and tartar is essential for developing an effective oral care routine that keeps your smile healthy and bright.

What is Dental Plaque?

Dental plaque is a sticky, colorless or pale yellow film that constantly forms on your teeth throughout the day. It's made up of bacteria, food particles, and saliva that naturally collect on tooth surfaces. Think of plaque as an unwelcome guest that moves in on your teeth after you eat or drink.

When you consume foods and beverages—especially those containing sugars and starches—the bacteria in your mouth feed on these particles and produce acids. These acids can attack your tooth enamel, the protective outer layer of your teeth, which is the first step in cavity formation.

If plaque isn't removed daily through brushing and flossing, it can lead to several dental problems:

  • Tooth decay (cavities): The acids produced by plaque bacteria gradually erode tooth enamel, creating holes in your teeth.
  • Gingivitis: This early stage of gum disease occurs when plaque builds up along the gumline, causing inflammation, redness, and bleeding when you brush.
  • Bad breath: The bacteria in plaque release unpleasant-smelling compounds that contribute to bad breath.

The good news is that plaque is soft and can be removed with proper daily oral hygiene. Regular brushing (twice daily), flossing, and using a tool like a water flosser can effectively disrupt and remove plaque before it hardens into tartar, which is much more difficult to remove.

What is Tartar (Dental Calculus)?

Tartar, also known as dental calculus, is what happens when plaque overstays its welcome on your teeth. It's the hardened, calcified form of plaque that firmly attaches to your tooth surfaces and can appear as yellow, brown, or even black deposits. Unlike plaque, which is soft and colorless, tartar is mineral-rich, rough-textured, and often visible to the naked eye.

The transformation from plaque to tartar happens through a process called mineralization. Here's how it works: The minerals in your saliva—primarily calcium and phosphate—naturally begin to combine with the sticky plaque on your teeth. Over time, usually within 24-72 hours of plaque formation, these minerals crystallize and harden the plaque into tartar. Think of it like cement setting—once it hardens, it's not coming off easily.

Tartar typically builds up in predictable locations in your mouth:

  • Along the gumline (where your teeth meet your gums)
  • Between teeth, especially in tight spaces that are harder to clean
  • Around dental work like crowns or bridges
  • Behind your lower front teeth, where saliva glands release minerals

What makes tartar particularly problematic is that its rough, porous surface creates the perfect environment for even more plaque to accumulate. It's like a vicious cycle—tartar forms, collects more plaque, which then turns into more tartar. Additionally, the rough texture can irritate your gums, potentially leading to more serious gum disease over time.

Unlike plaque, which you can remove at home with good oral hygiene, tartar can only be safely removed by dental professionals using specialized instruments during a professional cleaning.

Why Tartar is a Major Concern

Tartar buildup isn't just an aesthetic issue—it's a serious dental health concern that can lead to several problems if left untreated.

Gum Health Problems

When tartar forms along and below your gumline, it creates a rough surface that irritates your sensitive gum tissue. It typically leads to gingivitis, the early stage of gum disease characterized by red, swollen, and bleeding gums. If untreated, it can progress to periodontitis, the later stage of gum disease where the gums pull away from the teeth, creating pockets that become infected. Later on, this infection can damage the bone and tissues that support your teeth and even lead to tooth loss.

Increased Tooth Decay Risk

Tartar creates the perfect environment for harmful bacteria to thrive. These bacteria produce acids that eat away at your tooth enamel, increasing your risk of developing cavities. The rough surface of tartar also makes it easier for more plaque to accumulate, creating a continuous cycle of dental damage that becomes increasingly difficult to manage.

Persistent Bad Breath

The bacteria that live in tartar deposits release foul-smelling chemicals as they feed and multiply. This can cause chronic bad breath (halitosis) that doesn't get better with brushing, flossing, or mouthwash. If you're developing chronic bad breath despite good oral hygiene, tartar buildup might be the culprit.

Noticeable Tooth Discoloration

Tartar is usually yellow or brownish deposits on your teeth, most often along the gumline. As it builds up, it can really impact the appearance of your smile. Unlike surface stains from tea or coffee that can be minimized with whitening products, tartar staining cannot be removed with at-home treatments—it needs professional cleaning.

Complications Beyond Your Mouth

There is increasing evidence that tartar bacteria can cause health issues outside of your mouth, including heart disease, diabetes complications, and respiratory infections. While the exact links are still being studied, a tartar-free mouth is increasingly recognized as an important part of overall health.

The good news is that tartar can be efficiently eliminated through routine professional dental cleanings before it causes severe problems, and proper daily oral hygiene can significantly decelerate the rate at which it forms in the first instance.

How Do Water Flossers Work? The Science Explained

Mechanism of Action

Water flossers, also known as oral irrigators, use a surprisingly simple but effective technology to clean your teeth. These devices deliver a concentrated, pulsating stream of water through a specialized tip, creating a combination of water pressure and pulsation that works wonders for your oral health.

When you aim this pressurized water stream at your teeth and gums, several things happen simultaneously:

  • The water forcefully flushes out food particles trapped between teeth and below the gumline
  • The pulsating action creates a hydrokinetic effect that disrupts bacterial biofilms (the organized communities that make up plaque)
  • The water reaches areas that traditional brushing and string flossing often miss, like deep periodontal pockets

Think of it like power-washing your teeth—the water stream physically dislodges debris while the pulsations create tiny bubbles that burst and help break up the sticky plaque biofilm. Most water flossers allow you to adjust the pressure (typically between 10-100 PSI) to suit your comfort level and specific needs.

Proven Effectiveness in Plaque Removal

Water flossers truly shine when it comes to removing loose debris and disrupting newly-formed plaque, especially in places that are challenging to clean with traditional methods.

Water flossers are particularly beneficial for:

  • People with braces or dental work like bridges and implants
  • Those with limited dexterity who struggle with string floss
  • Individuals with sensitive gums who find traditional flossing uncomfortable
  • Anyone with periodontal pockets (spaces between teeth and gums)

The pulsating action of water flossers reaches up to 4-5mm below the gumline—areas that harbor harmful bacteria but are difficult to clean with other methods. This makes water flossers excellent tools for preventing gingivitis and maintaining gum health.

While water flossers excel at removing loose plaque and food particles, it's important to understand their limitations when it comes to tartar, which we'll explore in the next section.

Can a Water Flosser Remove Tartar?

Water Flossers Cannot Remove Hardened Tartar

Water flossers cannot remove tartar (also called dental calculus) once it has formed on teeth. Tartar is a hard, crusty substance that develops when soft plaque stays on teeth too long and mixes with minerals from your saliva.

Why Water Pressure Isn't Enough

Tartar firmly bonds to tooth enamel in a way that water pressure is not able to dislodge. The hardened material needs special dental tools that possess the ability to physically scrape it off the tooth surface. No matter how high you dial the pressure on a water flosser, it simply is not able to provide the physical force needed to remove these hardened deposits.

Not a Substitute for Professional Cleaning

Think of water flossers as prevention, not as a means to treat already existing tartar. Professional dental cleaning from dentists or dental hygienists is the sole method of effectively removing tartar. Dentists and hygienists utilize specialized equipment that is designed to safely scrape away the tartar without hurting your teeth.

Marketing Claims vs. Scientific Evidence

Some water flosser companies might hint their products help with tartar, but science doesn't back up claims about tartar removal. Research shows water flossers are excellent for washing away plaque and preventing tartar from forming in the first place, but they can't remove tartar that has already hardened on your teeth. Dentists and dental organizations consistently point out this limitation, even while recognizing the many other benefits water flossers offer for keeping your mouth clean.

Does Water Flossing Prevent Tartar?

Yes, water flossing effectively prevents tartar by removing plaque before it can harden. By washing away plaque daily, water flossers help keep your teeth clean and tartar-free.

Stopping Plaque Before It Hardens

Water flossers flush away soft plaque from tooth surfaces, between teeth, and along the gumline. Daily use of a water flosser prevents this sticky film from hardening into tartar.

Water Flosser vs. String Floss for Prevention

Water flossers and string floss both help prevent tartar, but in different ways. Water flossers use streams of water to fire off plaque and food debris, deeper between gums (up to 6mm) and between braces and bridges. String floss strikes tooth surfaces directly and has the capability of pulling out plaque from areas in between tight teeth where water may not be able to get to as easily. Most dentists recommend doing both methods for the most thorough cleaning, although what works best is up to your teeth, ability, and dental work.

Why Choose Water Flossers? Benefits Beyond Basic Cleaning

Preventing tartar is perhaps the greatest benefit of water flossers, yet they help your mouth in many other ways too. Water flossers provide many health benefits that make them a great addition to your daily cleaning routine.

Better Gum Health

Water flossers reduce gum disease and bleeding since they wash away destructive bacteria from your gumline and between your teeth. Gentle pulses of water clean and also maintain healthy gums.

Cleaning Hard-to-Reach Areas

For people with braces, implants, bridges, or tight teeth, water flossers get into spaces where ordinary floss might have a hard time. The water stream can navigate around brace wires, under bridges, and between tightly fitting teeth to remove food and bacteria that tend to get stuck there. Dentists often prescribe water flossers for patients with these kinds of dental issues.

Gentler Alternative

The majority of people find water flossers more comfortable to use than string floss, especially those with receding or sensitive gums. The water stream cleans efficiently without the pain that can be caused by improperly using string floss. This cleaner, yet gentler, cleaning motivates people to stick to it more regularly, which leads to better mouth health.

Easy to Use

Water flossers benefit those who struggle with their hands, arthritis, or coordination problems who have trouble using string floss. The simplicity of design makes daily cleaning easier for many users, including children, the elderly, and people with physical disabilities. Because they are simpler to manipulate, users are more likely to floss daily.

How is Tartar Actually Removed? The Professional Solution

While water flossers help prevent tartar buildup, only dental professionals can remove tartar once it forms on your teeth. Regular visits to your dentist remain essential for maintaining optimal oral health.

Expert Care: What Dentists and Hygienists Provide

Dental professionals are the only ones who can safely and effectively remove tartar from your teeth. They possess the requisite training, the appropriate tools, and the expertise to scale off hardened deposits without damaging your tooth enamel or your gums. Attempting to get rid of tartar at home with non-dental tools has the potential to scratch your enamel, hurt your gums, and cause more damage than benefit.

Professional Dental Cleaning

During a professional cleaning, your dental hygienist or dentist will perform a process called scaling to remove tartar. They use either hand-held metal instruments called scalers or ultrasonic devices that use vibration to break up and remove tartar deposits. These tools can reach above and below the gumline where tartar often accumulates.

When all of the tartar is gone, your dental professional will brush your teeth with a slightly abrasive paste. This polishing helps to smooth the surface of the tooth, making it harder for new plaque to stick and easier for you to clean between visits. The final result is not only cleaner teeth but also fresher breath and healthier gums.

Why Regular Appointments Matter

Most dentists recommend cleanings every six months for the average person. Some people, though, need more frequent cleanings, such as those with:

  • A history of gum disease
  • Heavy tartar buildup
  • Certain medical conditions like diabetes
  • Smoking habits

Your dentist will recommend a cleaning schedule based on your individual needs. Following this schedule helps prevent excessive tartar buildup and catches any developing dental issues before they become serious problems. Even with excellent home care using water flossers and brushing, these professional cleanings remain necessary to remove tartar that inevitably forms in hard-to-clean areas.

Keep Your Smile Tartar-Free with Smart Water Flosser Habits

Water flossers can't eliminate tartar once it's formed, but they're excellent at preventing it from occurring in the first place by rinsing away plaque each day. For the healthiest smile, use your water flosser daily and continue to see your dentist on a regular basis for professional cleanings to scrape away any tartar that builds up. It's this team effort—your daily water flossing and professional care—that keeps your gums healthier, breath fresher, and smile brighter. Start with a water flosser today, select one that meets your needs, and follow those dental appointments to maintain your oral health at its optimum for the coming years.

You May Also LikeLearn More
Keeping your teeth clean between brushing can be confusing with so many options available today. Most people wonder whether they should stick with traditional dental floss or invest in a modern water flosser for better results. Traditional string floss uses thin nylon to physically remove plaque between teeth, while water flossers use streams of pressurized water to wash away debris. The truth is, both methods work well—dentists agree that the best flossing method is simply the one you'll actually use every day. What is Dental Floss? Dental floss is a thin strand specifically designed to clean between your teeth where your toothbrush can't reach. Made primarily of nylon or Teflon (a type of polytetrafluoroethylene), these materials provide the perfect balance of strength and flexibility to slide between tight spaces without breaking or fraying. Different types of dental floss are available to suit various needs: Waxed floss: Coated with a light wax layer that helps it glide more smoothly between tight teeth contacts, making it less likely to shred or break. Ideal for people with closely spaced teeth. Unwaxed floss: Thinner and made of many nylon strands twisted together. Some dental professionals believe unwaxed floss cleans more effectively because it doesn't have a slippery coating, though it may be more prone to breaking between tightly packed teeth. Flavored floss: Available in mint, cinnamon, and other flavors to make the flossing experience more pleasant and leave a fresh feeling afterward. Dental tape: Broader and flatter than regular floss, making it especially effective for people with wider spaces between teeth or those with dental bridges and other restorations. Each type offers specific benefits depending on your teeth spacing, sensitivity level, and personal preference, but they all serve the essential purpose of removing plaque and food particles from between teeth that brushing alone can't reach. How to Use Dental Floss Correctly Getting the most from your daily flossing routine starts with proper technique. Many people floss regularly but miss out on the full benefits because of small technique errors. Here's how to floss effectively: Step-by-Step Flossing Guide 1. Start with enough floss: Break off about 18-24 inches of floss. This gives you plenty to work with and allows you to use a fresh section for each tooth. 2. Hold it properly: Wind most of the floss around your middle fingers on both hands, leaving 1-2 inches of floss to work with between your hands. 3. Control with your thumbs and index fingers: Use your thumbs and index fingers to gently guide the floss between your teeth. 4. Use a gentle motion: Slide the floss between teeth using a gentle back-and-forth motion. Avoid snapping or forcing the floss, which can damage your gums. 5. Create a "C" shape: Once the floss reaches the gumline, curve it into a C-shape against one tooth and gently slide it into the space between the gum and tooth. 6. Clean thoroughly: Move the floss up and down against the side of each tooth, making sure to go slightly below the gumline where bacteria collect. 7. Use fresh sections: As you move from tooth to tooth, unwind fresh floss from your fingers. Using a clean section for each tooth prevents transferring bacteria between teeth. 8. Don't forget the back: Be sure to floss the back side of your last teeth as well. Common Flossing Mistakes to Avoid Snapping the floss: This can cut your gums and cause pain and bleeding. Always use gentle, controlled movements. Not reaching the gumline: The most harmful bacteria hide just below the gumline. Make sure your floss curves slightly beneath the gum. Using the same section of floss: This spreads bacteria from one area to another. Always move to a fresh section for each new tooth. Flossing too quickly: Effective flossing takes time—about 2-3 minutes. Rushing through it leaves plaque behind. Skipping teeth: Make sure to floss between all teeth, including those hard-to-reach back molars where food often gets trapped. Why Traditional Flossing Remains Essential for Oral Health Traditional dental floss continues to be a fundamental component of effective oral hygiene despite technological advances in dental care products. The following benefits highlight why this simple tool remains irreplaceable in maintaining optimal dental health. Floss Reaches Where Your Toothbrush Can't Traditional floss excels at removing plaque between teeth, especially in tight spaces where toothbrushes cannot reach. The physical contact of string floss against tooth surfaces provides superior mechanical cleaning of interdental areas, effectively dislodging stubborn bacteria and food particles that contribute to decay. Floss Is Affordable and Easy to Find As one of the most cost-effective oral hygiene tools available, traditional floss offers exceptional value for dental care. Found in virtually any pharmacy or grocery store, floss comes in various options to suit personal preferences without requiring electricity, batteries, or special equipment. Take Floss Anywhere, Use It Anytime The remarkable portability of traditional floss makes it ideal for maintaining interdental cleaning anywhere. Small enough to fit in pockets, purses, or travel kits, floss can be used on-the-go without special equipment or water sources. Dental professionals consistently endorse traditional flossing technique as essential for comprehensive oral hygiene. Regular flossing helps prevent gingivitis by removing bacteria at the gumline and reduces the risk of more serious periodontal conditions. What is a Water Flosser? How Water Flossers Work A water flosser (also known as an oral irrigator) cleans between teeth using a pressurized stream of water rather than string. The device delivers a targeted jet of water through a small spout or floss tip that you position around your teeth while leaning over a sink. This water pressure effectively dislodges food particles, plaque containing bacteria, and debris from between teeth and along the gumline. The gentle yet thorough cleaning action reaches into areas that are difficult to access with traditional brushing alone, including deep gum pockets. Types of Water Flossers Countertop Water Flossers Countertop models connect to an electrical outlet and feature a water reservoir base with a handheld wand. These units typically offer: Larger water capacity requiring less frequent refilling More powerful and consistent water pressure Multiple pressure settings for customized cleaning Specialized tips for different needs (orthodontic, periodontal) Greater stability during use Cordless Water Flossers Cordless models are compact, portable units powered by batteries or rechargeable systems. Their advantages include: Travel-friendly design that fits easily in luggage No need for electrical outlets Convenient for small bathrooms with limited counter space Easier maneuverability around the mouth Simpler setup and maintenance Both types can be particularly beneficial for people with braces, dental implants, crowns, or those with dexterity issues that make traditional flossing challenging. However, dental professionals generally recommend using water flossers as a supplement to, rather than a replacement for, traditional string floss for optimal oral health. How to Use a Water Flosser Correctly Step-by-Step Instructions 1. Fill the reservoir with lukewarm water (cold water may cause sensitivity). 2. Select the appropriate tip for your needs and attach it firmly to the handle. 3. Start with the lowest pressure setting, especially if you're a first-time user. You can gradually increase as you become comfortable. 4. Lean over the sink to avoid mess, keeping your mouth slightly closed around the tip. 5. Turn on the device while the tip is in your mouth to prevent water spraying. 6. Place the tip at a 90-degree angle to your teeth, about 1/4 inch away from your gum line (not directly against teeth). 7. Focus on the gum line where teeth and gums meet—this is crucial for effective cleaning and plaque removal. 8. Follow a methodical pattern: start with back teeth and work your way around, pausing briefly (2-3 seconds) between each tooth. 9. Close your lips slightly to prevent splashing while allowing water to flow out into the sink. 10. Turn off the device before removing it from your mouth. Benefits of Water Flossers They Are Easier for People with Special Needs Water flossers are easier to handle for people with dexterity issues or arthritis. They work around braces and dental implants without getting caught or damaged. The simple technique requires minimal coordination, unlike the precision needed for string floss. They Clean Hard-to-Reach Areas Water flossers reach tight spaces between teeth that traditional floss might miss. They clean deeper periodontal pockets effectively, flushing out hidden bacteria. The water stream navigates easily around bridges, crowns, and other dental work. They Are Gentler on Sensitive Gums The pulsating water is gentler on sensitive or receding gums than string floss. Adjustable pressure settings let you customize cleaning intensity to your comfort level. Many users experience less bleeding and irritation when switching from traditional floss. They Help Prevent Gum Disease Regular water flossing helps prevent gum disease by removing harmful bacteria. The streaming action effectively disrupts and washes away plaque biofilm. Water flossers complement brushing in a complete oral hygiene routine for optimal health. Dental Floss vs. Water Flossers: A Head-to-Head Comparison Good oral hygiene goes beyond just brushing your teeth. Cleaning between teeth helps prevent gum disease and tooth decay. Traditional dental floss and water flossers are two popular options for this task. Feature Dental Floss Water Flossers Effectiveness Physically scrapes away plaque; reaches tight spaces between teeth Removes more plaque according to studies; better for cleaning around braces and dental work Ease of Use Requires good hand coordination; can be difficult to master Simple to use; great for people with limited dexterity or braces Cost Very affordable ($2-5); minimal ongoing expense More expensive upfront ($30-100+); needs replacement tips Portability Extremely compact; fits anywhere; no power needed Bulkier; needs charging and water source Maintenance No maintenance; just dispose after use Needs regular cleaning; parts wear out over time Both dental floss and water flossers have their strengths. Traditional floss is cheaper and more portable, while water flossers are easier to use and better for people with braces or dexterity issues. Many dentists recommend using both: dental floss for its effective scraping action and water flossers for flushing out debris from hard-to-reach spots. Not everyone finds traditional string floss easy or comfortable to use. While both methods can effectively clean between your teeth, certain situations make water flossers particularly helpful. Here's when you might want to consider choosing a water flosser for your daily routine: If you have arthritis or dexterity issues, choose a water flosser with an ergonomic handle to make daily cleaning easier. For children learning oral hygiene habits, water flossers are more engaging and simpler to master correctly. When wearing braces or orthodontic appliances, use a water flosser with an orthodontic tip specifically designed for cleaning around wires and brackets. If you find traditional flossing painful, try a water flosser or floss picks as gentler alternatives that still provide effective cleaning. If you have dental implants, use a water flosser with specialized implant tips to clean around abutments without scratching them. For seniors in assisted living, recommend water flossers to caregivers as they're easier to help with than traditional flossing. When recovering from dental surgery, follow your dentist's recommendation, typically using a water flosser on the lowest pressure setting. If you have consistently bleeding gums despite good technique, try combining methods—water floss first to loosen debris, then follow with string floss for thorough cleaning. Choose Your Perfect Flossing Tool Today Whether you pick regular floss, a water flosser, or both, what matters most is cleaning between your teeth every day. Regular floss is cheap and portable, while water flossers are easier to use and better for braces. Think about what works for your specific needs—do you travel a lot? Have trouble with hand movements? Wear braces? Not sure which to pick? Just ask your dentist at your next visit. The best tool is simply the one you'll actually use consistently, because regular cleaning between teeth keeps your smile healthy for years to come.
Official COSLUS April 25 .2025·COSLUS
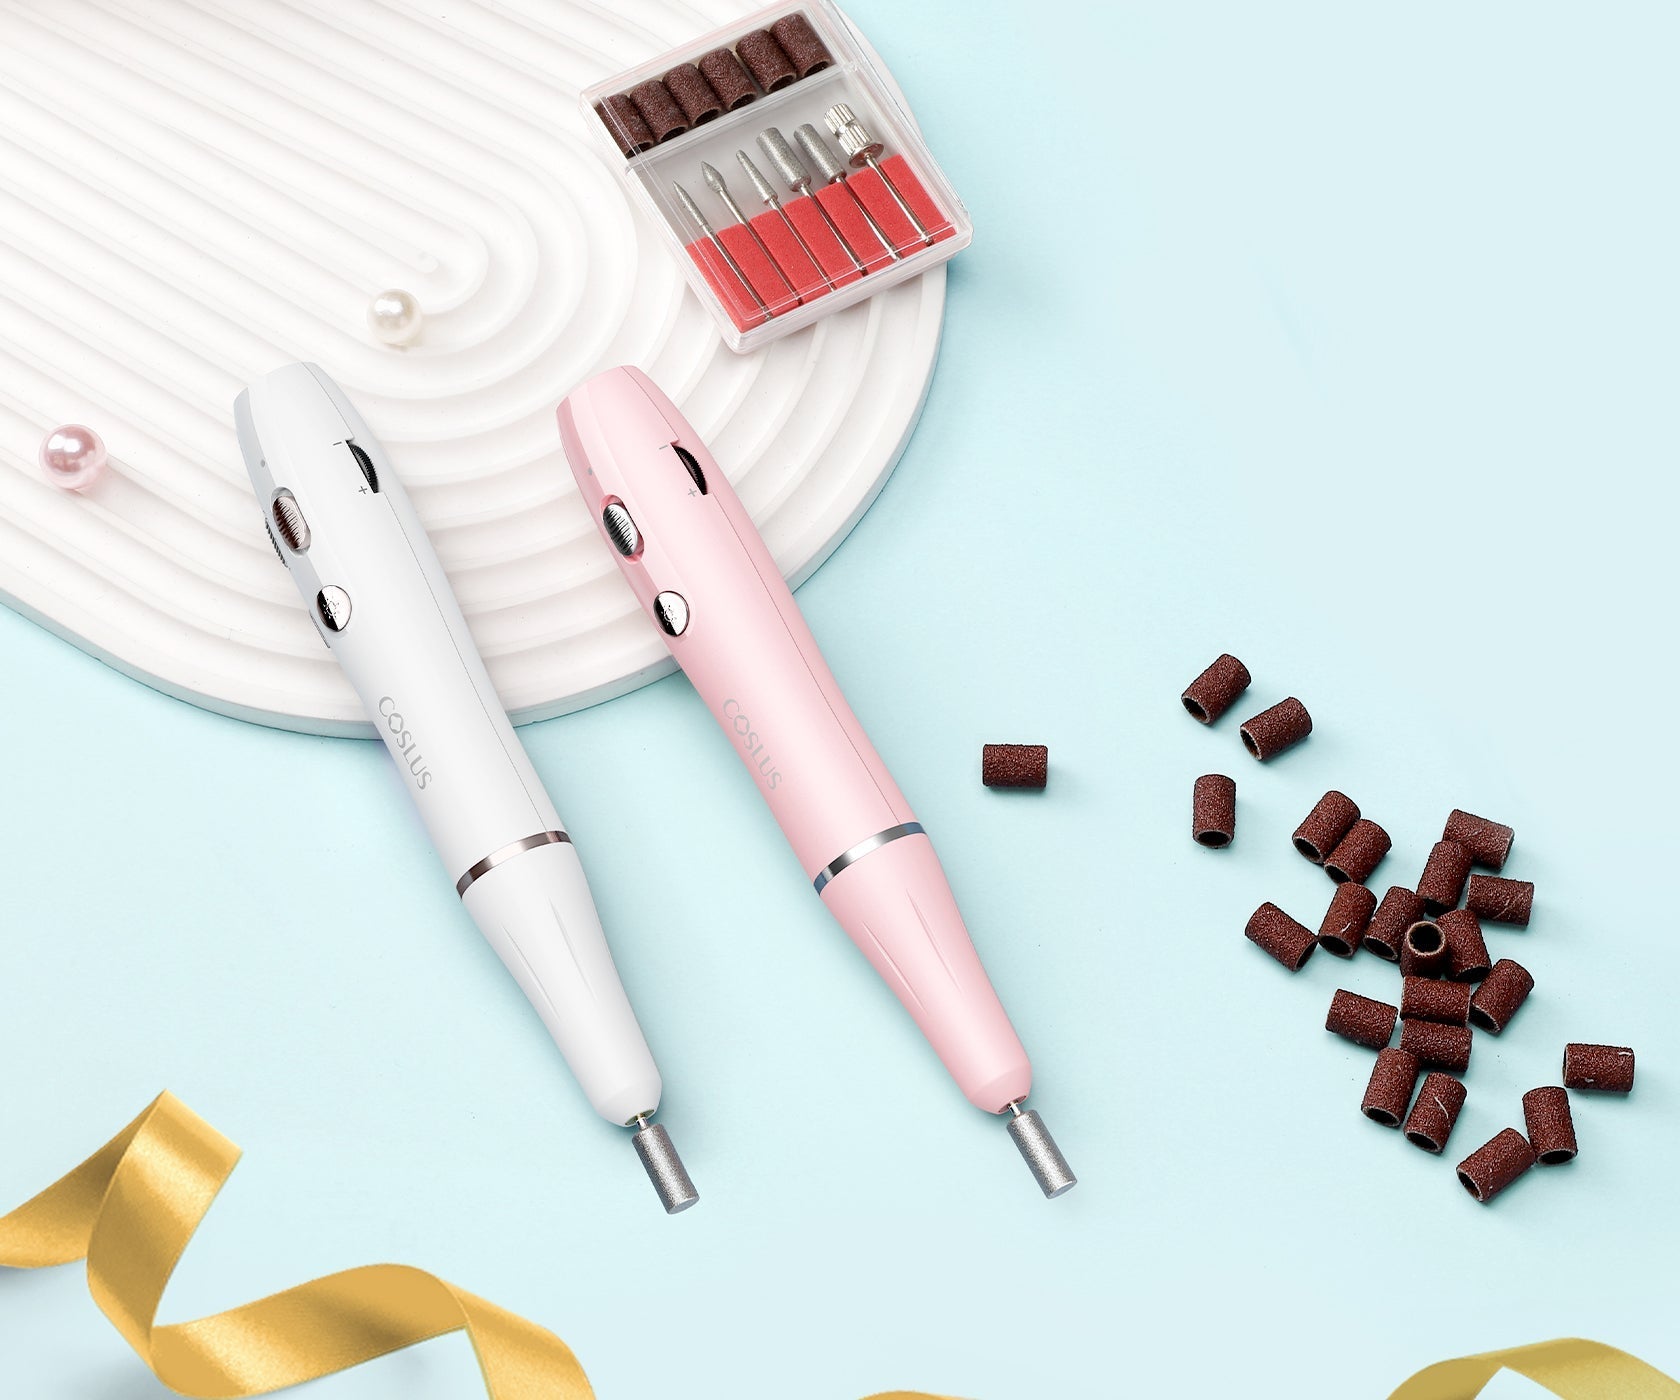
Keeping your nails healthy while achieving a perfect manicure can be challenging, especially when considering electric nail files as an option. Many nail enthusiasts wonder if these powered tools are worth the investment or if they might cause more harm than good. Electric nail files offer speed and convenience, but they also come with potential problems like nail damage, safety issues, and discomfort from vibration. What is an Electric Nail File? If you've seen a nail tech shape and buff nails with ease in a fraction of the time it would take you at home with a regular file, you're seeing an electric nail file in action. An electric nail file (also called an e-file or nail drill) is a handheld motorized tool that spins interchangeable bits at varying speeds to file, shape, buff, and polish nails. Rather than back-and-forth physical movement such as manual files, electric files achieve the work by vibrating or rotating, which provides faster, more precise results with little physical effort. Most models feature variable speeds (typically 3,000 to 30,000 RPM) and are sold in corded or rechargeable battery-powered versions. At the salon, nail technicians use e-files for numerous purposes like shaping and shortening artificial nails, gel polish removal, pre-application smoothing of the nail surface, and fine cuticle detail work. Electric files are particularly handy in salon use for creating crisp smile lines for French manicures and for getting into tight areas around the cuticles. For home users, less powerful and less complicated versions of the files help with general nail preparation, extension maintenance, and light buffing. Common Disadvantages of Electric Nail Files While proper training helps minimize risks with electric nail files, even experienced users face inherent challenges with these powerful tools. The very features that make e-files efficient—high-speed rotation and powerful motors—also create specific drawbacks that anyone considering their use should carefully weigh. 1. They Can Damage Your Nails Filing too fast with e-files can thin nails before you realize it. This weakens the nail plate and may cause damage that takes months to heal. Misused e-files create painful "rings of fire" (red, inflamed skin) or nail dents. The worst damage happens when you hit the nail matrix (growth area under the cuticle), which can permanently deform nails. 2. They Can Malfunction and Cause Injuries Corded e-files pose electrical risks, especially in wet salon environments. Some models overheat during long use, creating fire hazards or breaking mid-service. Rechargeable models avoid some electrical issues but have battery problems like declining performance over time. 3. They Create Uncomfortable Heat High-speed rotation tends to create friction and heat naturally. Excessive pressure or speed distributes this heat to the nail bed, resulting in anything from warm temperature to stinging burning. This heat can make nails brittle or even separate from the nail bed, especially on thin nails or when using dull bits. 4. They Vibrate and Hurt Your Hands Vibration affects clients and nail technicians alike. Clients will experience discomfort or pain, especially those who have sensitive hands or arthritis. For technicians, repeated exposure results in hand tiredness during the treatment and leads to carpal tunnel syndrome or tendonitis over time. 5. Low-Quality Models Increase Risks Professional e-files are totally different from economical consumer models. Economical models have poor speed control, which makes precision difficult to obtain and which also increases the risk of damage. Economical bits wear out faster, require more pressure, and generate more heat and vibration. Poor ergonomics of cheaper models implies hand fatigue and trouble with fine work. Misconceptions About Electric Nail Files 1. "Electric Files Always Damage Nails" One of the oldest myths is that e-files necessarily damage natural nails. Damage does happen, but not as a mechanism designed into the tool. Properly used professional e-files are actually gentler on nails than abrasive manual filing techniques. The precision of e-files allows trained technicians to work only on the exact areas that need attention and not waste time filing over the entire nail surface unnecessarily. Most nail technicians have successfully utilized electric files for several years without client damage, illustrating that the equipment itself is not necessarily damaging. 2. "The Tool Is Dangerous, Not The User" Nail damage, when it does occur with electric file use, is generally due to a technique misuse and not due to the tool being defective. Some of the typical mistakes made by users include: Exerting too much pressure (the bit should do the work, not force) Selecting inappropriate speed settings (higher isn't always better) Using the wrong bit for the task at hand Holding the file in one spot for too long Filing in the wrong direction against the nail grain These are mistakes that can be made with any tool, but the power of electric files just amplifies the damage. Just like a power saw is more demanding than a hand saw, electric files require proper respect and technique skills. 3. "Anyone Can Learn To Use Them Quickly" The second misconception is that electric nail files are intuitive tools anyone can master by watching some YouTube videos. The reality is that an effective e-file technique requires formal training and lots of practice. Professional nail technicians may take months or weeks to develop their skills before they are fully confident. Learning involves understanding: How different bits function and when to use each type Proper hand positioning and tool angles How to maintain control at various speeds Recognizing when to stop filing based on visual and tactile feedback The majority of nail technicians recommend that beginners start by practicing on artificial tips or themselves first, then practice on clients, slowly building speed and confidence over time. 4. "More Expensive Means Safer" While quality matters with electric files, price alone doesn't guarantee safety. Some mid-range models offer excellent control features and reliability, while certain expensive models may still cause damage in untrained hands. More important than price is selecting a file with appropriate features for your skill level, including adequate speed control, minimal vibration, and ergonomic design. Even the most basic model can be safe when used with proper technique and respect for the tool's capabilities. Factors That Exacerbate Disadvantages You've probably heard both sides of the electric nail file debate—some say they're perfectly safe while others warn they'll ruin your nails. The reality? These tools aren't automatically good or bad. Here's what actually makes these tools risky so you know what to watch out for: Poor Training Causes Most Damage: Without proper training, users apply too much pressure, hold the file at the wrong angles, and use inappropriate speeds. Professional nail techs need specialized e-file courses, not just general nail education. Home users should learn proper techniques before attempting to use them. Cheap Tools Are More Dangerous: Low-quality electric files often lack precise speed controls and have inconsistent motors that cause unexpected speed changes. They typically vibrate more, reducing control and increasing hand fatigue. Choose models from established manufacturers with safety certifications, even if they cost more. Using Wrong Bits Harms Nails: Using incorrect bits for specific tasks increases damage risk. Coarse-grit bits can quickly thin natural nails. Metal bits generate excessive heat. Worn bits require more pressure, causing more heat and potential damage. Each bit type—carbide, diamond, ceramic—has a specific purpose that users must understand. How to Use Electric Nail Files Safely to Minimize Risks Don't worry—electric nail files aren't as scary as they might sound. You can use them safely and get great results if you know what you're doing. The very things that can cause problems—the speed, power, and special bits—are actually what make these tools so effective when used correctly. 1. Learn How to Use Your E-File First: Don't just wing it with your e-file! Take time to learn proper techniques through online courses, YouTube tutorials from licensed professionals, or in-person workshops. Even a single lesson will significantly enhance your skills and safety. Begin with the fundamentals of how to hold the handpiece and know various bit types before trying advanced techniques. 2. Buy Good Quality Tools for Safety: A good electric nail file need not be expensive, but steer clear of the lowest priced ones. Find ones with smooth speed transitions (not merely high/low) and ergonomic grip designs that minimize hand fatigue. The best e-files have little vibration and even power output, making them simpler to control. 3. Press Lightly and Keep Moving: Let the tool do the work instead of pressing hard—light, gentle movements prevent heat buildup and nail damage. Keep the file moving constantly rather than lingering in one spot, and take breaks to check your progress. When in doubt, slow down! Lower speeds give you more control and reduce risks. 4. Clean Your Tools After Each Use: Keep your bits clean after every use by swabbing off dust and debris—this easy habit stops excessive friction and heat. Change bits when they get dull or worn out, typically every few months with frequent use. Clean your handpiece once a week and inspect the cord (if it is corded) for damage FAQs About Electric Nail Files Q1: Are electric nail files safe for beginners? Electric files can be safe for beginners if they start off with training. Choose a beginner-friendly model with lower speeds (less than 15,000 RPM) and practice on artificial tips first, not your real nails. Start with the lowest speed and use light pressure. Take a class or watch step-by-step tutorials from professional nail technicians before first use. Q2: How do I avoid overheating while using an e-file? To prevent overheating, don't leave the bit in one position for more than a few seconds. Apply light pressure—let the bit do the work instead of applying pressure to it. Rest every 15-20 seconds to let the nail cool. If the nail feels warm to the touch, stop using it immediately. Lower your speed setting and make sure that you are using the appropriate bit for the task at hand. Clean bits from time to time, as accumulated debris causes friction and heat. Q3: What should I look for when buying an electric nail file? Look for variable speed controls to 3,000 RPM for precision applications. Choose a low-vibration model to prevent hand fatigue. If for professional work, choose one with a powerful motor (at least max 30,000 RPM) that can handle all-day use. Choose one that accepts standard-sized bits for more flexibility. Look at weight and ergonomics—the file must be easy to hold. Q4: How often should I replace the bits? Change bits when they become worn or when there is visible wear. In professional use, carbide bits will last 3-6 months with a good cleaning, and diamond and ceramic will last 6-12 months depending on usage. Bits have a longer life in homeowner use. Using dull bits puts more pressure and excessive heat buildup on the nails, damaging them. Q5: Can electric files be used on natural nails? Yes, but with caution. Use fine grit bits (180 grit or higher) at low speeds (less than 10,000 RPM) on natural nails. The e-file should touch the nail surface lightly—use it to smooth and buff only, never cut length or thickness. Manual files are used most often by professionals on natural nails to prevent breaking them. Use Electric Nail Files Right and Get Amazing Results Don't let the risks scare you away! With the right approach, electric nail files transform your manicure routine from tedious to professional in minutes. The key? Proper training, quality equipment, and smart technique. Choose the perfect speed settings, use the correct bits for each task, and maintain a gentle touch. You'll slash your manicure time in half while achieving precision that manual files simply can't match. Whether you're a DIY enthusiast or a budding professional, these powerful tools deliver flawless results when used correctly. Take control of your nail game today and experience the difference proper e-file skills make!
Official COSLUS April 25 .2025·COSLUS
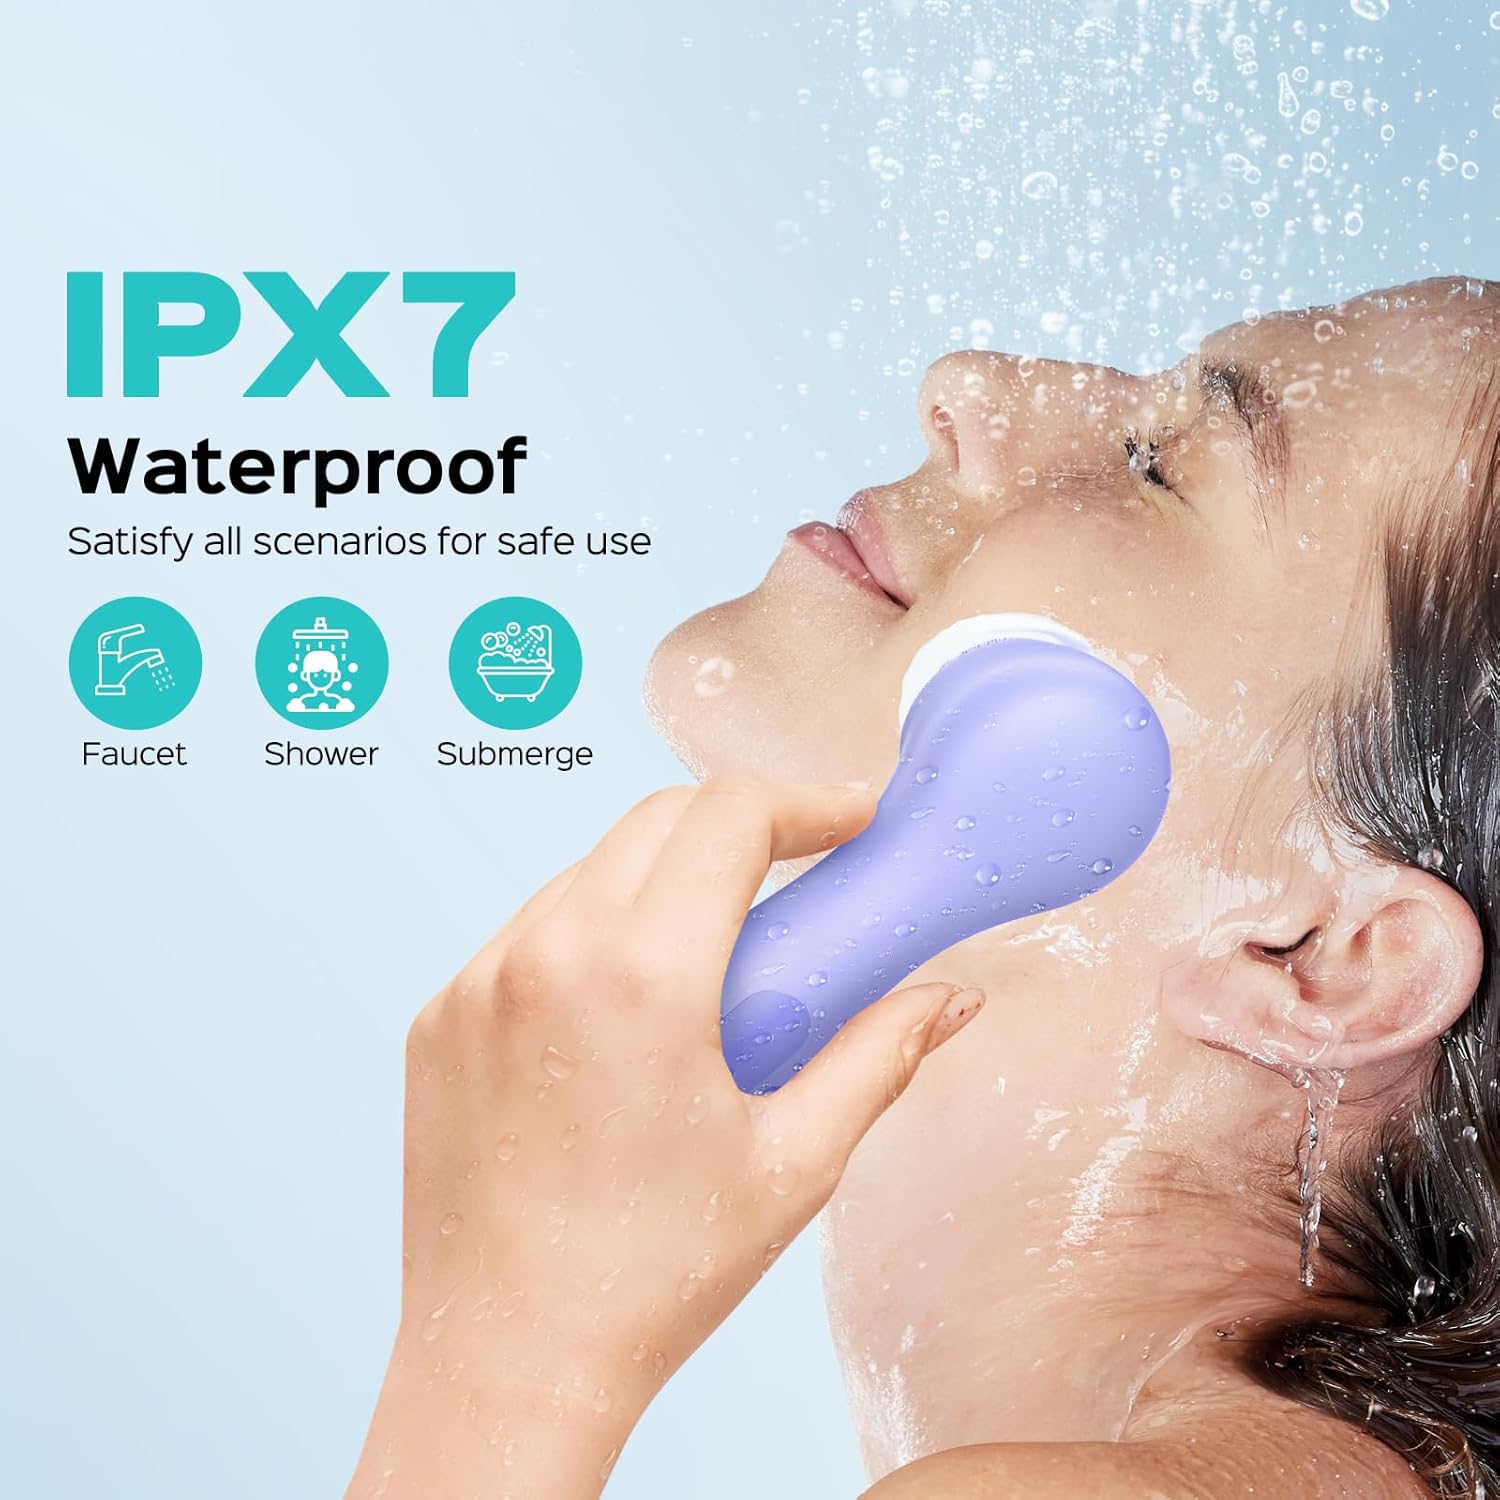
Keeping your skin clean and healthy can feel like a challenge, especially when you're unsure about which tools work best for your specific needs. Many people struggle with stubborn makeup residue, clogged pores, and dull skin despite regular washing. Facial cleansing brushes offer a solution by providing deeper cleansing than hands alone, but knowing when and how to use them makes all the difference. These handheld devices work through gentle vibrations or soft bristles to remove impurities that regular washing might miss. Evening use typically works best since your skin collects dirt, oil and pollution throughout the day, and using the brush 2-3 times weekly helps maintain that healthy glow without risking irritation or over-exfoliation. What Exactly is a Facial Cleansing Brush? A facial cleansing brush is a handheld skincare tool designed to give your face a deeper clean than washing with your fingers alone. These devices typically feature either soft bristles or silicone touchpoints that move across your skin—some rotate in circles while others pulse with gentle sonic vibrations. The motion helps remove makeup residue, dead skin cells, and dirt that regular washing might miss. You'll find different types to choose from: traditional brushes with nylon bristles that rotate, gentler silicone models that vibrate, and even hybrid options. The right choice depends on your skin's needs—sensitive skin generally does better with softer silicone versions, while oilier skin might benefit from more thorough bristle cleansing. When to Use Your Facial Cleansing Brush Now that you know what a facial cleansing brush is, let's talk about when to use it for the best results. Using it at the right time can make a big difference for your skin. Why Nighttime Is Often Best Using your facial brush at night helps remove all the dirt, oil, pollution, and sunscreen that builds up on your skin during the day. This deep clean creates a fresh surface for your nighttime face creams and serums to work better. Your skin also naturally repairs itself while you sleep, so cleaning well before bed helps this process. Can You Use It in the Morning? You can use your facial brush in the morning to wash away oils that form on your skin overnight and to create a smooth base for makeup. However, using the brush twice a day might clean your skin too much and cause irritation over time. For most people, using a facial cleansing brush once a day—usually at night—works best and keeps skin healthy. How Often Should You Use It? Now that you know the best time of day to use your facial cleansing brush, let's tackle another key question: how often should you use it? While nighttime use is generally ideal, the frequency of use depends on several factors unique to you and your skin. Key Factors Influencing Frequency Your skin type plays a major role in how often you should use a facial brush. Oily skin often tolerates more frequent use, while dry or sensitive skin needs less. The type of brush matters too—a silicone brush is typically gentler than bristle brushes, making it better for more regular use. Pay attention to how your skin responds, as everyone's skin tolerance is different. General Guidelines & Listening to Your Skin Start slowly with your facial brush, using it just once or twice a week. If your skin handles this well, you can gradually increase to 2-3 times weekly, which works well for most people. Some with very resilient skin may use it daily, but this isn't necessary for most. Watch for warning signs of overuse: redness, irritation, unusual tightness, dryness, or increased sensitivity. If you notice these signs, cut back on how often you use your brush and give your skin time to recover. Is a Facial Cleansing Brush Right for Your Skin? Facial cleansing brushes help some people get clearer skin but can cause problems for others, so you should check if one works for your skin type before buying it.. Who Benefits Most? Not everyone needs a facial cleansing brush. These tools work best for: People with oily skin who need help removing excess oil Those with clogged pores looking for deeper cleaning Anyone with dull skin who wants gentle exfoliation Regular makeup wearers who need help removing all makeup residue People whose skin doesn't get irritated easily When to Be Cautious or Avoid Some people should skip using these brushes or be extra careful: People with very sensitive skin that gets red or irritated easily Those with active, inflamed acne (brushes can spread bacteria) Anyone with skin conditions like rosacea, eczema, or psoriasis People with sunburned skin or open wounds Those taking medications that make skin more sensitive How to Use a Facial Cleansing Brush Correctly Once you've decided whether or not a facial cleansing brush is suitable for your skin type, learning how to use the right technique is important to get maximum benefits while remaining irritation-free. Even individuals with suitable skin types can be at risk of issues if they improperly use these tools, so the correct steps can be a lifesaver. Preparation Steps Start by wiping off all heavy makeup with a makeup remover or micellar water before using your brush. Wet the face and brush the head with lukewarm water, not hot water, because it can irritate your skin. Apply a gentle, nonabrasive cleanser directly on either the face or brush head; gel or cream cleansers tend to work well together with facial brushes. The Cleansing Process Turn on your brush and gently move it over your skin in small circular motions without pressing hard. Divide your face into zones—forehead, cheeks, and nose/chin area—spending about 20 seconds on each zone. Keep the total cleansing time to around 60 seconds (or follow your device's specific instructions), and always avoid the delicate skin around your eyes. After cleansing, rinse your face thoroughly with lukewarm water and pat dry with a clean towel. Apply your serums and moisturizers immediately after to hydrate freshly cleansed skin. Brush Care Wash your brush head clean after every use following the manufacturer's directions to avoid bacteria accumulation. All but one need rinsing with running water and periodic deep cleaning with mild soap. Always dry the brush head in the air completely before storage to avoid mold and bacteria development. What a Facial Cleansing Brush Can Do for Your Skin Proper technique with your facial cleansing brush isn't just about avoiding irritation—it's also about maximizing the many benefits these tools can offer. When used correctly as outlined in the previous section, facial cleansing brushes can transform your skincare routine with several important advantages. Better Cleaning Than Hands Alone Facial cleansing brushes remove dirt, oil, and makeup much more effectively than washing with your hands alone. The brush's movement helps dislodge impurities from pores that fingers simply can't reach, leading to fewer breakouts and clearer skin over time. Natural Skin Renewal The brush gently removes dead skin cells from the surface of your skin without harsh scrubbing. This gentle exfoliation helps smooth rough patches and prevents the dullness that comes when old skin cells build up on your face. Brighter, Fresher-Looking Skin By removing both surface impurities and dead skin cells, facial cleansing brushes help reveal the fresher skin underneath. This process leads to a more vibrant complexion with regular use, as your natural skin tone appears more even and healthy. Better Absorption of Your Skincare Products Clean, freshly exfoliated skin absorbs creams and serums more effectively. After using a facial cleansing brush, your moisturizers and treatments can work better because they penetrate deeper into the skin, potentially giving you better results from the products you already own. The Other Side of the Coin: When Facial Brushes Cause Problems While facial cleansing brushes provide better benefits like deeper cleaning and improved product absorption as we've seen, they're not without their cons. Being aware of these possible issues—and how to avoid them—means you'll get all the benefits and none of the drawbacks. Irritation and Redness Pressing too hard or choosing the wrong brush for your skin type can leave your face feeling raw and looking red. To keep your skin happy, use a light touch, start with the gentlest setting, and select a soft brush head that matches your skin's sensitivity level. The Over-Exfoliation Problem Just like too much chocolate can get you ill, over-exfoliating can damage your skin's natural barrier. This leads to dryness, sensitivity, and redness that cancels out the efforts your skincare routine is making. Start using your brush once or twice a week initially, and hear your skin out when it comes to frequency. Preventing Broken Capillaries Scrubbing too aggressively—especially around delicate areas—can break tiny blood vessels under the skin, creating permanent red marks. Keep your movements light and circular, avoid the eye area completely, and if you notice persistent redness, take a break from using your brush. Keeping Bacteria at Bay A wet brush head is a five-star hotel for bacteria, which will cause breakouts when they are transferred onto your skin. Clean your brush after use, let it air dry completely in an open well-ventilated area, and replace the brush head every so often as advised by the manufacturer. Using Your Facial Brush for Better Skin Getting great skin doesn't have to be hard. A facial cleansing brush can make a big difference when used right. The key is simple: use it in the evening, about 2-3 times a week, with gentle circles. Pay attention to how your skin reacts and adjust as needed. This tool should help your skin, not hurt it. Want better results? Choose a brush that fits your skin type, follow our tips, and watch your skin become clearer and healthier. Your skin deserves good care—start today!
Official COSLUS April 29 .2025·COSLUS
Leave a commernt
All comments are moderated before being published.
This site is protected by hCaptcha and the hCaptcha Privacy Policy and Terms of Service apply.
Contact Us
提示信息

We use cookies to personalize content and to help us provide you with a better shopping experience. By clicking“OK, Got it! ”, you agree to its use of cookies and Privacy & Security. OK