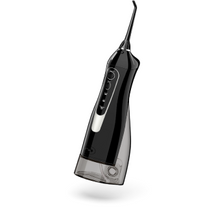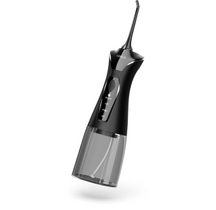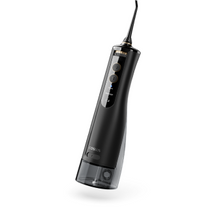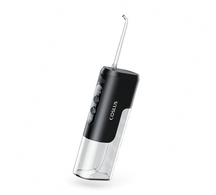
DY-108 Pro
Cart 1
You've got free shipping!

Your cart is empty

Add your favorite items to your cart

Continue Shopping
Why Choose Coslus?
img

Fast & Free Shipping

img

30-Day Money Back

img

2-Year Warranty

img

24/7 Support

How to Use an Electric Toothbrush for a Superior Clean

When was the last time you thought about how you brush your teeth? It's something most of us do o...
by Official COSLUS 26 May 2025·COSLUS
Home > Blog > How to Use an Electric Toothb...
Shares

When was the last time you thought about how you brush your teeth? It's something most of us do on autopilot, but your brushing technique has a huge impact on your dental health. Electric toothbrushes have become a game-changer for many people, offering better cleaning power with less effort than traditional manual brushes. They're not just for people with dental problems—they're for anyone who wants healthier teeth and gums with less work. This straightforward guide will show you how to use an electric toothbrush properly, maintain it, and address common concerns. Follow these simple tips, and you'll be on your way to a cleaner, healthier smile.

Why Should You Switch to an Electric Toothbrush?

Electric toothbrushes are cleaner than manual ones with less effort on your part. They take thousands of strokes per minute and get into the places that an ordinary toothbrush tends to miss.

  • Electric Toothbrushes Clean Better: The fast, regular strokes clean each tooth extensively, particularly between teeth and in hard-to-reach areas around the gumline where plaque accumulates. This prevents cavities and keeps your mouth healthier.
  • Gentler on Your Gums: Most electric toothbrushes include pressure sensors that warn you when you're brushing too hard, protecting your gums and tooth enamel from wear. This helps you develop healthier brushing habits.
  • Smart Features That Are Helpful: Today's electric toothbrushes have timers to make sure you brush for the full two minutes, reminders to move to other parts of your mouth, and various modes for sensitive teeth, gum care, or whitening.

Electric toothbrushes provide intensive cleaning every time, whether you're tired or in a hurry. They come in handy, especially for individuals who have hand disabilities like arthritis or anyone who just can't quite master the correct brushing technique.

Getting Started: Your Pre-Brushing Checklist

Before you start using your new electric toothbrush, there are a few simple steps to take that will help you get the most out of it.

Make Sure It's Fully Charged

When you first get your electric toothbrush, place it on the charging base for the recommended time before using it. Most models need 12-24 hours for a complete first charge, even if the battery indicator shows it's ready sooner. This helps condition the battery and provides maximum power for your first brushing session. After the first charge, regular charging between uses will keep your toothbrush ready whenever you need it. Many models can last 1-2 weeks on a single charge, but it's a good habit to return the brush to its charger after each use.

Take Time to Read the Instructions

Every electric toothbrush model is a bit different, so spend a few minutes looking through the instruction manual. Pay special attention to:

  • How the power button and settings work
  • What the different cleaning modes do
  • What the lights or indicators mean
  • How long to charge the brush
  • How to properly clean and maintain your toothbrush

Pick the Right Brush Head

Electric toothbrushes usually come with different brush head options, each designed for specific needs:

  • Standard/Regular heads: Good for everyday cleaning
  • Sensitive heads: Softer bristles for sensitive teeth and gums
  • Whitening heads: Often have special rubber cups or polishing bristles
  • Gum care heads: Extra-soft bristles that focus on the gumline
  • Deep clean heads: More bristles for a thorough cleaning

Choose a brush head that matches your main concern. The DY-108 Pro Electric Toothbrush Heads offer excellent standard cleaning performance for daily oral care. If you're not sure, start with the standard head that came with your toothbrush and ask your dentist for recommendations at your next visit.

How to Brush Your Teeth Correctly with an Electric Toothbrush: 6 Steps to a Perfect Clean

Using an electric toothbrush is different from using a manual one. Follow these simple steps to get the best cleaning possible and protect your teeth and gums.

Step 1: Apply Toothpaste

First, wet the brush head slightly—just enough to dampen it. Then apply a pea-sized amount of fluoride toothpaste to the brush head. This small amount is all you need because electric toothbrushes create foam and distribute the paste much better than manual brushes. Using too much toothpaste just creates excessive foam and might make you want to spit before you've finished brushing properly.

Step 2: Correct Positioning

Place the brush head against your teeth at a 45-degree angle toward your gum line. This position is crucial because it allows the bristles to clean both your teeth and the area where your gums meet your teeth—a spot where plaque loves to hide. Make sure the bristles gently touch both your teeth and gums.

Step 3: Power On and Gentle Guidance

Once the brush is in position in your mouth, turn it on. If you have a sonic toothbrush, keep your lips mostly closed to prevent splatter. Let the toothbrush do the work—this is the biggest difference from manual brushing! You don't need to scrub or press hard. In fact, using too much pressure can damage your gums and wear down tooth enamel. Simply hold the brush lightly and guide it slowly from tooth to tooth, spending about 2-3 seconds on each one. The electric motion is doing all the cleaning work for you.

Step 4: Systematic Coverage (The Quadrant Method)

To make sure you clean your entire mouth thoroughly, divide it into four sections (quadrants):

  • Upper right
  • Upper left
  • Lower right
  • Lower left

Many electric toothbrushes have a feature called a "quad pacer" that buzzes or pauses briefly every 30 seconds to remind you to move to the next section.

For each quadrant, brush:

  • The outer surfaces (the sides facing your cheeks and lips)
  • The inner surfaces (the sides facing your tongue)
  • The chewing surfaces of your molars

Start at the back of one quadrant and work your way forward, then move to the next quadrant. This systematic approach helps ensure you don't miss any areas.

Step 5: Brushing Duration

Brush for a full two minutes—the time dentists recommend for thorough cleaning. Most electric toothbrushes have a built-in timer that will alert you when two minutes have passed. If yours doesn't have this feature, set a timer on your phone. Two minutes might feel longer than you expect when you're brushing properly! Following professional brushing recommendations is one of the dental care essentials that significantly impacts long-term oral health.

Step 6: Finishing Up

After brushing your teeth, gently brush your tongue to remove bacteria that can cause bad breath. Not all electric toothbrush heads are designed for tongue cleaning, so check if yours is suitable or consider using a separate tongue scraper.

Turn off your toothbrush before removing it from your mouth. Rinse your mouth thoroughly with water, and then rinse the brush head under running water to remove any remaining toothpaste and debris. Shake off excess water and stand your toothbrush upright (if possible) to let it air dry completely between uses.

Electric toothbrushes are designed to clean better with less effort from you—so relax, be gentle, and let the technology do its job!

6 Tips That Make Your Electric Toothbrush Work Better

Once you've mastered the basics of using your electric toothbrush, these professional tips will help you take your oral care routine to the next level. These techniques maximize cleaning effectiveness while protecting your teeth and gums.

1. Don't press too hard

The most important thing to remember with electric toothbrushes is that less pressure is more effective. Let the bristles barely touch your teeth and gums—the toothbrush's technology provides all the cleaning power you need. Pressing harder doesn't clean better; it actually reduces effectiveness by limiting the brush head's ability to oscillate or vibrate properly.

Many premium models feature pressure sensors that light up, vibrate, or reduce power when you press too hard. Pay attention to these signals and adjust accordingly. If your brush doesn't have this feature, practice holding it with just enough pressure that you feel the bristles against your teeth but not enough to bend them significantly.

2. Hold it lightly like a pencil

How you hold your toothbrush makes a significant difference. Dentists recommend holding your electric toothbrush with a light, pencil-like grip between your thumb and fingers—not in a closed fist. This "pencil grip" naturally reduces the pressure you apply and gives you better control for precise positioning.

This lighter grip also helps prevent the common tendency to scrub, which can damage enamel and gums. When held properly, your brush should feel like an extension of your hand, allowing for gentle, controlled movements around your mouth.

3. Brush one quadrant of your mouth at a time

Divide your mouth into four sections (upper right, upper left, lower right, lower left) and focus on one section before moving to the next. Within each section, position the brush head to cover one tooth and part of the gum line, hold for 2-3 seconds, then move to the next tooth. This methodical approach ensures thorough cleaning throughout your mouth.

4. Use the right mode for your needs

Modern electric toothbrushes often come with multiple cleaning modes designed for specific needs. Take advantage of these features:

  • Clean (For daily cleansing)
  • Comfort
  • White (Deep Cleaning)
  • Gum care (For orthodontics and during dental treatment)
  • Sensitive (For beginners & sensitive teeth)

Start with the gentlest setting if you're new to electric toothbrushes, then gradually experiment with other modes as you become comfortable.

5. Angle the brush where teeth meet gums

The area where your gums intersect your teeth is critical to oral health, but often neglected. Position your brush at a 45-degree angle against your gum line to brush this intersection effectively. This angle positions the bristles below the gum line to sweep out plaque deposits in the sulcus (the small crevice between your gum and tooth).

Take special care in the gum line areas, especially on the teeth in the back of your mouth that are harder to reach. Proper cleaning there can go a long way toward keeping your risk for gingivitis and gum disease at a minimum.

6. Follow the same path each time you brush

Create a routine brushing pattern to cover all areas. Most dental experts suggest beginning with the outside of your back teeth on one side, moving around to the other side, then repeating for the inside, and lastly, cleaning all chewing surfaces. This methodical approach avoids missed spots.

No matter what pattern you choose, maintain consistency in order to build muscle memory so you'll brush your entire mouth every time by default.

If you are coming from a manual toothbrush, give two weeks to acclimate to the electric feel. The strong vibrations and the automatic brushing will be awkward at first, but your mouth will acclimate. Use lower intensities if your brush has levels, and progress in intensity as you acclimate to the brush.

8 Common Mistakes to Avoid When Using an Electric Toothbrush

Even with the best electric toothbrush, your oral health routine can fall short if you're making some common mistakes. Here are the main pitfalls to avoid:

1. Applying too much pressure

One of the biggest mistakes people make is brushing too hard. Unlike manual brushes, electric toothbrushes require almost no pressure to be effective. The bristles just need to touch your teeth while the motor does the work. Pressing too hard can:

  • Wear down your tooth enamel
  • Cause gum recession
  • Damage the sensitive tissue around your teeth
  • Reduce the effectiveness of the brush's motion

Many modern electric toothbrushes include pressure sensors that flash, buzz, or reduce power when you press too hard—pay attention to these signals!

2. Using manual brushing techniques

Electric toothbrushes work differently from manual ones. Avoid:

  • Scrubbing back and forth vigorously
  • Making your own circular motions
  • Moving the brush too quickly across teeth

Instead, hold the brush gently against each tooth for a few seconds and let the technology do its job. The brush is designed to create thousands of movements per minute that you simply can't replicate with manual techniques.

3. Rushing through your brushing

Skimping on brushing time is another frequent error. The professionally recommended minimum is two minutes—30 seconds per quadrant of your mouth. Most people brush for just 45-60 seconds, which is not sufficient time to effectively remove plaque. Utilize your toothbrush's built-in timer or set one on your phone if necessary.

4. Brushing randomly

Racing around your mouth without a plan will leave you with empty areas. The quadrant method (dividing your mouth into four quadrants) ensures complete coverage. Be aware of those 30-second signals your brush provides you, and double-check that you're providing each quadrant with a good cleaning before moving on to the next one.

5. Keeping brush heads too Long

Worn-out brush heads significantly reduce cleaning effectiveness. Replace your brush head:

  • Every 3 months as a general rule
  • Sooner if the bristles become frayed or discolored
  • After you've been sick
  • According to your specific manufacturer's recommendations

Some brush heads have colored indicator bristles that fade when it's time for replacement—don't ignore these signals!

6. Neglecting brush head cleaning

After brushing, many people simply give the brush head a quick rinse. However, thoroughly cleaning your brush head is essential to prevent bacteria buildup. After each use:

  • Rinse the brush head completely under running water
  • Shake off excess water
  • Store upright to allow air drying
  • Weekly, you can soak the head in antibacterial mouthwash for a deeper clean

7. Forgetting to wet the bristles first

A minor but helpful tip: slightly wetting the bristles before applying toothpaste helps with even distribution of the paste across your teeth. Dry bristles can cause the toothpaste to stick in one spot or fall off entirely.

8. Turning on the brush outside your mouth

Especially with powerful sonic toothbrushes, turning them on before they're positioned in your mouth will send toothpaste flying everywhere! Always place the brush against your teeth first, then power it on. This simple habit keeps your bathroom cleaner and ensures all the toothpaste stays where it belongs—on your teeth.

5 Tips to Keep Your Electric Toothbrush Clean and Working Well

1. Rinse your toothbrush after every use

After brushing, rinse both the brush head and handle under warm water. Make sure water flows through all the bristles to remove toothpaste and food particles. Clean where the brush head connects to the handle, as this area often traps moisture. Shake off excess water and wipe the handle with a dry cloth.

2. Store your toothbrush in a clean, dry place

  • Keep your toothbrush standing upright so water drains away
  • Store in an open, airy space (not in closed containers)
  • Keep at least 3 feet from the toilet
  • Don't let brush heads touch each other
  • Only use travel cases when actually traveling

3. Clean all parts of your toothbrush once a week

For the brush head:

  • Soak in mouthwash or a mix of hydrogen peroxide and water for 5-10 minutes
  • For buildup, clean with baking soda paste
  • Rinse thoroughly afterward

For the handle:

  • Wipe with rubbing alcohol or mild soap
  • Clean crevices and buttons with a cotton swab
  • Clean the metal shaft where the head attaches

For the charging base:

  • Unplug before cleaning
  • Wipe with a damp cloth
  • Dry completely before plugging back in

4. Get a new brush head every 3 to 4 months

  • Replace every 3 to 4 months
  • Replace sooner if bristles look frayed or discolored
  • Always replace after being sick
  • Set reminders or use subscription services to remember

5. Take care of the battery to make it last longer

  • Let the battery fully drain once a month
  • Don't leave on the charger all the time
  • If storing long-term, charge to 50%

Taking care of your electric toothbrush doesn't require much time, but makes a big difference in how well it works and how long it lasts. A clean, well-maintained toothbrush not only saves you money in the long run but also ensures you're getting the best possible clean for your teeth every day.

How Often Should I Charge My Electric Toothbrush?

Charging frequency depends on your specific model and usage patterns:

  • For standard rechargeable models: Most newer electric toothbrushes will run for 1-2 weeks on a single charge with normal twice-daily use. Allow the battery to completely drain before recharging every month or so to maintain the best battery performance and lifespan.
  • For lithium-ion battery models: These newer brushes tend to hold a charge for 2-4 weeks and do not require being fully depleted of power before being recharged. Do not keep them on the charger constantly, however, as this will reduce battery life over time.
  • For traveling: Fully charge your toothbrush prior to traveling, particularly if your model lacks USB charging. Most high-end models come with travel cases that have charging functionality built in for longer trips.

Battery status lights on most devices will blink or glow in a second color when power is low, giving ample warning to recharge before next use.

Can I Use Any Brand of Toothpaste With My Electric Toothbrush?

Yes, you may use any ADA-approved toothpaste with your electric toothbrush. Nevertheless, several things can make your experience improve:

  • Steer clear of whitening toothpastes that are very abrasive: With the enhanced cleaning power of an electric toothbrush, these may strip away enamel gradually. If whitening is your aim, switch to a less abrasive toothpaste and the whitening mode on your brush instead.
  • Consider the texture of toothpaste: Gel toothpastes may be less likely to splatter than thicker, paste types when used in conjunction with high-powered sonic instruments.
  • Use the correct amount: Use a pea-sized amount of toothpaste—too much toothpaste used produces too much foam that obstructs vision and good technique during brushing.

There are a few manufacturers that offer toothpastes specifically made to accompany their electric toothbrushes, but these are promotional partnerships and not technical requirements.

Are Electric Toothbrushes Safe For Sensitive Teeth, Braces, Or Dental Work?

Electric toothbrushes are generally safe and often recommended for people with dental sensitivities or appliances, with some specific considerations:

  • For Sensitive Teeth: Electric toothbrushes are gentle on sensitive teeth. Choose one with a "sensitive" mode that vibrates less aggressively. Start on the lowest setting and use soft-bristled brush heads used for sensitive teeth.
  • For Braces: Electric toothbrushes are wonderful for braces and often do a better job than manual brushes. Look for special orthodontic brush heads that are designed to get around brackets and wires. Don't press too hard and harm your braces.
  • For Crowns, Veneers, and Implants: New dentistry can fit electric toothbrushes. They're actually great for brushing around implants and bridges where food accumulates. Just be careful with the pressure, especially around implants.
  • Following Dental Surgery: Don't brush with an electric toothbrush on operated areas until your dentist advises you to. Usually, you'll need to wait until fully healed.

Electric toothbrushes are often prescribed by dentists to patients with dental work because they clean more effectively with less opportunity for damage from incorrect brushing.

Make Your Electric Toothbrush Work Best for You

Electric toothbrushes can transform your oral health when you use them correctly. Getting comfortable with your electric toothbrush is straightforward, and the benefits are clear: cleaner teeth with less work than a manual brush. Ready to improve your routine? Start tonight by using the right technique, check if your brush head needs replacing, and ask your dentist for personalized advice at your next visit. These small daily changes will make a real difference to your dental health over time!

You May Also LikeLearn More
Oral Care
Quick Answer Yes, many children can benefit from using a water flosser—especially those with braces, sensitive gums, or trouble using string floss. It should be part of a full oral care routine, not a total replacement. Ask your child’s dentist before making changes. Clean Teeth Are Harder for Kids Than You Think Keeping your child’s mouth healthy is important—but it’s not always easy. Brushing alone isn’t enough to keep plaque and food from hiding between the teeth. That’s why flossing matters so much. Still, many kids don’t floss. Some say it hurts. Some say it’s boring. Others simply can’t do it well. Parents often get stuck repeating reminders with little success. Water flossers are becoming a popular solution. These simple tools use water to clean between teeth. But are they safe and effective for kids? Let’s find out. Why Flossing Matters for Children Good dental habits start early. But many kids struggle with flossing, and it’s not always their fault. Tiny mouths, busy schedules, and general dislike for floss can all get in the way. That’s why understanding why flossing is important helps parents stay consistent—and kids stay cavity-free. Flossing helps prevent cavities and gum problems. Flossing removes food bits and plaque that toothbrushes miss. If left between teeth, this buildup can lead to cavities, gum bleeding, and bad breath. Early flossing builds strong habits. Dental experts recommend flossing as soon as two baby teeth touch. This can happen around age 2 or 3. At first, parents should help. By age 8–10, most kids can floss alone. Children’s teeth trap more food. Kids often snack during the day and forget to brush. Their smaller mouths also make it harder to reach all areas. Flossing becomes a key tool for full-mouth care. What Is a Water Flosser, and How Does It Work? If you’re new to water flossers, you’re not alone. These tools may seem high-tech, but they’re actually quite simple. Knowing how they work helps you decide whether they’ll fit into your child’s routine—and if they offer any real advantages over traditional floss. A water flosser uses water instead of string. It is a small tool that has a reservoir and a motor. When used, it shoots a fine jet of water to clean between teeth and below the gumline. Distinct from string floss. String floss wipes sticky plaque from the surface of the tooth. Water flossers wash it away with pressure. Both are effective—but in different ways. For optimal results, dentists usually recommend doing both. Types of water flossers. They are either plug-in and rest on your sink, or they are battery-operated and cordless. Cordless models are smaller and lighter, making them easier for children to utilize. Most have special tips. You can opt for regular, orthodontic, or gum care tips. Selecting the appropriate one ensures maximum comfort and results. Why Many Kids Prefer Water Flossers Kids aren’t always excited about dental care. But water flossers can change that. From ease of use to the “cool” factor, many children find them more fun and less stressful than string floss. Here’s what makes them stand out from a kid’s perspective. They’re easier to use. No need to wrap floss or reach into tight spots. Just aim the nozzle and press a button. This helps kids who struggle with fine motor skills. They’re more comfortable. The gentle stream doesn’t hurt or cut the gums. This makes it ideal for children with sensitive teeth or bleeding gums. They clean around braces. Food gets stuck in braces easily. Water flossers can clean around wires, brackets, and retainers better than string. They feel fun and new. Many kids see water flossers as a gadget, not a chore. That makes them more likely to use it daily. They build confidence and routine. Using a water flosser gives older children more control over their own care. It also helps turn flossing into a consistent habit. They help with tight or crowded teeth. When teeth are close together, string floss can be hard to slide in. Water flossers clean more easily between tight spaces. What Parents Should Know Before Buying Water flossers sound great—but are they really the right choice for your child? Before you buy, it’s smart to look at the whole picture: cost, maintenance, limitations, and what your child can handle. Here's what you need to weigh. Water flossers are not a full replacement. They don’t scrape plaque as well as string floss. That’s why many dentists say they should be used along with traditional flossing, not instead of it. They cost more. A water flosser usually costs between $30–$70. Additionally, you need to change the tips every two months and wash the tank once a week. Some kids don’t like the feeling. The water spray will at first seem strange or too noisy. Children might need to try it a couple of times before they feel comfortable with it. Young kids still need help. Children younger than seven years should use a water flosser with adult supervision. Parents need to teach them to avoid mess or injury. It’s not great for school or on the go. Water flossers are neither handheld nor portable outside of the home. Normal floss is still best for travel or use at lunchtime. Who Should Consider a Water Flosser? Not every kid requires a water flosser. But for others, it will make an enormous difference. If your child wears braces, has sensitive gums, or simply despises flossing, a water flosser might be a useful addition. Let us figure out who benefits the most. Kids with braces or appliances If your child has braces, expanders, or retainers, water flossers can clean where toothbrushes and string can’t reach. Kids with flossing difficulties If flossing causes tears, fights, or frustration every night, a water flosser might help turn things around. Sensitive gums or frequent bleeding A soft water stream can be less irritating than floss, especially for children with sore gums or dental anxiety. Families trying to build better habits A water flosser may get reluctant kids more excited about oral care—and that’s a win. Homes with multiple children Water flossers often allow multiple users with different tips. This can make it easier to manage oral care for more than one child. How to Use a Water Flosser Safely and Effectively Getting a water flosser is one thing—using it correctly is another. To help your child build a healthy routine, you’ll want to keep things safe, simple, and consistent. These tips can help make daily use both effective and stress-free. Use once a day. Most dentists recommend using the water flosser before brushing at night. It’s a good way to remove food that’s built up during the day. Let kids pick their tip. Some children like choosing a colored tip or handle. This small choice can make them feel more involved. Pair it with brushing and string floss. No tool does everything. Combining all three methods gives the best results. Reward progress. Use sticker charts or praise to keep kids motivated. Building positive habits early sets the stage for long-term health. Clean the flosser weekly. Empty the tank after each use. Wash it with warm water and vinegar once a week. Change the tip every 3–6 months to avoid bacteria. Frequently Asked Questions (FAQs) Q1. What’s the best water pressure setting for kids? Begin with the lowest pressure (approximately 30 PSI). Increase only if your child is not uncomfortable and does not experience bleeding gums. Q2. Can my child take a water flosser on trips? Yes. Cordless ones are perfect for travel. Simply drain and dry the tank prior to packing. Q3. Are water flossers safe for kids with loose baby teeth? Yes, but use a low setting and avoid aiming directly at the loose tooth. Ask your dentist if you’re unsure. Q4. Can I share one device between kids? Yes, if each child has their own color-coded tip. Most flossers are designed for multiple users. Q5. What’s the right age to start? Many brands suggest use starting at age 6. Younger kids may use one with adult help. Always ask your child’s dentist first. Q6. Will a water flosser help with bad breath? Yes. It helps remove food and bacteria between teeth—two major causes of bad breath in kids. Final Thoughts: Should Kids Use a Water Flosser? A water flosser is not magic—but it’s a helpful tool. For children with braces, sensitive gums, or flossing trouble, it can turn frustration into a routine. It also builds confidence and independence. Still, it’s not a total fix. Pair it with string floss, brushing, and regular check-ups for the best results. Always check with your dentist before starting. Want to make flossing easier and more fun for your child? A water flosser might be the right step forward.
Official COSLUS July 05 .2025·COSLUS
Skin Care
Facial brushes can make your skin cleaner and smoother. But only if you use them the right way. Many people use them too often or press too hard. That can hurt your skin instead of helping. In this guide, you'll learn how to use a facial brush safely. You’ll also know when to use it, who should avoid it, and how to get the best results for your skin type. Clean Start: How to Use a Facial Brush Step-by-Step Using a facial brush is easy. But you need to follow the steps in order. This helps protect your skin and keeps your brush working well. 1. Remove Makeup First Always remove your makeup prior to using your brush. Use a makeup remover, micellar water, or cleansing balm. This will clean the brush and stop you from clogging up your pores by pushing makeup further into them. 2. Apply a Mild Cleanser Choose a face wash that does not have scrubbing beads and strong acids. Foaming cleanser or gel bases are fine. Do not use any face wash that has exfoliating particles in it. 3. Wet Your Face and the Brush Lukewarm water helps the brush move smoothly. Splash water on your face. Then, soak the brush head under running water. This helps reduce friction and prevents your skin from getting scratched. Make sure both are wet before you turn on the brush. 4. Move in Small Circles Turn on the brush if it’s electric. Use light, circular motions on your cheeks, nose, forehead, and chin. Do not stay in one place too long. The total time should be about one minute. 5. Rinse and Pat Dry After brushing, rinse your face with lukewarm water until all the cleanser is gone. Don’t leave any residue behind. Use a clean towel to gently pat your skin dry. Avoid rubbing, which can irritate fresh skin. Also, rinse the brush head well and shake off excess water. Let it air-dry in a clean space. 6. Finish With Your Routine Cleansing opens your pores and preps your skin. After brushing, use a toner to balance your skin’s pH. Then, apply a serum based on your skin needs—like hydration or calming care. Finish with a gentle moisturizer to lock in hydration and soothe your skin barrier. 7. Safety Tips Never press hard on your face. Don’t use it over pimples, scabs, or rashes. Follow the instructions for your brush model. Clean your brush after every use. Timing Matters: How Often Should You Use a Facial Brush? Facial brushes can be too much if you use them every day. Your skin needs time to rest and rebuild. The right frequency on your skin type and how your skin reacts. Oily or Combination Skin If your skin makes extra oil or gets shiny quickly, a brush can help keep your pores clear. Use it two times per week. If your skin handles exfoliation well, you might use it three times—but stop if redness or tightness happens. Always watch how your skin reacts. Dry or Sensitive Skin If your skin feels tight, flaky, or reacts easily, be more careful. Start with once a week. If your skin feels okay, try twice per week. But stop if you see redness or get a burning feeling. Use the softest brush head you can find and avoid using it near irritated spots. Mature or Thin Skin Older skin is often more delicate. Use once a week at most. Choose the softest brush head available. Signs You Are Overdoing It Redness that doesn’t go away after 30 minutes Flaking or dry patches Skin that stings when applying products If any of these happen, stop using the brush for a week. Let your skin recover before trying again. Know the Limits: Who Should Skip Facial Brushes? Facial brushes are not right for everyone. Some skin types may get worse with brushing. Here are the top reasons to avoid them: Active acne: Brushing over inflamed pimples can spread bacteria. Skin diseases: People with rosacea, eczema, or psoriasis should not use facial brushes. Damaged skin: If your skin is sunburned or healing from a treatment, skip the brush. Post-surgery or peeling: Fresh skin needs time to recover fully. If unsure, ask a dermatologist before starting. Common Mistakes That Harm the Skin Many people think more brushing means cleaner skin. That’s not true. Here are mistakes that can hurt your face: Using Strong Exfoliants Don’t use acid-based cleansers or physical scrubs with your brush. That’s too much exfoliation and can cause micro-tears in your skin. Not Cleaning the Brush A dirty brush is not safe. It can collect oil, dead skin, and bacteria. Rinse the brush every time after use. Once a week, clean it with gentle soap and warm water. Let it dry fully in the open air. Pushing Too Hard More pressure doesn’t mean cleaner skin. It can break tiny blood vessels or cause swelling. Always use light, gentle motions. Let the brush do the work. Brushing Too Long One minute is enough. Don’t try to "deep clean" by brushing for longer. It can cause more harm than good. Fitting It In: Where the Facial Brush Belongs in Your Routine To get the best results, use your brush at the right time in your skincare routine. Night Is Best Your skin collects dirt, oil, and sunscreen during the day. Brushing at night helps remove all of that. Your skin can also rest while you sleep. Routine Order (Evening) Remove makeup Apply cleanser Use the facial brush Rinse and pat dry Use toner Apply serum Finish with moisturizer Morning Routine? Use Caution In the morning, you don’t need deep cleaning. Washing with your hands is enough. Using a brush may irritate skin that’s still recovering from the night before. Real Routines: Match Your Skin Type The brush is just one part of your skincare. Here’s how to fit it into different skin types: Step For Oily Skin For Dry Skin For Sensitive Skin For Mature Skin Cleanser Gel cleanser Cream cleanser Fragrance-free cleanser Balm or cream cleanser Brushing Brush twice a week Brush once a week Brush with soft bristles once a week Soft brush once a week Toner Pore-tightening toner Hydrating toner Soothing toner Antioxidant toner Serum Lightweight serum Hyaluronic acid serum Barrier-repair serum Anti-aging serum Moisturizer/Cream Oil-free moisturizer Thick moisturizer Rich moisturizer with ceramides Nourishing night cream Frequently Asked Questions (FAQs) Q1. Can I use a facial brush with retinol? No. Do not use a facial brush on the same night you use retinol. This can make your skin very dry or irritated. Leave 1–2 days between brushing and retinol use. Q2. How often should I replace my brush head? Most brands recommend changing the brush headistles look bent, dirty, or discolored, replace them sooner. Q3. Can I use my facial brush in the shower? Some brushes are waterproof, others are not. Check the product label. If waterproof, it’s okay to use in the shower—but always air-dry it afterward to prevent mold. Q4. Is a silicone brush better for hygiene? Of course. Silicone brushes don’t hold bacteria as easily as bristle brushes. They are easier to clean and better for sensitive skin. Q5. Can I use the same brush for my face and body? No. Use a separate brush for your face. Body brushes are usually rougher and not safe for facial skin. Final Thoughts: Use Smart, Brush Gentle Facial brushes can be helpful—but only when used with care. Start slow. Don’t press hard. Clean your brush often. Use it at night for better results. Pay attention to how your skin feels after use. If it feels smooth and soft, you’re doing it right. If it feels sore or red, take a break. With the right method, your facial brush can be a great tool for clean, healthy skin.
Official COSLUS July 05 .2025·COSLUS
Using an electric toothbrush feels like it should take care of everything, right? But even with the best brush, it’s easy to miss spots or use it the wrong way. Brushing too hard or skipping around can leave behind plaque and cause gum trouble. The good news is, a few small tweaks can make your brushing way more effective. With the right moves, your mouth feels cleaner and your smile stays healthier. 1. Hold the Brush at a 45-Degree Angle Holding the brush head at a 45-degree angle along your gum line allows the bristles to reach both the edge of your tooth and the area just beneath the gums—where plaque tends to build up most. Feel free to adjust this, especially in avoiding gingivitis, which often starts when that plaque is not effectively removed. Don't scrub back and forth; rather, position the brush at that angle and let it do its thing. The spins or shaking is designed to loosen dirt without additional pressure, so move the brush gently and let it clean as it goes. 2. Let the Brush Do the Work—Don't Scrub One of the biggest mistakes people make when brushing with electric toothbrushes is to brush as you would with a manual toothbrush—scrubbing hard and fast. Not only is this unnecessary, but it can also wear away your enamel and irritate your gums in the long term. Electric toothbrushes do all the work for you, so you just have to hold and guide. This is especially true for sonic electric toothbrushes, which use high-frequency vibrations to clean more effectively than manual brushing. This is how to brush properly: 1. Hold the brush gently—don't squeeze. 2. Push the brush head against your teeth and gums—then let it spin or vibrate on each area. 3. Work it slowly back and forth over your teeth—move the brush head tooth by tooth, without applying additional pressure. 4. Don't rub back and forth—this could damage more than good. 5. Let the technology in the brush do it for you—most models clean quicker than your hand can, so don't apply pressure. Softer brushing is not only safer but also more effective. 3. Brush for 2 Full Minutes (Use the Built-In Timer) Most people don’t brush as long as they think—they stop after 45 seconds to a minute without even realizing it. But to fully clean your teeth and gums, you need a full two minutes. That gives your brush enough time to reach every surface and break down the buildup that leads to plaque and bad breath. A helpful way to stay on track is the 30-second-per-quadrant method. Divide your mouth into four sections: upper left, upper right, lower left, and lower right. Spend about 30 seconds brushing each one slowly and evenly. Most electric toothbrushes come with a built-in timer that either pauses or buzzes every 30 seconds, so you know when it’s time to switch areas. Don’t try to guess the time in your head—it’s usually shorter than you think. Using the timer ensures you give every part of your mouth equal care, making your brushing routine more consistent and effective. 4. Clean Each Tooth Surface: Front, Back, and Chewing Surface If you're using an automatic or rushed brusher, it's easy to miss the crucial areas that are most crucial. Each tooth has three important sides that need your attention: the front, the back, and the top (chewing surface). Start with the Front This is what the outside world gets to see when you grin. Angle your brush and go slowly across each tooth. Don't merely sweep across a row of them—stop for a second or two on each one so the bristles can get in there and do their job. Don't Skip the Backs The back of your teeth, especially those towards the tongue, are prone to being neglected. These places are just as susceptible to building up plaque and bacteria. Angle the brush slightly and move slowly along the back of each set of teeth. This keeps your breath clean and your gums in good health. Target the Chewing Surface Molars and premolars also have deep grooves that trap food and sugar. Put the brush flat on top of each tooth, and let it have a few seconds to clean out those tiny pits. This is important for cavity prevention. Front Bottom Teeth Need Special Care The back surface of your lower front teeth is one of the easiest areas to miss. The space is thin and tight, so try holding the brush head upright and using light up-and-down motions. A few extra seconds here will prevent tartar from building up. Taking it slow and covering every surface allows your brushing to be that much more efficient. With a little more TLC, your teeth will be smoother, your breath will still be fresher, and your dentist will notice the difference. 5. Use the Right Brush Head and Replace It Often Not all brush heads are made alike, and the proper one can make your routine more effective and more comfortable. Soft bristles are safest and most recommended for most people—they are good on gums but hard enough to clean properly. If you have special requirements, like braces, sensitive gums, or heavy plaque accumulation, there are specific brush heads that cater to those conditions. Also, don't forget to replace your brush head every 3 months. Even earlier if the bristles are starting to flex or fray. Worn-down bristles can't get the task accomplished and can even irritate your gums the incorrect way. Most heads are easy to swap, and a couple even have color-fade markers so you know it is time for a new head. Clean tools equal a cleaner mouth. If you're considering an upgrade, sonic toothbrushes offer advanced cleaning technology that might better suit your oral health needs. 6. Pay Attention to Your Gumline and Back Molars Some areas are difficult to reach even with an electric toothbrush—especially along the gum line and in the back teeth. These are often where plaque and food particles accumulate most easily, but they're also where these areas get skimped or rushed. Spending a little extra time taking care of them will pay dividends in the battle against gum disease and tooth decay. This is how to clean these annoying areas better: 1. Tilt the brush slightly towards the gumline to enable bristles to gently sweep below where plaque tends to build up. 2. March slowly and pause briefly along each curvature of your gums but avoid pressing too hard. 3. Tilt the brush head to be able to reach your back molars behind, brushing the top and sides thoroughly. 4. Spend a few extra seconds in these areas, especially if food traps are there or your gums bleed during brushing. These subtle changes clean your whole mouth—not just the difficult spots. 7. Rinse and Clean the Brush After Every Use Getting your toothbrush clean is just as important as good brushing. Toothpaste and germs can be left behind on the bristles or handle of your toothbrush after brushing. If not, you may be spreading mold, unpleasant smells, or possibly redepositing germs into your mouth the next time you brush. Make cleaning a habit: 1. Rinse the brush head thoroughly with running water to dislodge any excess toothpaste and debris. 2. Shake off excess water and store standing up, where it will air dry fully between uses. Avoid using closed containers, which retain moisture. 3. Wash the handle once a week, especially in and around buttons or ridges where dirt is likely to settle. 4. Clean from time to time, especially during flu season or after a cold—some models allow for brush head disinfection by ultraviolet cleaners or dipping into antibacterial rinse. A clean brush protects both your teeth and your health. Brush Better with These Electric Toothbrush Techniques Brushing with an electric toothbrush makes all the difference—if you brush smart. These seven simple steps guarantee you're brushing better, lowering your risk of gum issues, and wiping out the spots most of us commonly miss. No need to overhaul your whole routine—just make a few small changes and the payoff is huge. Try putting one or two of these tips into practice today and see how much fresher your mouth feels. Your smile will thank you.
Official COSLUS June 26 .2025·COSLUS
Think your electric toothbrush cleans itself while it cleans your teeth? Think again. A neglected toothbrush becomes a bacteria magnet and stops working as well as it should. The good news is that proper maintenance takes just a few minutes and can extend your toothbrush's life significantly. Small changes to your routine can make a huge difference in both hygiene and performance. Why Your Electric Toothbrush Needs Regular Cleaning and Care Your electric toothbrush is a precision tool designed to remove plaque and bacteria from your teeth and gums. But when you don't maintain it properly, it can actually work against you, harboring the very germs it's supposed to eliminate. Regular cleaning and maintenance aren't just about keeping your toothbrush looking good—they're essential for your oral health and wallet. Clean Toothbrushes Work Better Electric toothbrushes use fast movements to break up plaque and food bits that regular brushing misses. The bristles get into tight spots between your teeth and along your gums to remove bacteria before they cause problems. But this only works when the bristles are clean and the toothbrush is running properly. This is particularly important for sonic toothbrushes, which rely on high-frequency vibrations to deliver their cleaning power. Knowing how to use your electric toothbrush properly is just as important as keeping it clean for achieving a superior clean. Dirty Toothbrushes Can Make Your Mouth Worse When you don't clean your toothbrush, it becomes home to the same bad bacteria that cause cavities and gum disease. Old toothpaste and spit stick around, giving germs a perfect place to grow. All this buildup can also slow down the motor and make the bristles less effective at cleaning your teeth. Research shows contaminated toothbrushes can harbor harmful pathogens that threaten both oral health and overall wellbeing. Proper Care Saves Money and Protects Your Health Cleaning your toothbrush regularly kills germs before they can multiply and cause dental problems. Clean bristles stay strong and do a better job removing plaque every time you brush. Taking good care of your toothbrush also prevents expensive repairs and makes it last much longer—sometimes two or three times as long as a neglected one. With these compelling reasons to keep your toothbrush clean, let's make sure you have everything you need to get started. The good news is that most cleaning supplies are probably already sitting in your bathroom. Essential Supplies for Electric Toothbrush Cleaning You don't need expensive or fancy products to keep your electric toothbrush clean. Most of what you need is probably already in your bathroom or kitchen. Having the right supplies on hand makes cleaning quick and easy. What You'll Need Supply Purpose Where to Find Soft cloth or paper towels Wiping down surfaces Bathroom/kitchen Mild hand soap or dish soap Gentle cleaning Kitchen sink Antibacterial mouthwash or hydrogen peroxide Disinfecting brush heads Medicine cabinet Soft-bristled brush (old toothbrush works) Scrubbing tight spots Bathroom drawer UV sanitizer (optional) Extra sanitizing power Online/pharmacy 4 Safety Steps You Must Follow Before you start cleaning, these safety steps will protect both you and your toothbrush: 1. Always unplug your toothbrush charger before cleaning any electrical parts 2. Keep water away from charging ports and electrical connections 3. Make sure everything is completely dry before plugging back in 4. Never submerge the handle or charger in water With these basic supplies ready to go, you're all set to start the actual cleaning process. How to Clean Your Electric Toothbrush: Step-by-Step Cleaning your electric toothbrush properly isn't rocket science, but a lot of people get it wrong. The good news is that with just a few simple habits, you can keep your toothbrush working great and your mouth healthier. Here's exactly what you need to do. What to Do After Every Brush Your after-brushing routine sets the tone for how clean your toothbrush stays. These quick steps take under two minutes but make a huge difference: 1. Rinse the brush head right away under warm water—don't let toothpaste and gunk sit there and get crusty 2. Pop off the brush head and rinse both pieces separately, especially around where they connect (that's where gross stuff loves to hide) 3. Give everything a gentle shake and pat dry with a clean towel—just don't scrub the bristles too hard or you'll wreck them 4. Stand your toothbrush upright somewhere with good airflow, away from the toilet if possible, so it can dry out completely Getting into this habit after every brushing keeps things fresh and makes your weekly deep clean much easier. Your Weekly Deep Clean Once a week, your brush head needs some extra attention to kill off stubborn germs that regular rinsing misses. This is especially important if you've been under the weather: What You're Doing How to Do It How Long Quick Tip Disinfect soak Drop the brush head in antibacterial mouthwash or hydrogen peroxide 15-30 minutes Use whatever mouthwash you already have Scrub it clean Gently brush the bristles and tight spots with a soft brush 2-3 minutes That old toothbrush in your drawer works great Go natural Soak in watered-down white vinegar (mix 1:2 with water) 15-30 minutes Perfect for getting rid of buildup Final rinse Rinse everything thoroughly and let it air dry 1 minute Make sure no cleaning stuff is left behind This weekly ritual keeps your brush head in top shape and working like it should. For sonic toothbrushes with their advanced technology, this maintenance is particularly important to preserve the precision and effectiveness of their high-frequency vibrations. Keeping the Electric Parts Clean The handle and charger need some TLC too, but you've got to be careful around anything electrical. Clean these parts weekly or whenever they look grimy: 1. Always unplug the charger first—seriously, water and electricity are not friends 2. Wipe down the handle with a damp cloth, but keep water away from the charging spots and buttons 3. Dust off the charger base with a dry cloth, getting into those little grooves where dirt builds up 4. Clean the charger with a barely-wet cloth, then dry it right away with a clean towel 5. Let everything air dry for 10-15 minutes before plugging back in—patience pays off here Taking good care of the electrical bits means your toothbrush will keep charging properly and won't break down on you. However, getting the cleaning routine down is just half the battle—where you store your toothbrush between uses is equally important. Where and How to Store Your Electric Toothbrush Where and how you store your electric toothbrush makes a huge difference in how clean it stays and how long it lasts. Most people make storage mistakes that turn their toothbrush into a bacteria magnet without even realizing it. Getting the storage right is actually pretty simple once you know what works. Keep It Standing Up and Uncovered at Home Your toothbrush needs to breathe after each use, so always store it upright in a holder or cup where air can flow around it. Never put a cap or cover on a wet toothbrush—that traps moisture and creates the perfect breeding ground for mold and bacteria. Find a spot away from the toilet if possible, since flushing can spray germs around your bathroom. The key is giving your toothbrush space to dry out completely between uses. Use a Ventilated Case for Travel Only When you're traveling, you need protection but still want airflow, so invest in a travel case with ventilation holes or slots. These cases protect your toothbrush from getting banged around in your luggage while still letting moisture escape. Make sure your toothbrush is as dry as possible before packing it, and take it out of the case as soon as you reach your destination. Never use these enclosed cases at home for daily storage. Never Share Brush Heads Each person should have their own brush head—sharing is a fast way to pass bacteria, viruses, and other germs back and forth. If you have multiple electric toothbrushes in your household, keep them separated so the brush heads don't touch each other. Color-coded brush heads or labels make it easy for everyone to grab the right one. Replace any brush head that might have been contaminated, like after someone's been sick. Smart storage prevents most problems before they start, but your battery needs some love too. A few simple charging habits can dramatically extend your toothbrush's lifespan. How to Keep Your Toothbrush Battery Healthy Your electric toothbrush battery is what keeps everything running, but most people don't think about taking care of it until it starts dying too quickly. Good battery habits can double or even triple how long your toothbrush lasts before you need a replacement. A few simple practices will keep your battery strong and your toothbrush reliable. Follow Smart Charging Habits Give your new toothbrush a full charge before using it for the first time—this helps the battery reach its full potential right from the start. Try not to top off the battery constantly with short charging sessions, as this can actually wear it out faster over time. Instead, let it run down to about 20-30% before charging it back up fully. Some manufacturers recommend letting the battery drain completely once a month, so check your manual to see what works best for your specific model. Keep the Charging Contacts Clean Those little metal contacts where your toothbrush sits on the charger can get gunky with toothpaste residue, soap scum, and general bathroom grime. When they're dirty, your toothbrush won't charge properly and the battery will suffer. Once a week, unplug your charger and gently wipe both the contacts on the toothbrush handle and the charger base with a dry cotton swab or soft cloth. If there's stubborn buildup, use a slightly damp cloth but make sure everything is completely dry before plugging back in. When Should You Replace Your Brush Head? A healthy battery will keep your toothbrush running strong, but even the best-maintained toothbrush needs new brush heads regularly. Most people wait way too long to replace their brush heads, which means they're not getting the clean they think they are. Follow the Three-Month Rule Replace your brush head every three months, even if it still looks okay to you. This isn't just a marketing trick—dental professionals recommend this timeline because bristles lose their effectiveness long before they look obviously worn out. Many brush heads come with indicator bristles that fade from blue to white when it's time for a change, which takes the guesswork out of timing. If you're recovering from being sick, replace the brush head right away to avoid reinfecting yourself. Watch for These Warning Signs Your brush head will tell you when it's time to go, even before the three-month mark hits. Look for bristles that are bent, frayed, or splaying outward instead of standing straight up—this means they're not cleaning effectively anymore. If you notice your teeth don't feel as clean after brushing, or if your brush head has a smell that won't go away even after cleaning, it's definitely time for a replacement. Some people need to replace their brush heads more often if they brush aggressively or have particularly hard water that wears down the bristles faster. Electric Toothbrush Extras: Sanitizers and Must-Have Accessories If you want to take your toothbrush cleaning to the next level, there are some high-tech options and accessories that can help. But before you spend extra money, it's important to know what actually works and what's just marketing hype. Some of these gadgets are genuinely useful, while others can actually damage your toothbrush. UV Sanitizers: Are They Worth It? UV sanitizers use ultraviolet light to kill germs on your brush head, and they do work when used properly. The main benefits are convenience and peace of mind—you just pop your brush head in and let the machine do its thing. However, they're not absolutely necessary if you're already following a good cleaning routine, and cheaper models might not provide enough UV exposure to be effective. Quality UV sanitizers can cost $30-100, so consider whether the extra germ-killing power is worth it for your situation. Look for FDA-Approved Products When shopping for sanitizing products or accessories, stick with items that have FDA approval or clearance. These products have been tested for safety and effectiveness, unlike many knockoff gadgets you'll find online. Popular brands like Violife and Pursonic make reliable UV sanitizers that are FDA-cleared. For cleaning solutions, hydrogen peroxide and antibacterial mouthwashes are your safest bets since they're already approved for oral use. Never Use These Cleaning Methods Some cleaning methods that work for other items will destroy your electric toothbrush. Never put any part of your toothbrush in the dishwasher—the high heat and harsh detergents will melt plastic parts and ruin the bristles. Microwaving toothbrush parts is equally dangerous and can cause fires or toxic fumes. Avoid boiling water, bleach, or harsh chemicals that aren't meant for oral care products. Stick to gentle cleaning methods designed for items that go in your mouth. Electric Toothbrush Acting Up? Here Are 4 Quick Fixes Even with all the right supplies and techniques, sometimes things can still go wrong with your electric toothbrush. The good news is that most problems are fixable with the right approach. Here are the most common issues people face and how to solve them quickly. Problem 1: Mold Growing on Your Toothbrush Mold will usually take the form of green or black patches, especially around the brush head connection or in the handle. This happens when your toothbrush spends an excessive amount of time wet in a poorly ventilated area. Soak parts that are subject to mold in hydrogen peroxide for 30 minutes and then scrub clean with a mild scrub using an old toothbrush to remove obvious mold. If mold persists, you need better airflow in your storage area and should replace the brush head right away. Problem 2: Bad Smells That Won't Go Away Persistent smells mean bacteria have made a base in difficult-to-clean spaces on your toothbrush. Soak the head in antibacterial mouthwash overnight, then wash and air dry it completely. Should the smell be coming from the handle, wipe the dirt off with diluted white vinegar and make sure you are letting it air dry completely after each usage. Sometimes an enduring smell means a new brush head is needed, though the brush head might look fine. Problem 3: Stubborn Buildup You Can't Remove The white or yellowish buildup is probably dried toothpaste, hard water minerals, or a combination of both. Make a paste with baking soda and water and then apply an old toothbrush to gently scrub out the buildup. For very stubborn spots, soak areas in white vinegar for 15-20 minutes prior to scrubbing. Rince everything through afterward and make sure no cleaning residue is left behind. Problem 4: Toothbrush Won't Work After Cleaning If your toothbrush is not working after brushing, water probably gets into the electrical parts. Shut it off immediately and remove the brush head, and give it a good shake to remove excess water. Let everything air dry for a minimum of 24 hours before trying to use or charge it again. If it still doesn't work after drying completely out, call the manufacturer—most of them offer warranties against water damage if you clean it properly. Electric Toothbrush Cleaning FAQs: Your Most Common Questions Answered Q1: Can I use regular soap or toothpaste to clean my brush? Yes, you can use mild hand soap or dish soap to clean your electric toothbrush—just make sure it's gentle and fragrance-free. Toothpaste is too harsh for the brush head; it would scratch its bristles and plastic parts. You could use antibacterial mouthwash, hydrogen peroxide, or some diluted white vinegar. Q2: Is it safe to share electric toothbrush handles? No, you shouldn't borrow electric toothbrush handles from other family members. Even if you replace the brush heads, germs are still going to be transferred through saliva that touches the handle when you are brushing. Everybody needs his or her own entire toothbrush so that bacteria, viruses, and other infections are not shared. In cases where you have to share for a short period, make sure you sanitize the entire length of the handle with some antibacterial wipes before giving it to the next user. Q3: How do I clean hard-to-reach areas? An old toothbrush or soft-bristled brush is great for getting into areas around the brush head connection and handle recesses. Cotton swabs are excellent for small grooves and charging contacts—to clean electrical components, use dry swabs. For really tough spots, clean the removable parts first in your cleaning solution to break loose grime, then scrub gently. Never use sharp points that can puncture the plastic or damage the seals, nor force anything. Keep Your Electric Toothbrush Clean for Better Oral Health Keeping your electric toothbrush clean isn't rocket science, but it makes a huge difference in how well it works. These simple daily and weekly routines will save you money and keep your oral health on track. The best part is that once you get into the habit, it becomes second nature. Give your toothbrush the care it deserves starting today—you'll notice the difference right away.
Official COSLUS June 26 .2025·COSLUS
Leave a comment
All comments are moderated before being published.
This site is protected by hCaptcha and the hCaptcha Privacy Policy and Terms of Service apply.
Contact Us
提示信息

We use cookies to personalize content and to help us provide you with a better shopping experience. By clicking“OK, Got it! ”, you agree to its use of cookies and Privacy & Security. OK