Free shipping sitewide30-Day Money BackFree shipping sitewide30-Day Money BackFree shipping sitewide30-Day Money BackFree shipping sitewide30-Day Money BackFree shipping sitewide30-Day Money Back
DY-108 Pro
Cart 1
You've got free shipping!

Your cart is empty

Add your favorite items to your cart

Continue Shopping
Why Choose Coslus?
img

Fast & Free Shipping

img

30-Day Money Back

img

2-Year Warranty

img

24/7 Support

Complete Electric Toothbrush Care: Cleaning and Maintenance Guide for Peak Performance

Think your electric toothbrush cleans itself while it cleans your teeth? Think again. A neglected...
by Official COSLUS 26 June 2025·COSLUS
Home > Blog > Complete Electric Toothbrush ...
Shares

Think your electric toothbrush cleans itself while it cleans your teeth? Think again. A neglected toothbrush becomes a bacteria magnet and stops working as well as it should. The good news is that proper maintenance takes just a few minutes and can extend your toothbrush's life significantly. Small changes to your routine can make a huge difference in both hygiene and performance.

Why Your Electric Toothbrush Needs Regular Cleaning and Care

Your electric toothbrush is a precision tool designed to remove plaque and bacteria from your teeth and gums. But when you don't maintain it properly, it can actually work against you, harboring the very germs it's supposed to eliminate. Regular cleaning and maintenance aren't just about keeping your toothbrush looking good—they're essential for your oral health and wallet.

Clean Toothbrushes Work Better

Electric toothbrushes use fast movements to break up plaque and food bits that regular brushing misses. The bristles get into tight spots between your teeth and along your gums to remove bacteria before they cause problems. But this only works when the bristles are clean and the toothbrush is running properly. This is particularly important for sonic toothbrushes, which rely on high-frequency vibrations to deliver their cleaning power. Knowing how to use your electric toothbrush properly is just as important as keeping it clean for achieving a superior clean.

Dirty Toothbrushes Can Make Your Mouth Worse

When you don't clean your toothbrush, it becomes home to the same bad bacteria that cause cavities and gum disease. Old toothpaste and spit stick around, giving germs a perfect place to grow. All this buildup can also slow down the motor and make the bristles less effective at cleaning your teeth. Research shows contaminated toothbrushes can harbor harmful pathogens that threaten both oral health and overall wellbeing.

Proper Care Saves Money and Protects Your Health

Cleaning your toothbrush regularly kills germs before they can multiply and cause dental problems. Clean bristles stay strong and do a better job removing plaque every time you brush. Taking good care of your toothbrush also prevents expensive repairs and makes it last much longer—sometimes two or three times as long as a neglected one.

With these compelling reasons to keep your toothbrush clean, let's make sure you have everything you need to get started. The good news is that most cleaning supplies are probably already sitting in your bathroom.

Essential Supplies for Electric Toothbrush Cleaning

You don't need expensive or fancy products to keep your electric toothbrush clean. Most of what you need is probably already in your bathroom or kitchen. Having the right supplies on hand makes cleaning quick and easy.

What You'll Need

Supply Purpose Where to Find
Soft cloth or paper towels Wiping down surfaces Bathroom/kitchen
Mild hand soap or dish soap Gentle cleaning Kitchen sink
Antibacterial mouthwash or hydrogen peroxide Disinfecting brush heads Medicine cabinet
Soft-bristled brush (old toothbrush works) Scrubbing tight spots Bathroom drawer
UV sanitizer (optional) Extra sanitizing power Online/pharmacy

4 Safety Steps You Must Follow

Before you start cleaning, these safety steps will protect both you and your toothbrush:

1. Always unplug your toothbrush charger before cleaning any electrical parts

2. Keep water away from charging ports and electrical connections

3. Make sure everything is completely dry before plugging back in

4. Never submerge the handle or charger in water

With these basic supplies ready to go, you're all set to start the actual cleaning process.

How to Clean Your Electric Toothbrush: Step-by-Step

Cleaning your electric toothbrush properly isn't rocket science, but a lot of people get it wrong. The good news is that with just a few simple habits, you can keep your toothbrush working great and your mouth healthier. Here's exactly what you need to do.

What to Do After Every Brush

Your after-brushing routine sets the tone for how clean your toothbrush stays. These quick steps take under two minutes but make a huge difference:

1. Rinse the brush head right away under warm water—don't let toothpaste and gunk sit there and get crusty

2. Pop off the brush head and rinse both pieces separately, especially around where they connect (that's where gross stuff loves to hide)

3. Give everything a gentle shake and pat dry with a clean towel—just don't scrub the bristles too hard or you'll wreck them

4. Stand your toothbrush upright somewhere with good airflow, away from the toilet if possible, so it can dry out completely

Getting into this habit after every brushing keeps things fresh and makes your weekly deep clean much easier.

Your Weekly Deep Clean

Once a week, your brush head needs some extra attention to kill off stubborn germs that regular rinsing misses. This is especially important if you've been under the weather:

What You're Doing How to Do It How Long Quick Tip
Disinfect soak Drop the brush head in antibacterial mouthwash or hydrogen peroxide 15-30 minutes Use whatever mouthwash you already have
Scrub it clean Gently brush the bristles and tight spots with a soft brush 2-3 minutes That old toothbrush in your drawer works great
Go natural Soak in watered-down white vinegar (mix 1:2 with water) 15-30 minutes Perfect for getting rid of buildup
Final rinse Rinse everything thoroughly and let it air dry 1 minute Make sure no cleaning stuff is left behind

This weekly ritual keeps your brush head in top shape and working like it should. For sonic toothbrushes with their advanced technology, this maintenance is particularly important to preserve the precision and effectiveness of their high-frequency vibrations.

Keeping the Electric Parts Clean

The handle and charger need some TLC too, but you've got to be careful around anything electrical. Clean these parts weekly or whenever they look grimy:

1. Always unplug the charger first—seriously, water and electricity are not friends

2. Wipe down the handle with a damp cloth, but keep water away from the charging spots and buttons

3. Dust off the charger base with a dry cloth, getting into those little grooves where dirt builds up

4. Clean the charger with a barely-wet cloth, then dry it right away with a clean towel

5. Let everything air dry for 10-15 minutes before plugging back in—patience pays off here

Taking good care of the electrical bits means your toothbrush will keep charging properly and won't break down on you. However, getting the cleaning routine down is just half the battle—where you store your toothbrush between uses is equally important.

Where and How to Store Your Electric Toothbrush

Where and how you store your electric toothbrush makes a huge difference in how clean it stays and how long it lasts. Most people make storage mistakes that turn their toothbrush into a bacteria magnet without even realizing it. Getting the storage right is actually pretty simple once you know what works.

Keep It Standing Up and Uncovered at Home

Your toothbrush needs to breathe after each use, so always store it upright in a holder or cup where air can flow around it. Never put a cap or cover on a wet toothbrush—that traps moisture and creates the perfect breeding ground for mold and bacteria. Find a spot away from the toilet if possible, since flushing can spray germs around your bathroom. The key is giving your toothbrush space to dry out completely between uses.

Use a Ventilated Case for Travel Only

When you're traveling, you need protection but still want airflow, so invest in a travel case with ventilation holes or slots. These cases protect your toothbrush from getting banged around in your luggage while still letting moisture escape. Make sure your toothbrush is as dry as possible before packing it, and take it out of the case as soon as you reach your destination. Never use these enclosed cases at home for daily storage.

Never Share Brush Heads

Each person should have their own brush head—sharing is a fast way to pass bacteria, viruses, and other germs back and forth. If you have multiple electric toothbrushes in your household, keep them separated so the brush heads don't touch each other. Color-coded brush heads or labels make it easy for everyone to grab the right one. Replace any brush head that might have been contaminated, like after someone's been sick.

Smart storage prevents most problems before they start, but your battery needs some love too. A few simple charging habits can dramatically extend your toothbrush's lifespan.

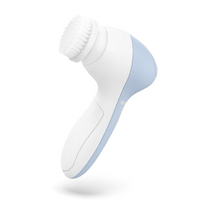
How to Keep Your Toothbrush Battery Healthy

Your electric toothbrush battery is what keeps everything running, but most people don't think about taking care of it until it starts dying too quickly. Good battery habits can double or even triple how long your toothbrush lasts before you need a replacement. A few simple practices will keep your battery strong and your toothbrush reliable.

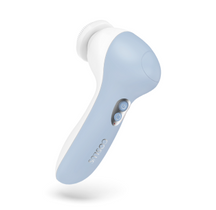
Follow Smart Charging Habits

Give your new toothbrush a full charge before using it for the first time—this helps the battery reach its full potential right from the start. Try not to top off the battery constantly with short charging sessions, as this can actually wear it out faster over time. Instead, let it run down to about 20-30% before charging it back up fully. Some manufacturers recommend letting the battery drain completely once a month, so check your manual to see what works best for your specific model.

Keep the Charging Contacts Clean

Those little metal contacts where your toothbrush sits on the charger can get gunky with toothpaste residue, soap scum, and general bathroom grime. When they're dirty, your toothbrush won't charge properly and the battery will suffer. Once a week, unplug your charger and gently wipe both the contacts on the toothbrush handle and the charger base with a dry cotton swab or soft cloth. If there's stubborn buildup, use a slightly damp cloth but make sure everything is completely dry before plugging back in.

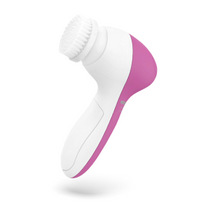
When Should You Replace Your Brush Head?

A healthy battery will keep your toothbrush running strong, but even the best-maintained toothbrush needs new brush heads regularly. Most people wait way too long to replace their brush heads, which means they're not getting the clean they think they are.

Follow the Three-Month Rule

Replace your brush head every three months, even if it still looks okay to you. This isn't just a marketing trick—dental professionals recommend this timeline because bristles lose their effectiveness long before they look obviously worn out. Many brush heads come with indicator bristles that fade from blue to white when it's time for a change, which takes the guesswork out of timing. If you're recovering from being sick, replace the brush head right away to avoid reinfecting yourself.

Watch for These Warning Signs

Your brush head will tell you when it's time to go, even before the three-month mark hits. Look for bristles that are bent, frayed, or splaying outward instead of standing straight up—this means they're not cleaning effectively anymore. If you notice your teeth don't feel as clean after brushing, or if your brush head has a smell that won't go away even after cleaning, it's definitely time for a replacement. Some people need to replace their brush heads more often if they brush aggressively or have particularly hard water that wears down the bristles faster.

Electric Toothbrush Extras: Sanitizers and Must-Have Accessories

If you want to take your toothbrush cleaning to the next level, there are some high-tech options and accessories that can help. But before you spend extra money, it's important to know what actually works and what's just marketing hype. Some of these gadgets are genuinely useful, while others can actually damage your toothbrush.

UV Sanitizers: Are They Worth It?

UV sanitizers use ultraviolet light to kill germs on your brush head, and they do work when used properly. The main benefits are convenience and peace of mind—you just pop your brush head in and let the machine do its thing. However, they're not absolutely necessary if you're already following a good cleaning routine, and cheaper models might not provide enough UV exposure to be effective. Quality UV sanitizers can cost $30-100, so consider whether the extra germ-killing power is worth it for your situation.

Look for FDA-Approved Products

When shopping for sanitizing products or accessories, stick with items that have FDA approval or clearance. These products have been tested for safety and effectiveness, unlike many knockoff gadgets you'll find online. Popular brands like Violife and Pursonic make reliable UV sanitizers that are FDA-cleared. For cleaning solutions, hydrogen peroxide and antibacterial mouthwashes are your safest bets since they're already approved for oral use.

Never Use These Cleaning Methods

Some cleaning methods that work for other items will destroy your electric toothbrush. Never put any part of your toothbrush in the dishwasher—the high heat and harsh detergents will melt plastic parts and ruin the bristles. Microwaving toothbrush parts is equally dangerous and can cause fires or toxic fumes. Avoid boiling water, bleach, or harsh chemicals that aren't meant for oral care products. Stick to gentle cleaning methods designed for items that go in your mouth.

Electric Toothbrush Acting Up? Here Are 4 Quick Fixes

Even with all the right supplies and techniques, sometimes things can still go wrong with your electric toothbrush. The good news is that most problems are fixable with the right approach. Here are the most common issues people face and how to solve them quickly.

Problem 1: Mold Growing on Your Toothbrush

Mold will usually take the form of green or black patches, especially around the brush head connection or in the handle. This happens when your toothbrush spends an excessive amount of time wet in a poorly ventilated area. Soak parts that are subject to mold in hydrogen peroxide for 30 minutes and then scrub clean with a mild scrub using an old toothbrush to remove obvious mold. If mold persists, you need better airflow in your storage area and should replace the brush head right away.

Problem 2: Bad Smells That Won't Go Away

Persistent smells mean bacteria have made a base in difficult-to-clean spaces on your toothbrush. Soak the head in antibacterial mouthwash overnight, then wash and air dry it completely. Should the smell be coming from the handle, wipe the dirt off with diluted white vinegar and make sure you are letting it air dry completely after each usage. Sometimes an enduring smell means a new brush head is needed, though the brush head might look fine.

Problem 3: Stubborn Buildup You Can't Remove

The white or yellowish buildup is probably dried toothpaste, hard water minerals, or a combination of both. Make a paste with baking soda and water and then apply an old toothbrush to gently scrub out the buildup. For very stubborn spots, soak areas in white vinegar for 15-20 minutes prior to scrubbing. Rince everything through afterward and make sure no cleaning residue is left behind.

Problem 4: Toothbrush Won't Work After Cleaning

If your toothbrush is not working after brushing, water probably gets into the electrical parts. Shut it off immediately and remove the brush head, and give it a good shake to remove excess water. Let everything air dry for a minimum of 24 hours before trying to use or charge it again. If it still doesn't work after drying completely out, call the manufacturer—most of them offer warranties against water damage if you clean it properly.

Electric Toothbrush Cleaning FAQs: Your Most Common Questions Answered

Q1: Can I use regular soap or toothpaste to clean my brush?

Yes, you can use mild hand soap or dish soap to clean your electric toothbrush—just make sure it's gentle and fragrance-free. Toothpaste is too harsh for the brush head; it would scratch its bristles and plastic parts. You could use antibacterial mouthwash, hydrogen peroxide, or some diluted white vinegar.

Q2: Is it safe to share electric toothbrush handles?

No, you shouldn't borrow electric toothbrush handles from other family members. Even if you replace the brush heads, germs are still going to be transferred through saliva that touches the handle when you are brushing. Everybody needs his or her own entire toothbrush so that bacteria, viruses, and other infections are not shared. In cases where you have to share for a short period, make sure you sanitize the entire length of the handle with some antibacterial wipes before giving it to the next user.

Q3: How do I clean hard-to-reach areas?

An old toothbrush or soft-bristled brush is great for getting into areas around the brush head connection and handle recesses. Cotton swabs are excellent for small grooves and charging contacts—to clean electrical components, use dry swabs. For really tough spots, clean the removable parts first in your cleaning solution to break loose grime, then scrub gently. Never use sharp points that can puncture the plastic or damage the seals, nor force anything.

Keep Your Electric Toothbrush Clean for Better Oral Health

Keeping your electric toothbrush clean isn't rocket science, but it makes a huge difference in how well it works. These simple daily and weekly routines will save you money and keep your oral health on track. The best part is that once you get into the habit, it becomes second nature. Give your toothbrush the care it deserves starting today—you'll notice the difference right away.

You May Also LikeLearn More
Stop worrying about gum recession. Learn the truth about what happens after tartar removal and how to properly care for your gums so they heal and reattach.
Official COSLUS August 24 .2025·COSLUS
Complete guide to choosing the perfect face cleansing brush in 2025. Compare 5 top-rated electric brushes, learn which works for your skin type.
Official COSLUS August 21 .2025·COSLUS
Official COSLUS August 18 .2025·COSLUS
Sensitive teeth pain is caused by enamel wear or gum recession. Learn the causes, prevention tips, and treatments to relieve discomfort from hot, cold, or sweet triggers.
Official COSLUS August 13 .2025·COSLUS
Leave a comment
All comments are moderated before being published.
This site is protected by hCaptcha and the hCaptcha Privacy Policy and Terms of Service apply.
Contact Us
提示信息

We use cookies to personalize content and to help us provide you with a better shopping experience. By clicking“OK, Got it! ”, you agree to its use of cookies and Privacy & Security. OK